Filament vs. Resin 3D Printers

If you’re in the market for a 3D printer for personal use, you have two primary technologies to choose from: Filament or Resin. You might wonder: is filament or resin a better choice? The answer depends on your intended use. Each technology serves a distinct purpose and is suited for different tasks. In this article, we’ll examine the pros and cons of both filament and resin 3D printers to help you determine which type is the right fit for you. Regardless of whether you’re purchasing your first 3D printer or have extensive experience in printing, these printing technologies offer various benefits, and one of them is likely the ideal choice for your specific application.
First, let’s briefly explain how each of these technologies functions:
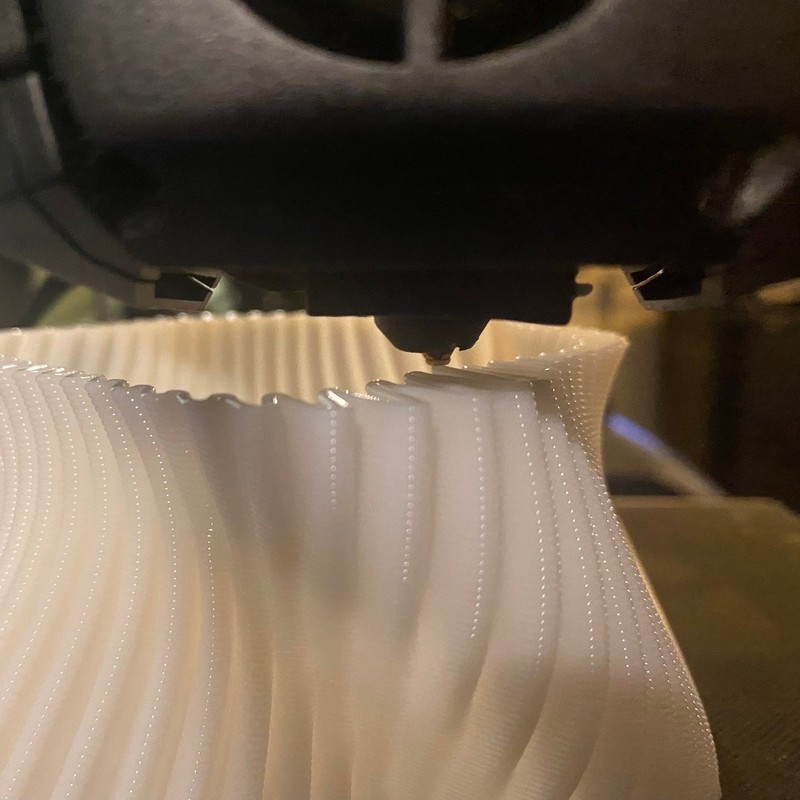
Filament printers create parts by melting plastic and depositing it layer by layer, forming a 3D object. Each layer is produced by moving the nozzle along a predetermined path while depositing melted plastic. Once the layer is finished, the nozzle moves up, and the subsequent layer is built on top of the previous one until a complete 3D part is formed.

Filament printers are also known as FDM (Fused Deposition Modeling) or, less commonly, FFF (Fused Filament Fabrication) machines. These terms can be used interchangeably.
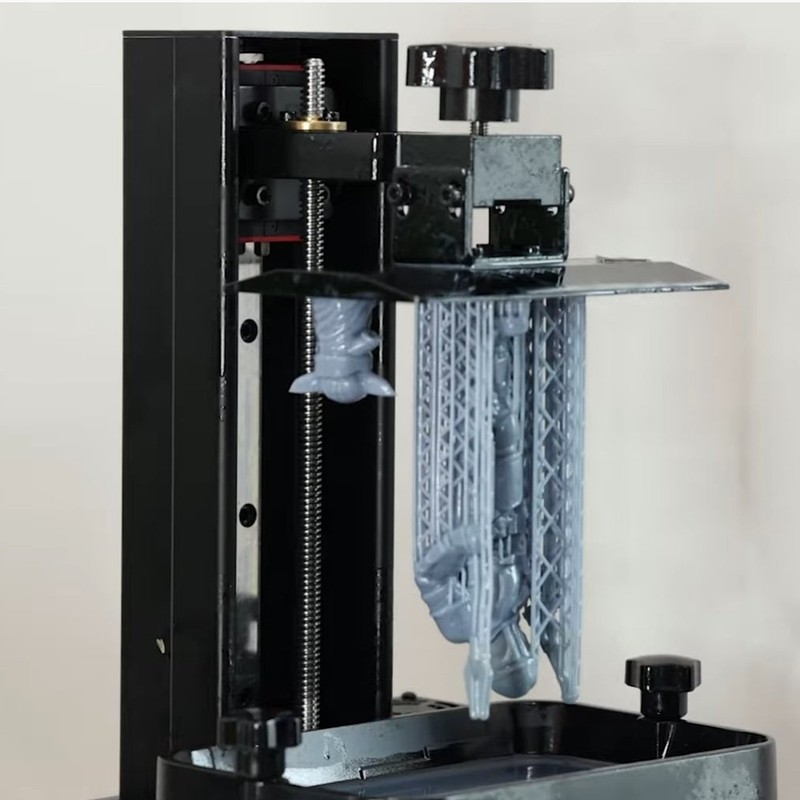
Resin printers generate parts from liquid resin that cures, or solidifies, upon exposure to UV light. Like Filament printers, resin printers also create parts in layers, but they do so by exposing each layer to a UV light pattern to solidify the resin in the desired areas. There are two common types of resin printers: DLP (digital light processing) and SLA (Stereolithography). These technologies differ in how they cure the resin: DLP printers utilize a UV LCD screen (essentially a small monitor) to cure an entire layer simultaneously, while SLA employs a focused laser that traces a path through each layer. Externally, these printers appear very similar. As most lower-cost resin printers use DLP technology, we will concentrate on that technology in this article.
When deciding which type of 3D printer to buy, you must first consider the kinds of objects you plan to create. Filament printers excel at producing sturdy, larger parts, while resin printers are superior for generating fine details and can print with greater precision on small components.
However, there’s more to the story. Several crucial factors should be considered when determining which technology best suits your specific needs.
Print Quality
Resin printers produce exceptional surface quality, and they can capture fine details in prints and create models without visible layer lines. While resin prints do have layers, they’re so thin that they usually can’t be seen with the naked eye. To put it in perspective, each layer on a resin printer is generally 25 - 50 microns thick, while filament printer layers are usually 100 - 300 microns thick.
Resin printers can achieve such fine details because the resolution of each layer is determined by the pixel size on the LCD screen, which is around 70 microns for most consumer DLP 3D printers. In contrast, filament printer resolution is limited by the nozzle opening size where the melted material is deposited, typically 0.4 mm (400 microns). It is possible to install smaller nozzles on filament printers, but the smallest practical nozzles are still 200 microns. Using such a nozzle will also increase the print time for the filament printer.
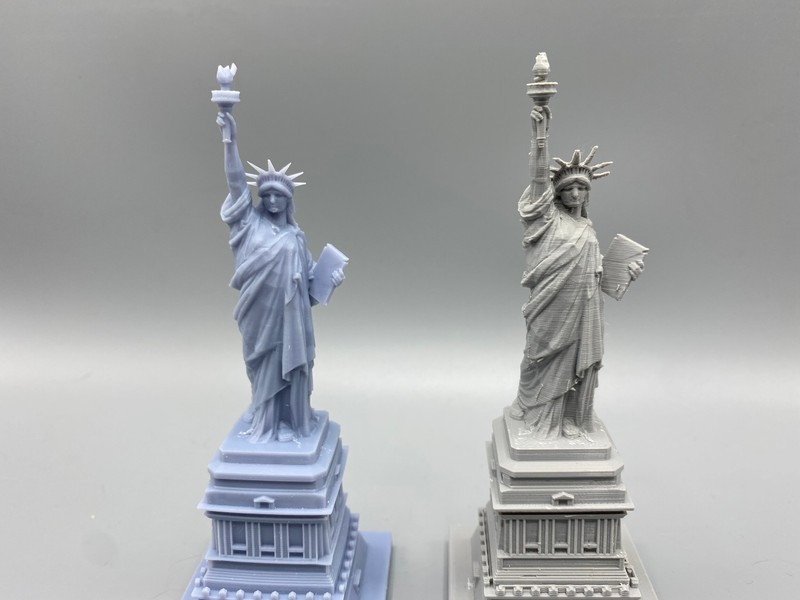
If your goal is to create small, intricate objects like mini-figures, jewelry prototypes, or parts that require high precision, resin printers are a better option.
Printed Part Durability
Parts created using filament provide excellent durability, even with standard plastics like PLA. Moreover, you can use alternative materials such as PETG and ABS, which offer enhanced strength and heat/UV resistance for outdoor components. It’s important to note that FDM 3D-printed parts have significantly less strength when forces act across layers, so you need to carefully consider the part orientation to maximize durability.
Standard resin prints tend to be rather fragile and are generally not the preferred choice for functional parts subjected to considerable forces. Also, since the resin is UV-sensitive, exposure to sunlight causes the prints to weaken over time. However, high-strength resins are available, which can enhance the sturdiness of resin prints. Unfortunately, this type of resin can be challenging to clean completely off the printed part and often leaves a sticky residue. We have had better success mixing this resin with standard resins to balance the drawbacks and achieve increased strength.
Overall, filament printing is a more suitable choice for functional components, as it offers superior strength and more possibilities for larger parts, which we’ll explore next.
Build Volume
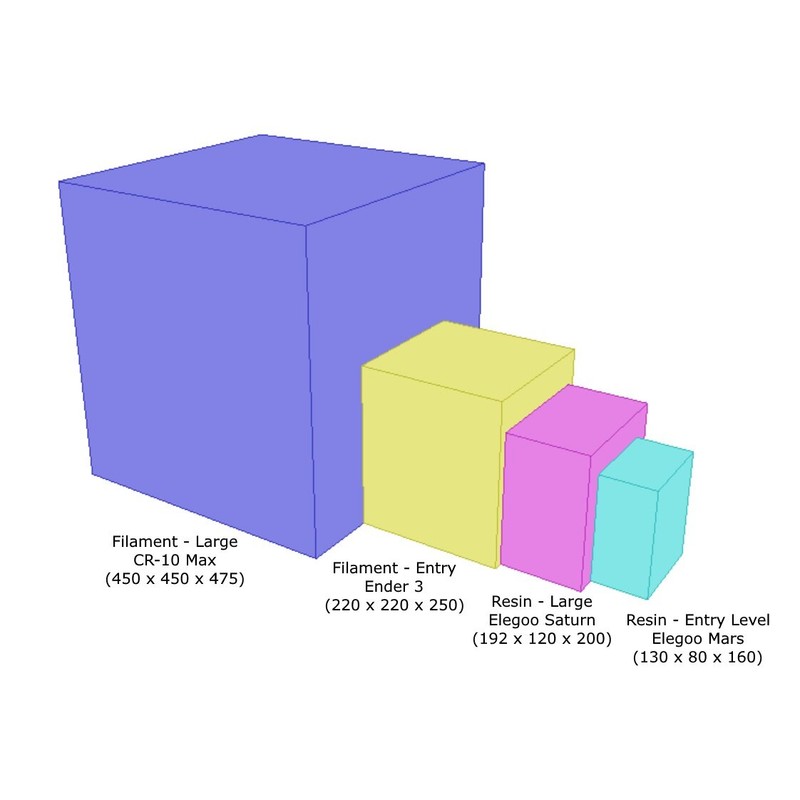
For printing larger parts, filament printers hold a distinct advantage. Entry-level filament printers, like the Creality Ender 3, have a build volume of 220 x 220 x 250 mm, and many larger volume printers are also available:
- Ender 3 Max: 300 x 300 x 350 mm (view on Amazon)
- CR-10 Max: 450 x 450 x 475 mm (view on Amazon)
Standard resin printers, on the other hand, have a much smaller build volume. Entry-level printers such as the Creality Halot-One and Elegoo Mars come with a standard size of 130 x 80 x 160 mm, while more premium large-format resin printers like the Elegoo Saturn measure 192 x 120 x 150 mm, which is still considerably smaller than even the entry-level filament printers.
Printing Speed
With standard settings, filament printers can create single objects much quicker. As you might expect, adding more objects to the print bed will proportionally increase the printing time, since the nozzle has to trace each part individually.
Resin printers, on the other hand (specifically DLP ones), can print multiple objects as quickly as a single object because the LCD is exposed to each layer for a fixed amount of time, regardless of the number of parts being printed. In such instances, resin can be significantly faster when you need to produce many parts. This advantage is limited by the small size of the print bed, but larger resin printers like the Elegoo Saturn can quickly print numerous parts on their more extensive print beds.
Initial Assembly and Setup
Assembly
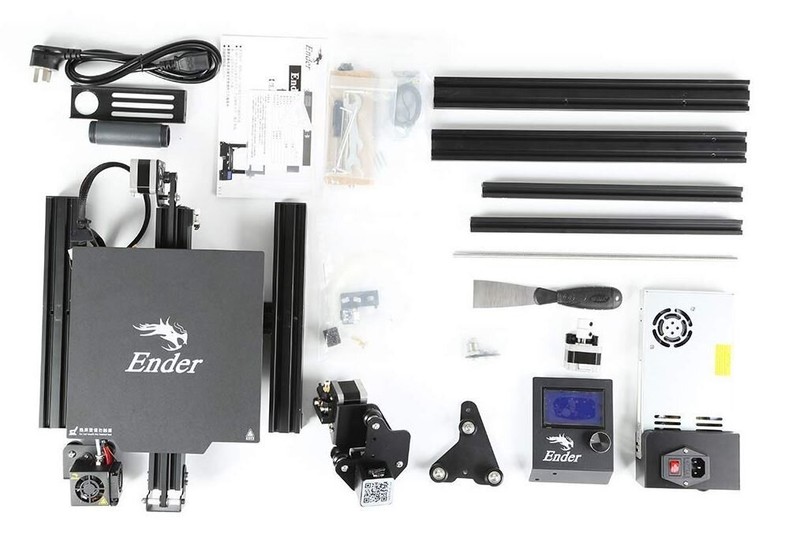
Most filament printers require some assembly, but the difficulty varies. Printers like the Creality CR-10 and Ender 3 Max come mostly assembled, taking only around 15 minutes to put together. Smaller printers like the Ender 3 V2 arrive in more parts and usually need about an hour for assembly. Once assembled, leveling the print bed may require some trial and error.
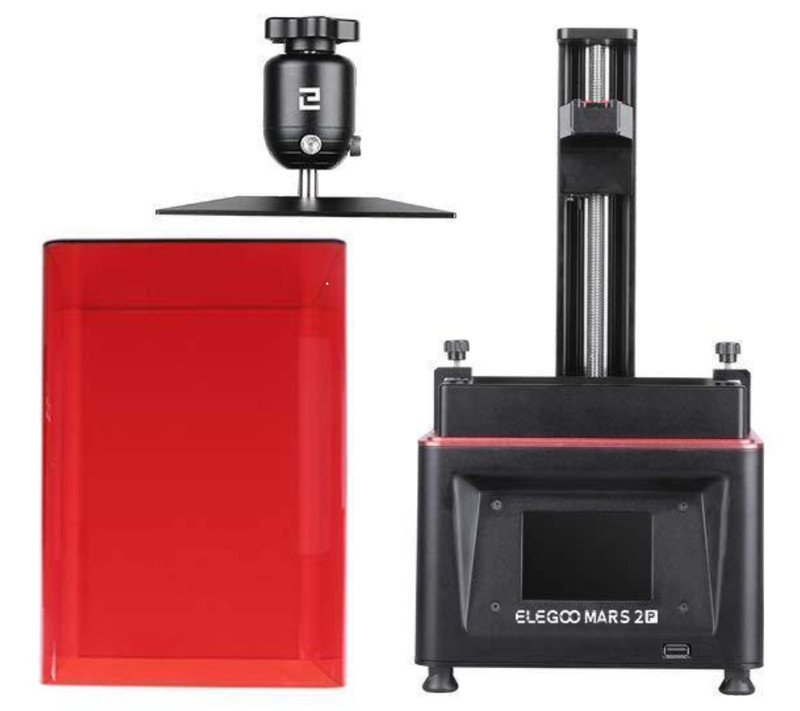
Resin printers, thanks to their smaller size, generally ship almost fully assembled. For the Elegoo Mars we use, the only necessary assembly was sliding the print bed assembly onto the printer. Leveling the bed is simpler than with filament printers - just loosen a few screws in the bed, home it with a sheet of paper underneath, and retighten.
Many filament printers like the Creality Ender 3 V2 are shipped in multiple parts and need about an hour for assembly. However, newer filament printers like the Ender 3 Neo series are being shipped nearly fully assembled.
Most resin printers ship almost completely assembled due to their smaller footprint and more straightforward design.
Software Setup
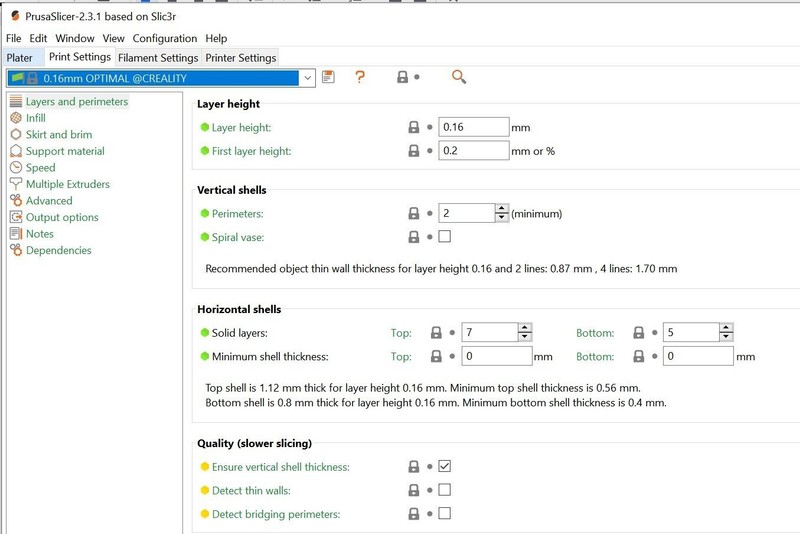
Once assembled, it can take some time to become familiar with the various settings available for filament printers in the printer slicer software to achieve the best print quality. Modern slicers like PrusaSlicer and Cura have premade profiles for most Creality printers, which simplifies the process, but understanding how different settings work is still crucial, as adjustments are often required to optimize printing for specific types of models. You’ll also need to experiment with how models are oriented on the printer for optimal results.
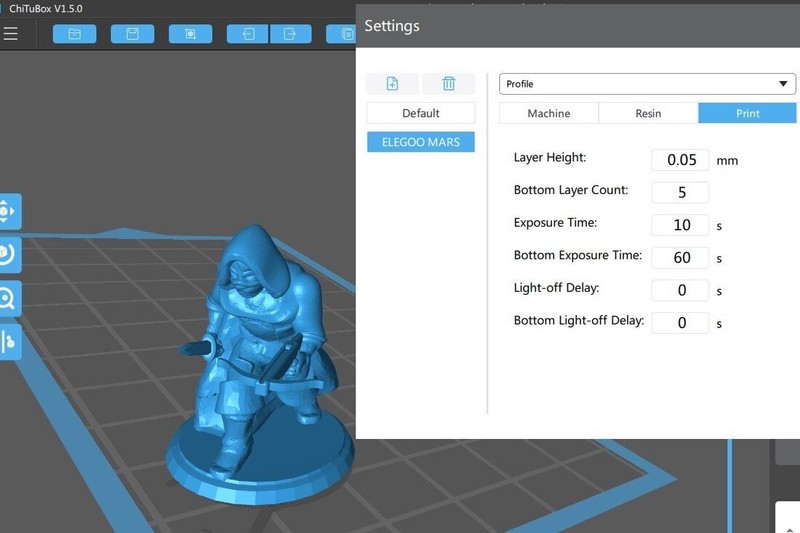
Resin printers have far fewer settings to configure, making it easy to start printing quickly after assembling the printer. The only settings you’ll ever need to change are the layer time (how long each layer is exposed to the UV light to cure) and support material settings. Print orientation is also important for resin printers to ensure the print stays adhered to the bed for the entire print.
Overall, resin printers are considerably easier to initially set up due to their very simple assembly and the simplicity of print settings.
Ease Of Use
While resin 3D printers are simple to set up, the liquid resin introduces some complexities when using the printer. It’s crucial to note that the resin is a skin irritant, so it’s important to wear gloves whenever you come into close contact with the resin, such as removing completed prints or removing the resin vat. The level of irritation can vary from person to person. We’ve heard stories of people getting severe burns from brief contact with the resin, but we personally haven’t had a reaction to small splashes on the skin that can sometimes occur (though we wash them off with soap as soon as it happens to be safe). Additionally, the resin has a distinct chemical smell that some people find unpleasant, although there’s no conclusive evidence that it’s harmful to breathe. It’s still recommended to keep resin 3D printers in a well-ventilated area.
Since completed prints will still have leftover liquid resin on the surface once they’re finished, you’ll need to post-process all prints using a solvent like Isopropyl Alcohol (IPA). You can buy specific washing stations for this purpose or use a lower-cost pickle strainer. The solvent will become cloudy with resin and lose effectiveness after a few uses, requiring replacement and safe disposal (you can’t pour it down the drain).
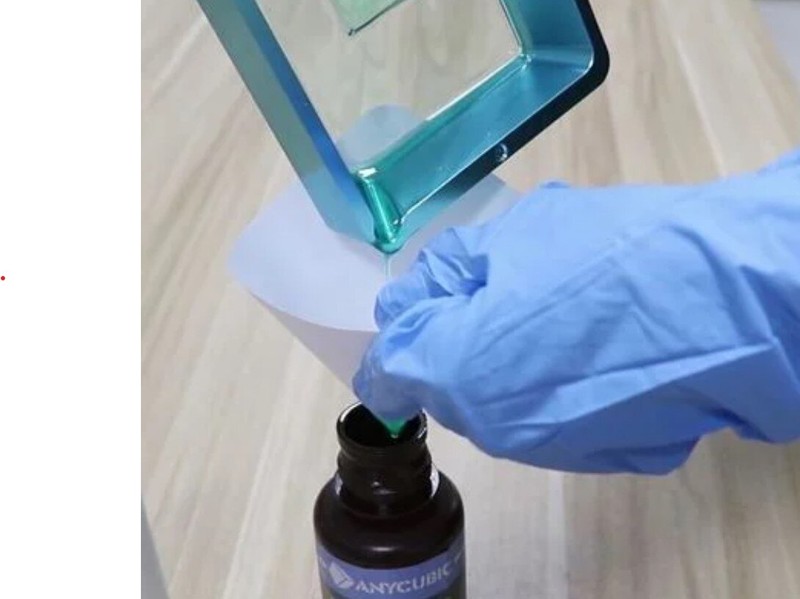
Another challenge with using resin is that switching materials can be time-consuming. To do this, you’ll need to carefully pour the resin from your vat back into the resin container, clean the vat out completely, and pour the new resin into the vat. We’ve bought several spare vats, which we use for common colors to avoid the need for changing the color in the vat. The vats can be easily exchanged, but the cost of additional vats can add up.
Overall, filament printers are easier to use once they are set up. All of the materials can be handled safely without protection, and most prints don’t require post-processing, apart from removing support material if needed. Swapping colors is also straightforward, as it only involves removing the old filament and inserting the new material.
Maintenance
Resin printers have fewer moving parts, with the only one being the Z-axis lead screw, which lifts the print bed as the print forms. As a result, they are less likely to encounter mechanical issues. However, there are a couple of components that you will likely need to replace over time:
- The FEP film on the bottom of the vat can bend or tear - after printing multiple parts, the thin film that forms the bottom of the vat can become bent or develop slight leaks. When this happens, you can either replace the film or get a new vat at a relatively low cost. Replacing the FEP film is not too difficult but takes some time due to the numerous screws securing it to the vat.
- The LCD can develop issues over time - such as dead pixels or regions, which will cause sections of your prints to have holes in them. Replacement LCDs are available but require disassembling the outer shell of the machine. Once you access the LCD, you can plug the new LCD in without any soldering or wire splicing needed.
Filament printers have moving parts in all three axes, which means that over time, parts of the motion system will need replacement or tightening. We’ve found that these types of repairs are relatively infrequent. Most filament printer maintenance relates to the filament path - the extruder that pushes the filament and the hot end that melts it before depositing it onto the part.
- The extruder gear, which contacts the filament and pushes it into the hot end, can wear over time , and the spring-loaded extruder mechanism can crack if your 3D printer uses a plastic extruder. These issues can be avoided by ensuring your printer has a steel extruder gear and an all-metal extruder.
- The internal components of the hot end tend to wear out over time since they are exposed to high temperatures. You can replace most individual components of the hot end or replace the entire assembly if time is more of a factor than cost.
In general, filament printers require slightly more maintenance , but the difference isn’t substantial.
Cost
In the past, purchasing a resin 3D printer was substantially more expensive than a filament printer. However, now there are numerous lower-cost resin machines on the market utilizing DLP technology. As a result, budget resin 3D printers are priced in the same range as entry-level filament 3D printers. This means that if you’re looking for a budget resin 3D printer or a budget filament 3D printer, you have plenty of options. For higher-end printers, resin tends to be more expensive. We’ll look at some side-by-side comparisons to give you a general idea:
Budget / Entry Level
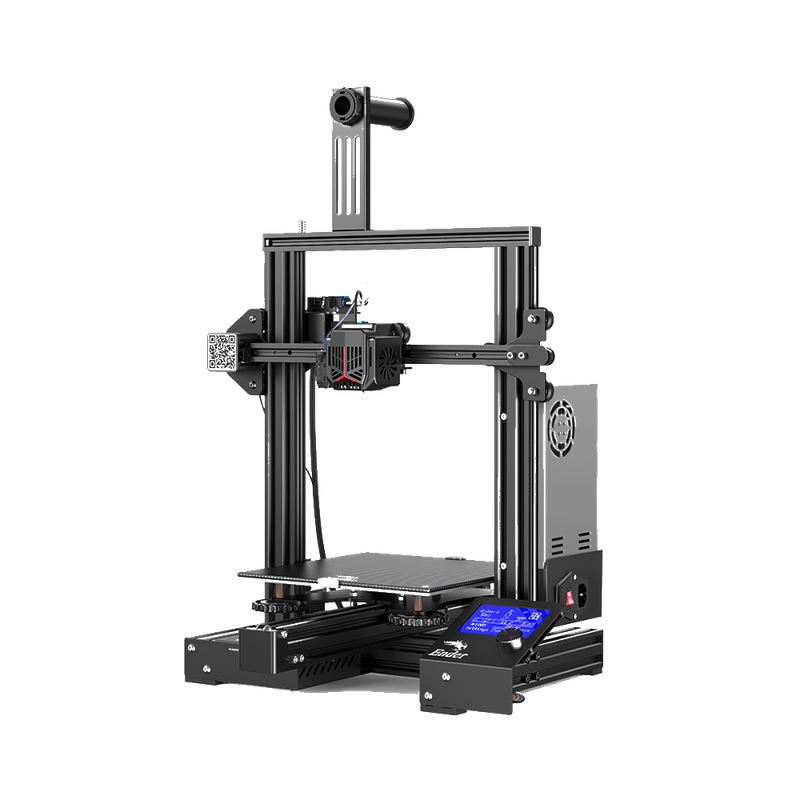
Filament Printer: Creality Ender 3 Neo (view on Amazon)
- Cost: $150-200
- Basic features
- Build volume: 220 x 220 x 250mm
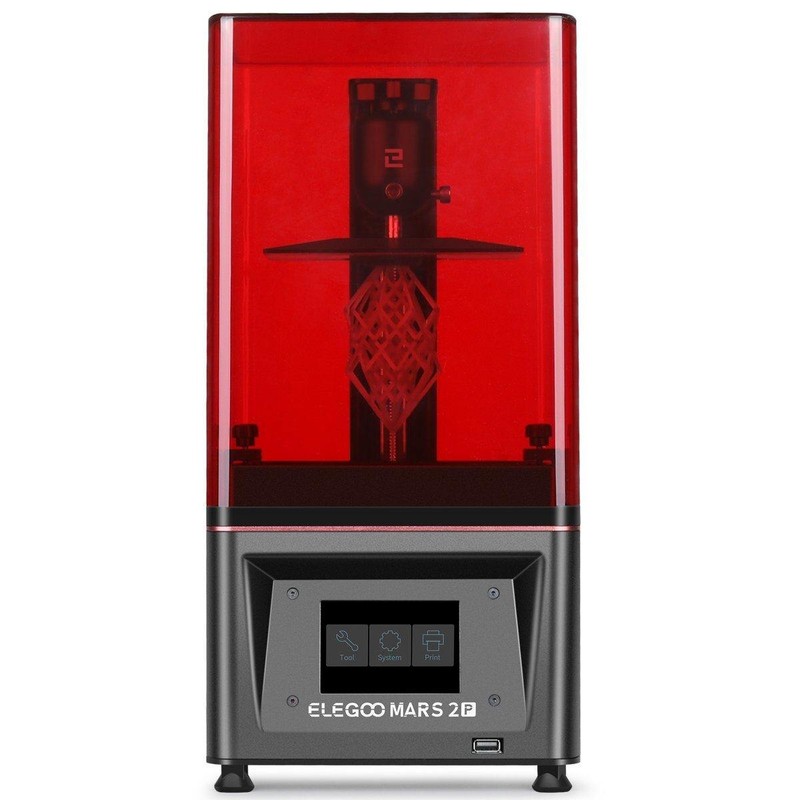
Resin Printer: Elegoo Mars (view on Amazon)
- Cost: $175-250
- Basic features
- Build volume: 130 x 80 x 160mm
Mid-Range
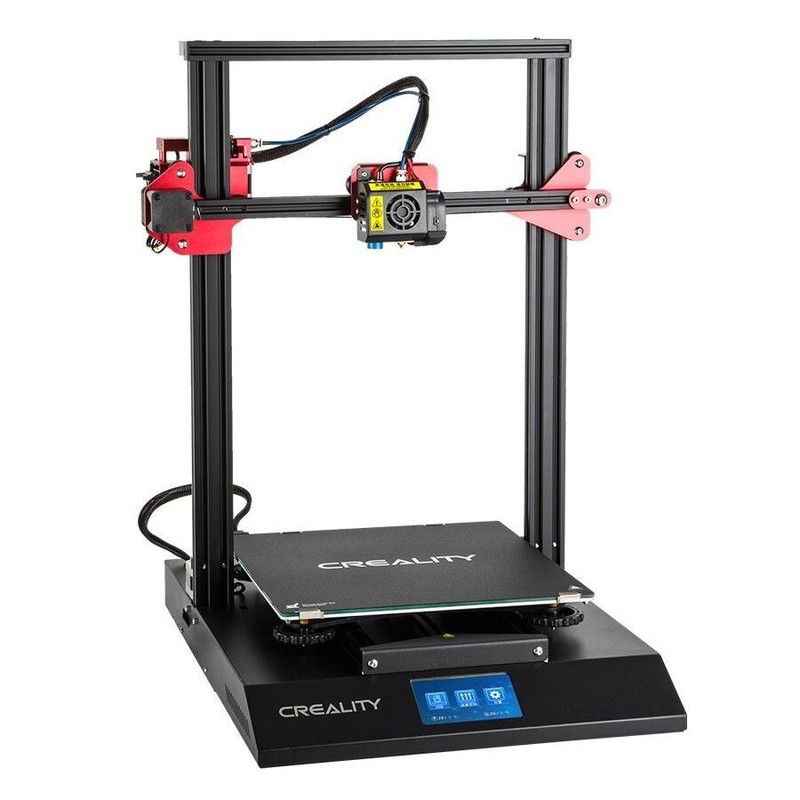
Filament Printer: Creality CR10S Pro (view on Amazon)
- Cost: $500-600
- Upgraded features such as silent motors, unibody design, touch screen, all metal dual gear extruder
- Large build volume: 300 x 300 x 400mm
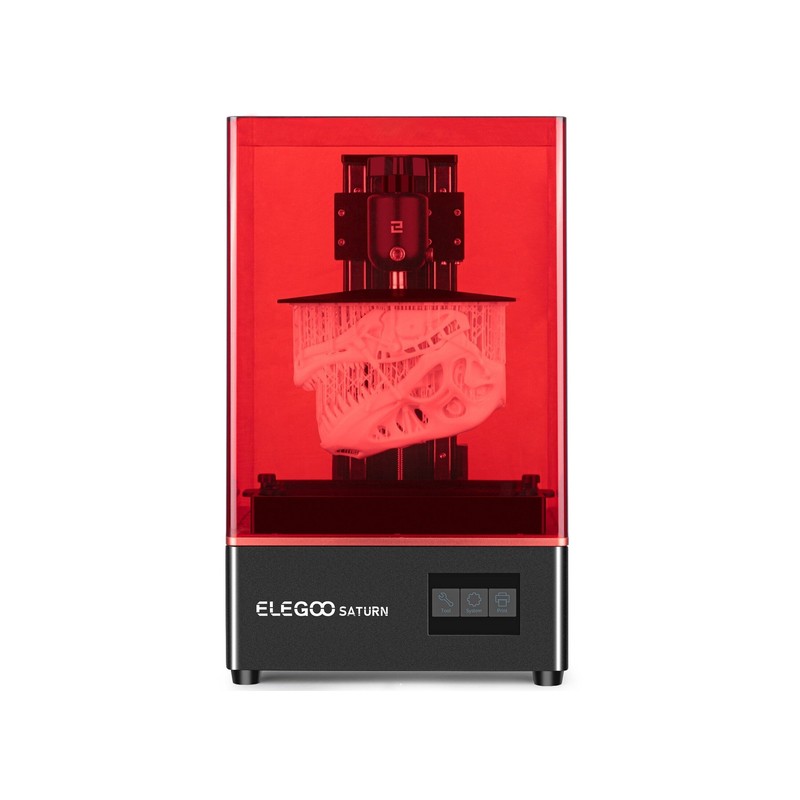
Resin Printer: Elegoo Saturn (view on Amazon)
- Cost: $450-550
- Upgraded features such as a high resolution LCD and dual linear rails
- Large build volume: 192 x 120 x 200mm
High-End / Industrial
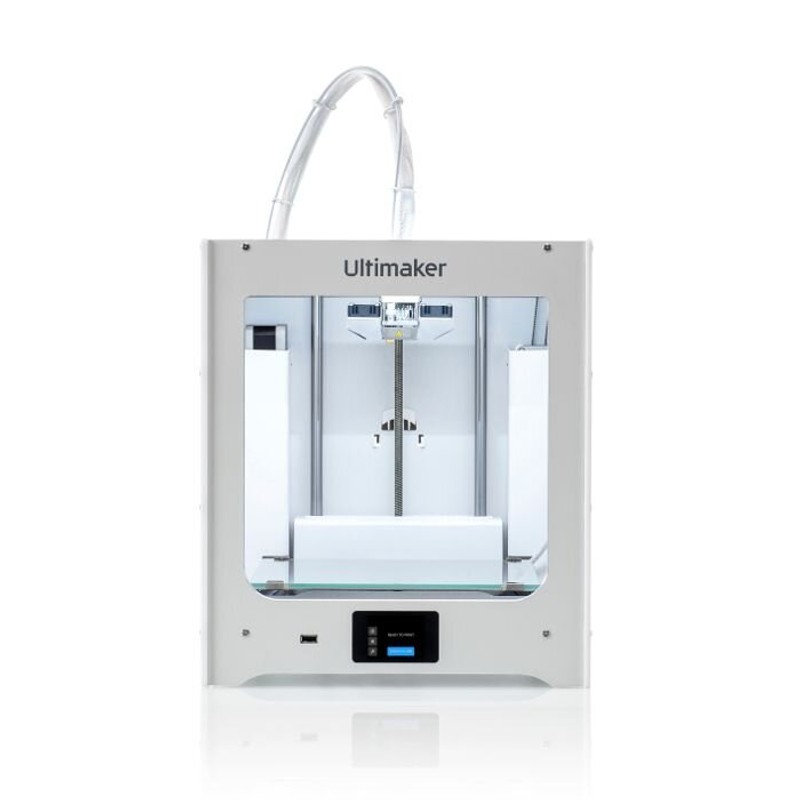
Filament Printer: Ultimaker S3
- Cost: $4,000 - 5,000
- Industrial-grade components and warranty, wireless printing
- Build volume: 230 x 190 x 200mm
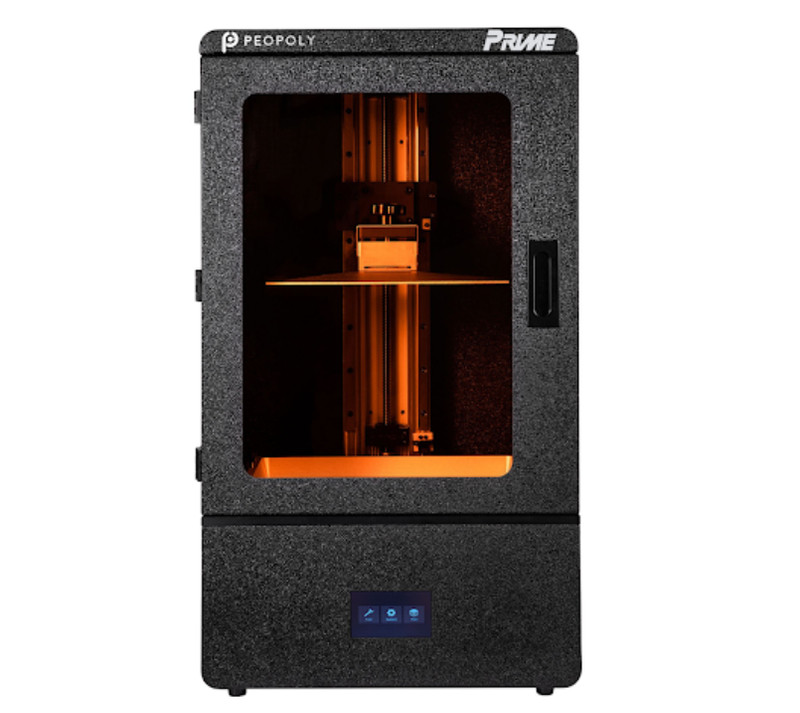
Resin Printer: Phenom Prime MSLA
- Cost: $3,000 - 4,000
- 6K UHD LCD, warranty, Masked SLA technology for improved resolution and speed
- Build volume: 276 x 155x 400mm
Ongoing Costs
It’s crucial to consider the total cost of owning a 3D printer, as the ongoing expenses can be a more significant portion of the overall cost compared to the initial purchase price of the machine. The majority of these ongoing costs are related to the materials used to create parts, which include filament or resin.
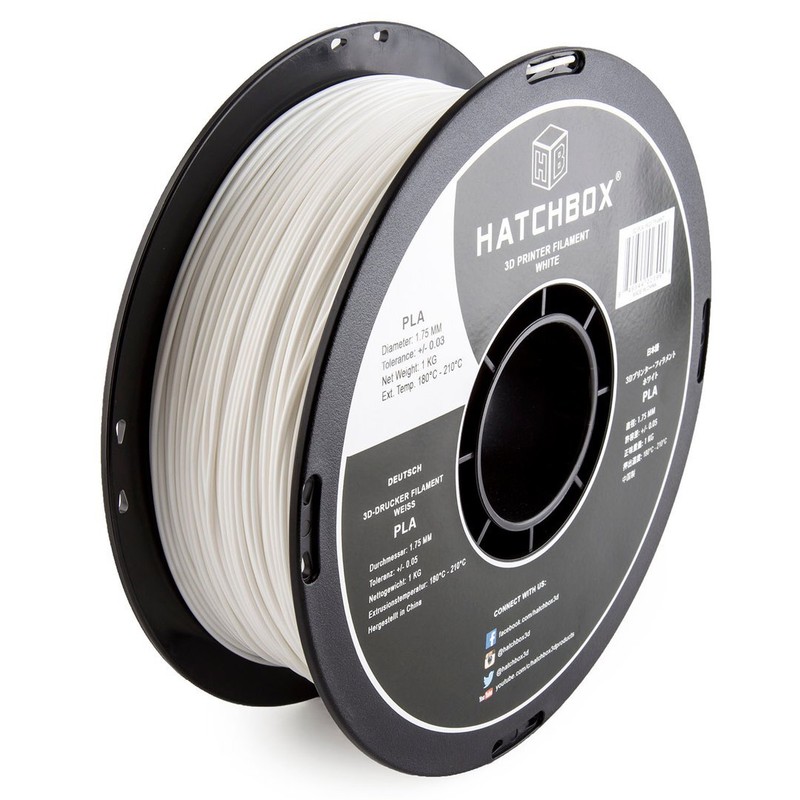
Filament
- Typically sold in 1KG rolls
- Cost: $15 - 25 per roll
- Usage depends greatly on part size
Resin
- Sold in 500g to 1kg sizes
- Cost: $30-40 per 1kg
- Since parts are smaller, lasts longer
- View Resin on Amazon
In general, resin has a higher cost per kilogram, but you’ll likely use less of it with a resin printer due to its smaller build size. If you plan to print larger parts on your resin printer, you can minimize resin usage by making the parts hollow and including a drain hole, allowing the unused resin in the central cavity to drain out. For filament printers, parts typically have a meshed infill pattern, which helps save material.
Another minor expense to consider is maintaining the 3D printer and ensuring you have the necessary supplies. Resin printers tend to cost a bit more in this aspect, as you’ll need to keep a stock of disposable gloves and a solvent like IPA for post-processing prints. Replacement parts for either type of printer are usually quite affordable, and you won’t need to purchase them frequently.
Next steps
Now that you have a general idea of which technology is better for your needs, the next step is to take a look at a few printers to learn more about what options are available. 3Dpros is primarily focused on filament 3D printing, so if filament printing looks like the right choice for you, we suggest looking at the filament 3D printer buying guide to learn what to look for in the filament 3D printer market.