Retraction

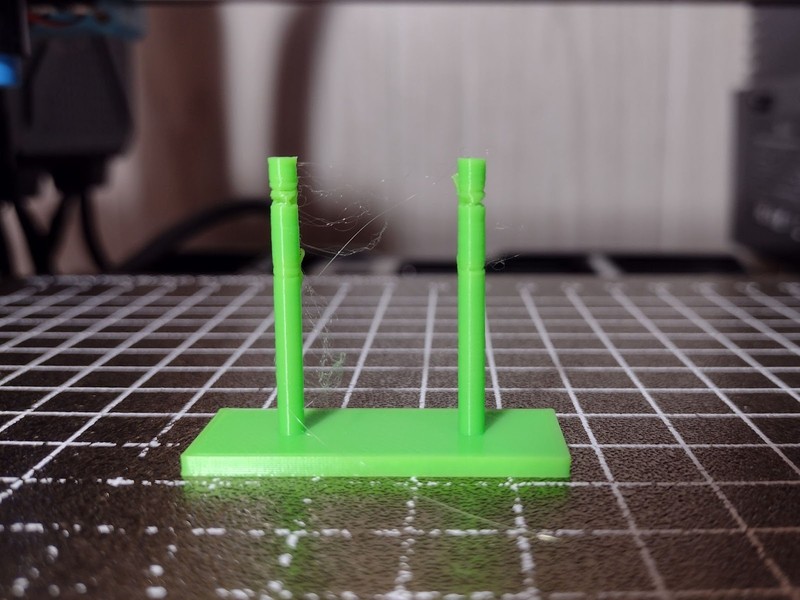
During printing, your print head will have to move between different parts of the print. During this movement, heat from the nozzle, as well as pressure built up from extrusion, can lead to excess filament oozing out of the nozzle. In the best of cases, this will lead to strings of filament left on your printed part. In the worst of cases, creating balls or zits of filament that ruin your outer walls. To prevent stringing and excess filament oozing from your nozzle, retraction is a must.
What is Retraction?
Retracting filament before the print head performs a travel movement will release pressure that has been built up on the nozzle due to extrusion, rather than continue to try and force out filament when it isn’t needed. Once your print head finishes the movement, the filament will continue to extrude as normal while stringing and oozing are kept at a minimum.
Retraction Settings
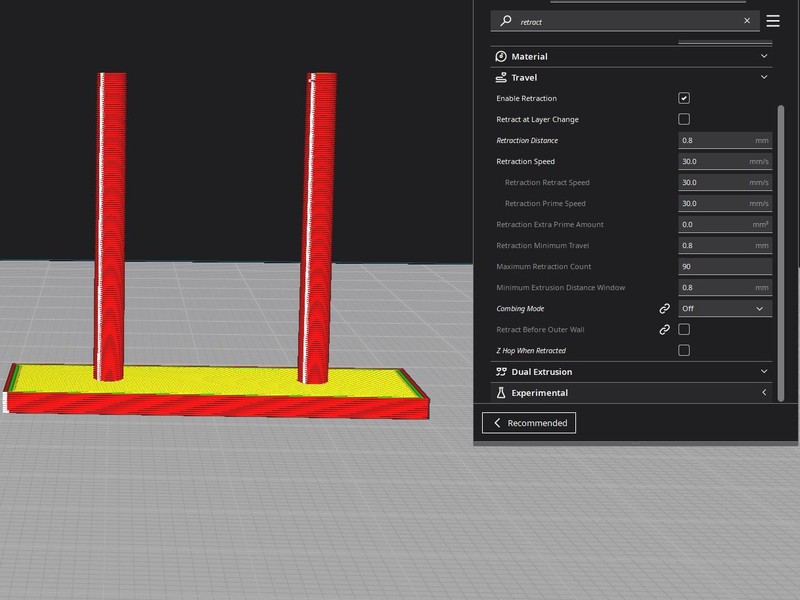
Getting your retraction settings fine-tuned is one of the first steps in calibrating a new 3D printer to get the best results possible out of every print. The settings you will want to change are Retraction Distance and Retraction Speed.

Retraction Distance is the length of material that is retracted before a travel movement. Too much Retraction Distance can cause clogs in your hotend and gaps in your walls, while too little distance will not make an impact on stringing whatsoever. Finding the right value will take some testing.
Direct drive extruders and Bowden-style extrusion systems will require vastly different values for Retraction Distance. The ideal Retraction Distance for a Bowden-style extruder can range anywhere from 2 mm up to 10 mm or more, depending on the length of the Bowden tube.
A direct drive extruder will require a much shorter Retraction Distance, as the Bowden tube is eliminated from the equation. These printers will often use a value between 0.2 mm and 2 mm.
To find the best Retraction Distance, start your testing with a low value and gradually increase it until you find a value that works for your printer and extruder. You can find the STL file for this retraction tower on Thingiverse.

Retraction Speed determines how fast your filament is retracted before movement. This value will slightly affect your print time, increasing or decreasing how long it takes for the filament to retract before a movement, and plays a role in eliminating stringing from your prints.
Too slow of a Retraction Speed will allow filament time to ooze out of the nozzle before movement. Too fast a Retraction Speed can damage your filament, potentially breaking it inside of the nozzle and leading to many issues. This value will vary less between direct drive and Bowden-style extruders, with many printers using a default value of around 25 mm/s - 60 mm/s. Again, it is best to test using a lower value and gradually increasing it until you see the desired results in your prints.
It is important to remember that every type of material will require its own retraction tuning for the best results. Your nozzle temperature will also affect your retraction settings, with higher temperatures often requiring more retraction to keep the filament from oozing out the nozzle. Keep your nozzle temps consistent between test prints and actual prints.
Lastly, you will need to know about Z-Hop. When enabled, Z-Hop, also known as Z-Lift, will slightly raise your print head above your model whenever a retraction occurs. The print head will then travel across your print with plenty of clearance before lowering the print head back down to continue printing. Z-Hop is used to reduce the chances of fragile prints being knocked over during travel by creating extra space between your nozzle and the print when traveling. It can also prevent your nozzle from scraping the top surfaces of your print, leaving behind travel marks.
The downside to using Z-Hop is that it will increase the time it takes for your printer to complete a travel movement, giving the filament a larger window of time to potentially ooze out of the nozzle. Enabling Z-Hop without making any changes to retraction settings will often result in a noticeable increase in stringing.
If you intend to use Z-Hop for your prints, be prepared to perform some additional tuning for your retraction settings to compensate for this new variable.