How To Set Support Material Settings For 3D Printing

Support material is a common part of the 3D printing process, but it can be challenging to figure out what settings to use for support material. If you use the wrong settings, your support material may be difficult to remove or may damage the underlying 3D print. In other cases, it may make your print take longer and use more material with no added benefit. In this guide, we’ll help you understand the purpose of each support material setting in your 3D printing slicer, and give you our recommendations for configuring these settings.
Why Do You Need Support Material?
You need support material when printing with a filament 3D printer because each layer of the print must be deposited on top of a previous layer to stay in place. If your print has overhangs—sections that extend outward without plastic layers directly below them—you’ll likely need to use support material to ensure a clean result. If you don’t use support material, gravity can cause significant overhangs to fail or degrade in quality. The plastic will often appear to droop downward in these areas.
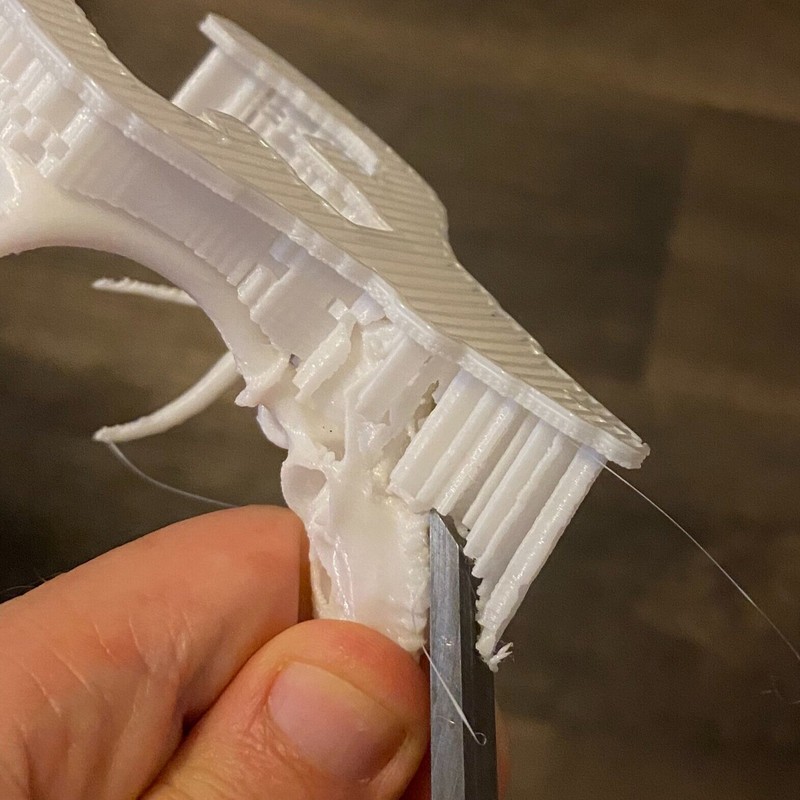
Support material is basically a plastic scaffolding that gets built during the print to support overhanging parts of the model. Once the model has completed, you can cut or snap off the support material.

There are a few common problems that you may run into if you configure the support material settings incorrectly in your slicer. First, it’s possible to print too much support material, which increases the time required for your prints, uses more material, and may require more time to remove from the completed print. Second, incorrect support material settings can cause the support material to stick to your model too firmly, which will dramatically increase the amount of cleaning required and may negatively affect the surface finish of your models.
In short, support material is an important part of 3D printing complex models, and it’s important to get the settings correct for the best results and easy cleanup.
Support Material Slicer Settings
These settings affect how the support material structures are generated and where they are placed. We’ll describe each setting and help you set it appropriately for your 3D printer.
Support material placement settings
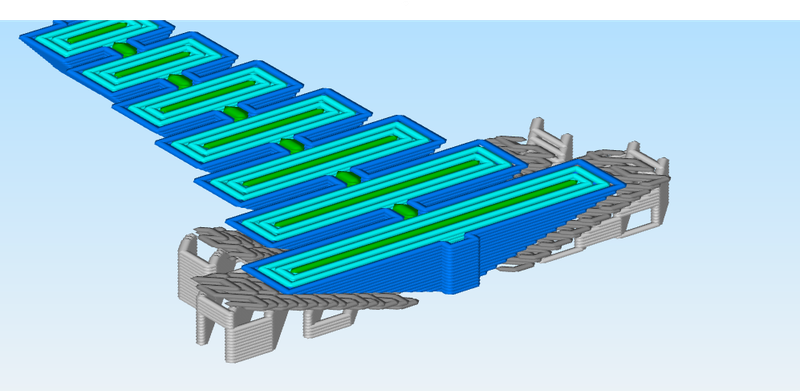
These settings control where the slicer adds support material around the model. Note that some slicers also provide the option for manual support placement, offering more control over where supports are added. If your slicer offers this option, we recommend trying the automatic settings first and observing the gcode preview to see how it placed the support material. If you aren’t happy with the results, it can be worth the time to use the manual placement settings—a bit of extra time in the slicer can save a significant amount of time in printing and cleanup.
Generate Support This setting determines if the slicer will add support material at all. You’ll need to enable this setting to have the slicer add support material to the model.
Support Overhang Angle: This setting determines where the slicer will generate support material structures, based on how steep the overhang is. Typically, you should set this to 60 degrees or higher (90 degrees is fully horizontal). It’s best to experiment with your printer to determine the highest angle you can use. We recommend printing a test model with varying overhang angles. This will give you an understanding of how your specific printer manages overhangs without support, aiding in finding the right balance between print quality and support material usage. In general, the less support material you have to add the better, since support material takes extra time to print and requires cleanup. Optimizing this setting can help you get faster, cleaner prints.

Support Placement: This setting dictates where the slicer will place supports. Typical options include “everywhere”, where supports are placed under all overhangs, and “touching build plate”, where supports are only created where overhangs are above the build plate. If at all possible, you should set this setting to the “touching build plate” option, becasue supports that are built on top of the model are significantly harder to remove than supports that are built on the build plate (print bed). However, if your model has steep overhangs that extend over another part of the model, you’ll have to use the “everywhere” setting.
Support material build settings
These settings relate to how the support material is generated.
Support Density: This setting defines the spacing of the support structures. Denser supports can improve the supported overhang by providing a more complete surface for the overhang to rest on. However, increased density means more material usage and longer print times. In most cases, you can get away with a fairly low density—try 10% as a starting point, and only increase it if the support material is ineffective at supporting overhangs.
Dense Support/Support Roof: In an effort to conserve material, you can configure your slicer to create denser supports only on the top layers that directly touch your model, known as the support roof. This setting helps ensure a smooth surface finish on the overhangs while saving material. You should almost always use this setting if it’s available.

We usually use a low density with a support roof to get a clean overhang with minimal material use. For slicers which allow you to set the number of dense support layers, we suggest starting with 2 dense support layers.
Other Slicer Settings
In addition to the support material settings, there are other slicer settings that influence how well your printer handles overhangs. While support materials can significantly enhance the quality of prints with steep overhangs, they can also increase print times and material usage, be tedious to remove, and leave marks on the print at the contact points. Ideally, you can use these other settings to reduce or eliminate the need for support material.
Layer Height
By using a smaller layer height (assuming the same extrusion width), you can improve overhang performance without resorting to supports, as each successive layer won’t extend as far outward from the previous one. A good rule of thumb to determine if a specific overhang may need support is to check whether more than two-thirds of the outer shell is being printed without anything underneath it.
Decreasing the layer height will also improve the surface quality, but will drastically increase print time, so be sure to consider this trade-off when adjusting this setting.


Part Cooling Fan
Another key setting for overhang performance is the part cooling fan speed. The part cooling fan is located on the print head of the 3D printer and aims a stream of air at the nozzle to rapidly cool the extruded filament immediately after it leaves the nozzle. Nearly all 3D printers on the market today include a part cooling fan, but some machines provide more airflow than others. The cooling speed impacts how quickly the printed material solidifies, which helps prevent drooping with overhangs. However, using an excessive cooling fan speed can cause weaker bonding between layers with some materials, such as ABS.
For PLA, we recommend setting the part cooling fan to full speed, whereas for ABS, we recommend using no part cooling. For recommendations for other filament types, see our filament guide, where we provide recommended slicer settings for all major filament types.

Part Orientation
One of the most effective ways to reduce or eliminate the need for support materials in 3D printing is to strategically orient your parts on the print bed. This can significantly impact the number of overhangs, and potentially reduce or eliminate the need for supports.
Keep in mind that part orientation can also impact the print’s strength, surface quality, and printing time. For instance, layers in a 3D print are weaker along the z-axis (the vertical axis). If the part will be under stress, it’s best to orient the model so that these forces apply along the x or y-directions, where the print is strongest, and not across layers. For more information on the factors that go into the strength of parts, see our guide on optimizing part strength.
