If you make a purchase using a shopping link on our site, we may earn a commission. Learn More
Bambu Lab A1 mini Filament Handling

The Bambu Lab A1 mini has many filament presets available when you load a filament spool onto the external spool holder or the AMS lite. They are divided by manufacturer and activating them loads certain settings.
As of firmware 01.02.00.00, released on Feburary 6, 2024, these are:
| Materials | Generic | Bambu Lab | Polylite | PolyTerra | Overture | eSUN |
|---|---|---|---|---|---|---|
| PLA | ✓ | ✓ (Several Types) | ✓ | ✓ | ✓ | |
| Matte PLA | ✓ | |||||
| PLA+ | ✓ | |||||
| PLA High Speed | ✓ | |||||
| PLA Silk | ✓ | ✓ | ||||
| PLA-CF | ✓ | ✓ | ||||
| PETG | ✓ | ✓ (Several Types) | ✓ | |||
| PETG-CF | ✓ | ✓ | ||||
| HIPS | ✓ | |||||
| PVA | ✓ | ✓ | ||||
| TPU | ✓ | ✓ (95A, 95A HF) |
Note that the AMS lite will load the Bambu Lab profiles automatically because an RFID chip is embedded within the Bambu Lab filament spools and refills and the AMS lite has an RFID reader near each spool holder specifically for this purpose.
All these presets exist in Bambu Studio which can override the settings set on the printer. These presets control nozzle and bed temperature, cooling, retraction length, retraction speed, etc. They can be edited in Bambu Studio, although the built-in presets cannot be overwritten, only copies saved.
Users can also make their own presets, either globally or within a project.
3D printing intermediate and expert users will be used to testing with temperature towers and retraction towers to determine filament settings. But what if Bambu Lab has done all this work for you? Can the Bambu Lab A1 mini get good results using only the built-in presets?
PLA
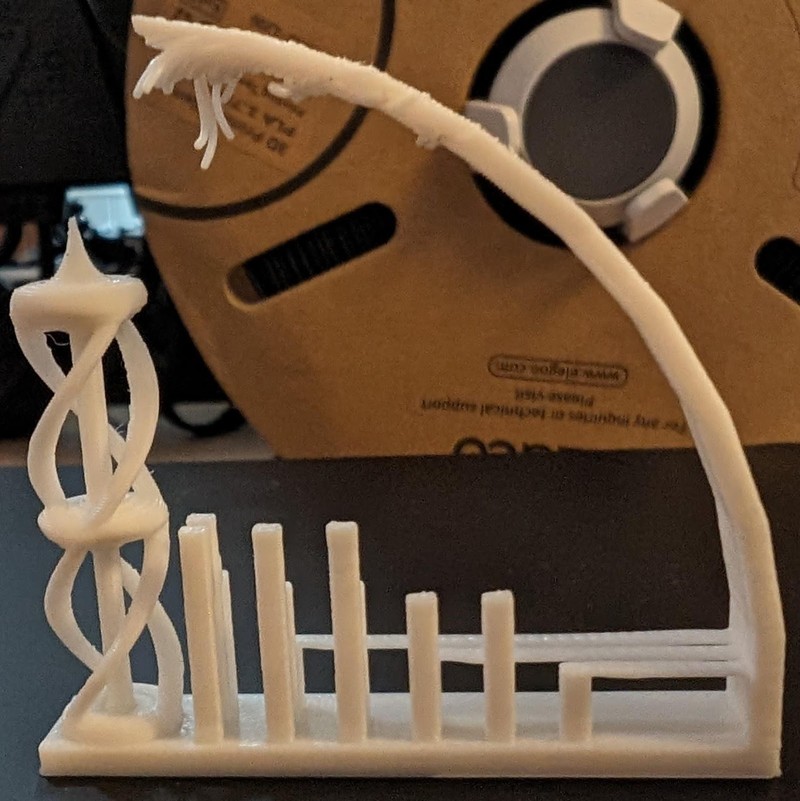
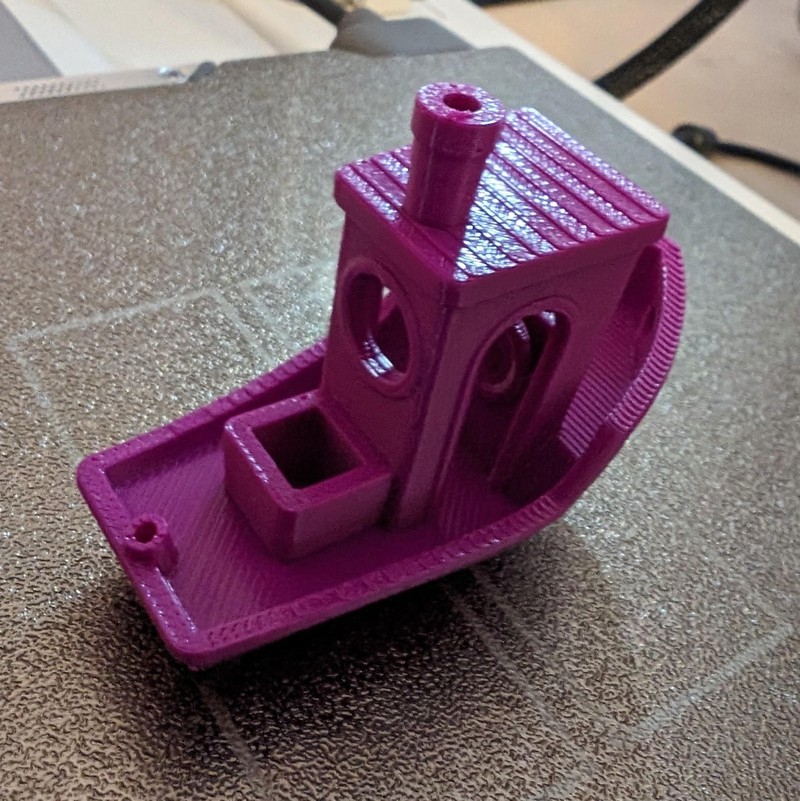
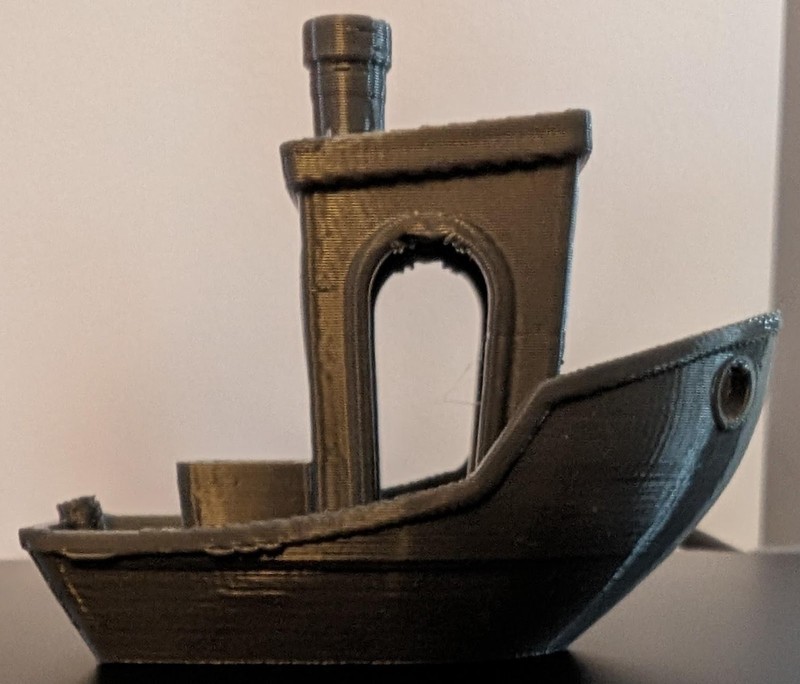
Using the test PLA filament included with the printer and printing the “speed Benchy” included on the microSD card resulted in
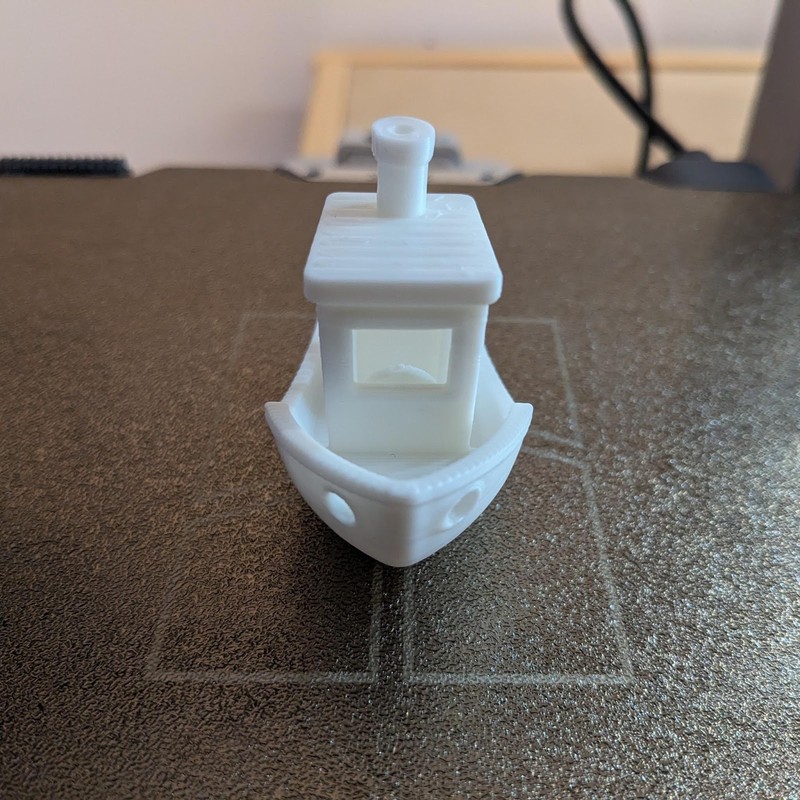
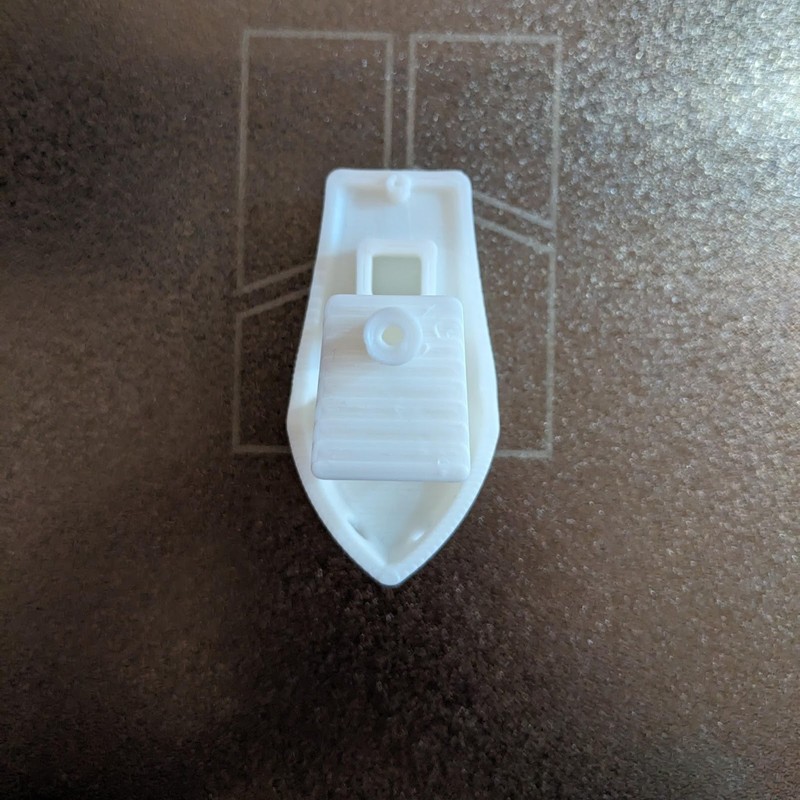
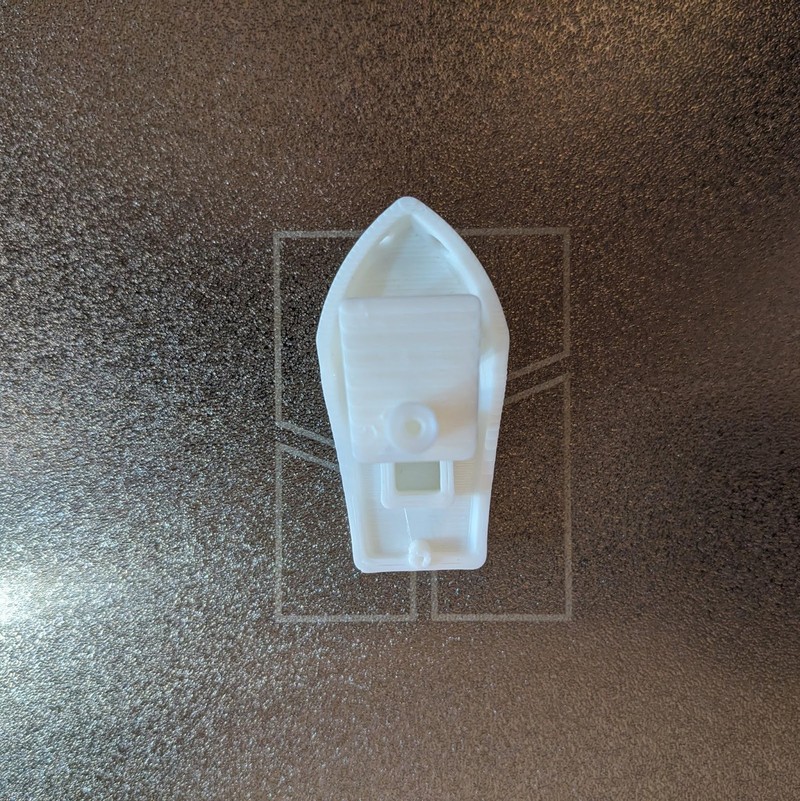
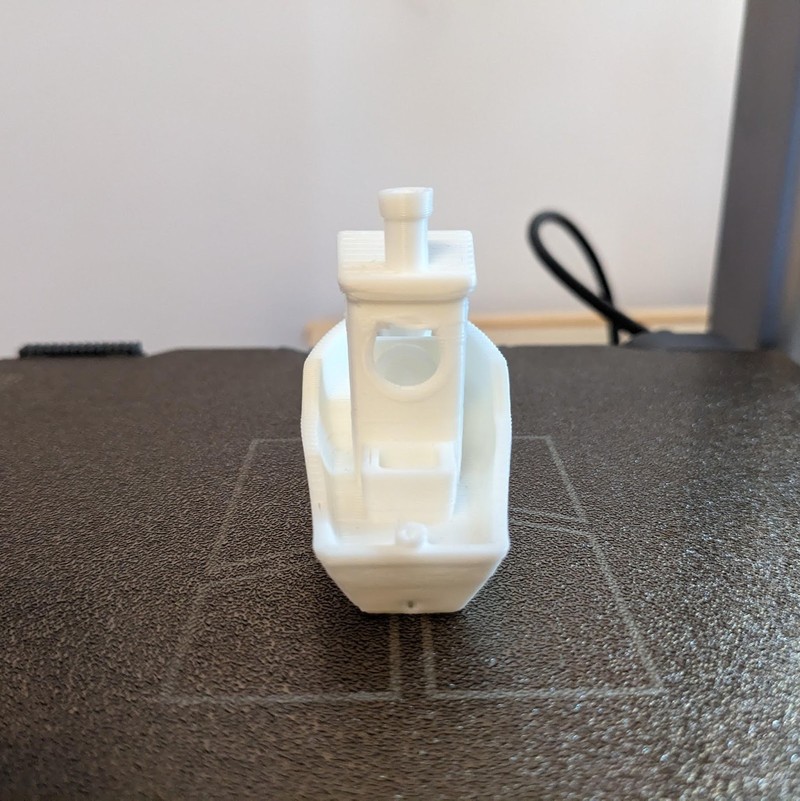
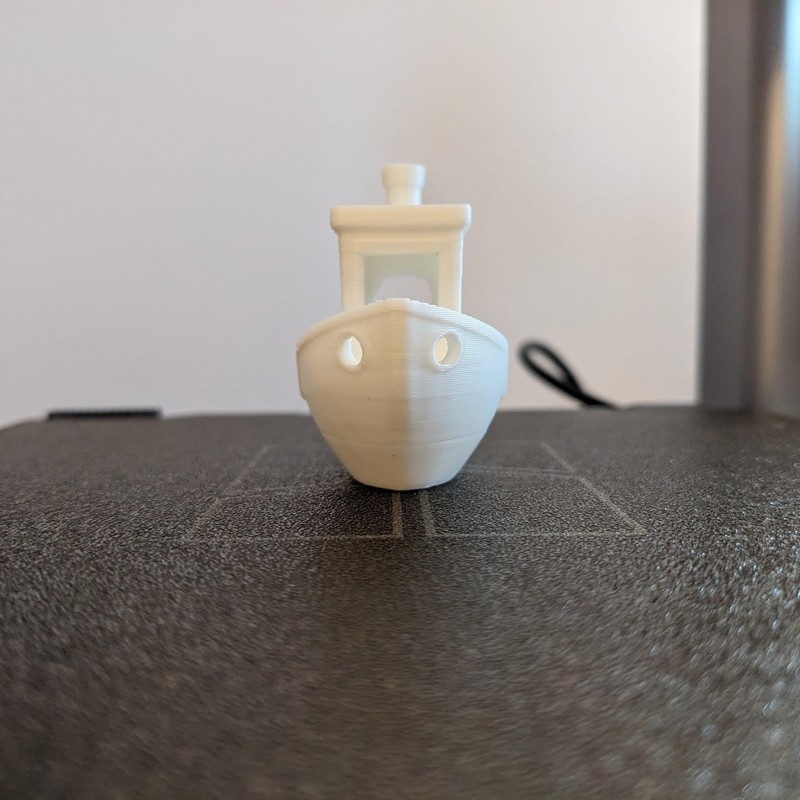
A nearly perfect Benchy
When we reprinted Benchy by the rules at 100mm/s, the arch defect behind the cabin disappeared, proving it was the speed and that it had nothing to do with the filament settings or filament handling.
The temperature setting for PLA is 220°C, which seems high, but there were no signs of excessive temperature - no stringing, no filament sagging, no burns on white or clear filament. The cooling seemed adequate to prevent deformation and the filament passed through the nozzle quickly enough that it did not scorch. It was probably set this high to lower the melt viscosity for high speed printing.
Default PLA Settings
Temperature Settings
- Nozzle Temperature: 220°C
- Bed Temperature:
- Smooth PEI Plate: 60°C
- Textured PEI Plate: 65°C
Cooling Settings
- No Cooling for the First Layer
- Fan Speed Thresholds:
- Minimum: 60%, Layer Time: 80 seconds
- Maximum: 80%, Layer Time: 6 seconds
- Explanation: The part cooling fan will operate at the minimum speed when the estimated layer time exceeds 80 seconds. If the layer time is less than 6 seconds, the fan will run at maximum speed. For times between these thresholds, the speed is interpolated based on the actual layer printing time.
- Fan Speed for Overhangs: 100%
Retraction Settings
- Retraction Length: 0.8mm
- Z Hop When Retract: 0.4mm
- Retraction Speed: 30mm/s
PLA filaments from other manufacturers performed equally well, with two exceptions:
- Silk filaments had bed adhesion problems until the filament type was set to “PLA Silk”.
- CC3D “PLA MAX” had bed adhesion problems until the temperature was raised to 230°C. The manufacturer does recommend this filament be printed “about 15°C higher than regular PLA” since the molten filament viscosity is very high.
Bed adhesion on textured PEI, smooth PEI, PEO, PET, H1H and PEY has never been an issue with the exception of the two cases above and the odd occasion where a bit of filament stuck to the nozzle causes errors in the auto leveling and Z offset. Bambu Lab filament has notably higher adhesion and will never just pop off the plate when cool, although it is not difficult to remove. Perhaps the printer operates a little differently when Bambu Lab filament is set.
We’ve printed very cheap PLA, expensive PLA, silk PLA, dual color silk PLA, matte PLA and glitter-filled PLA and the results are always excellent, no calibration required. In fact there really doesn’t seem to be anything to improve if we did calibrate.
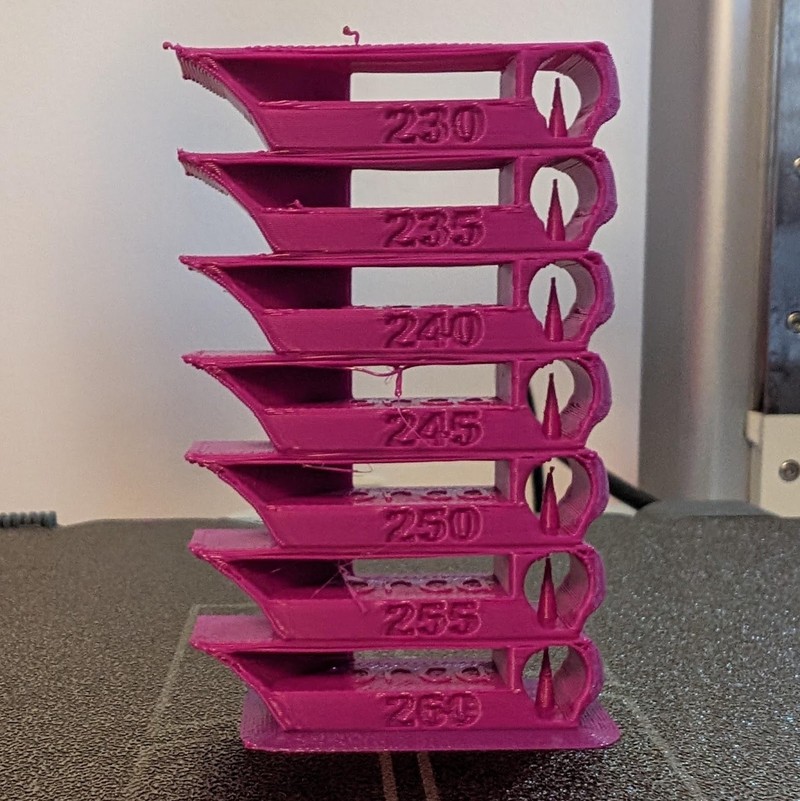
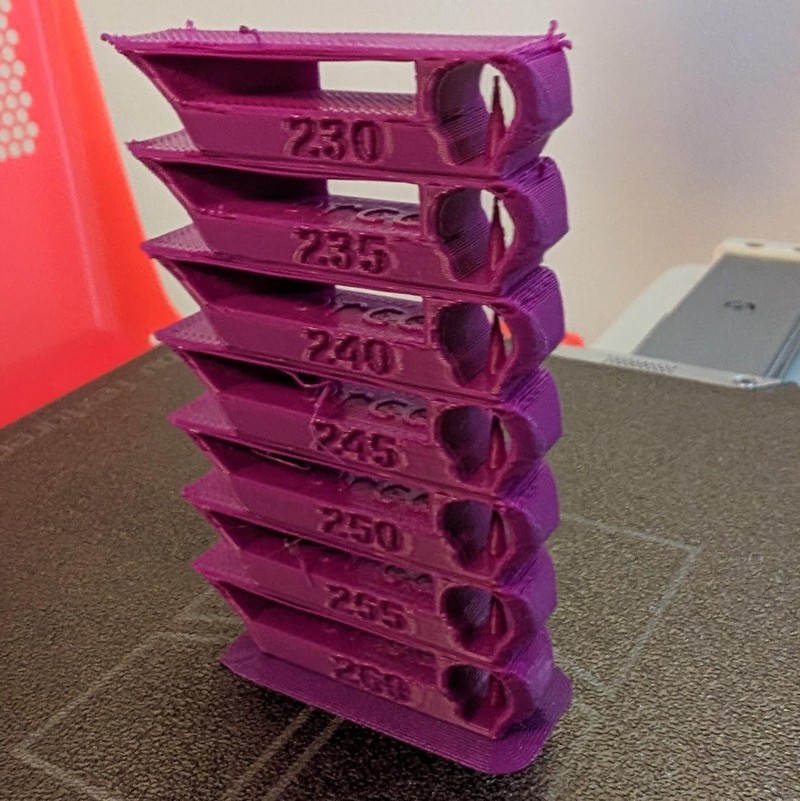
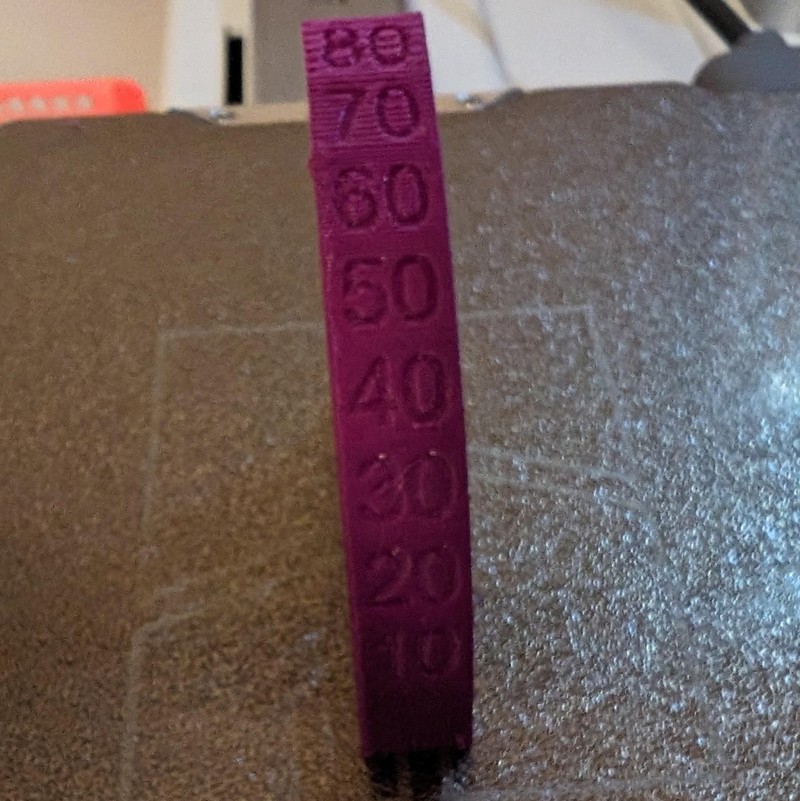
We did try a temperature tower and the results were unremarkable, in that every temperature seemed almost the same and no severe issues were observed at any temperature. There was very slight stringing well below the recommended temperature but it was not serious.
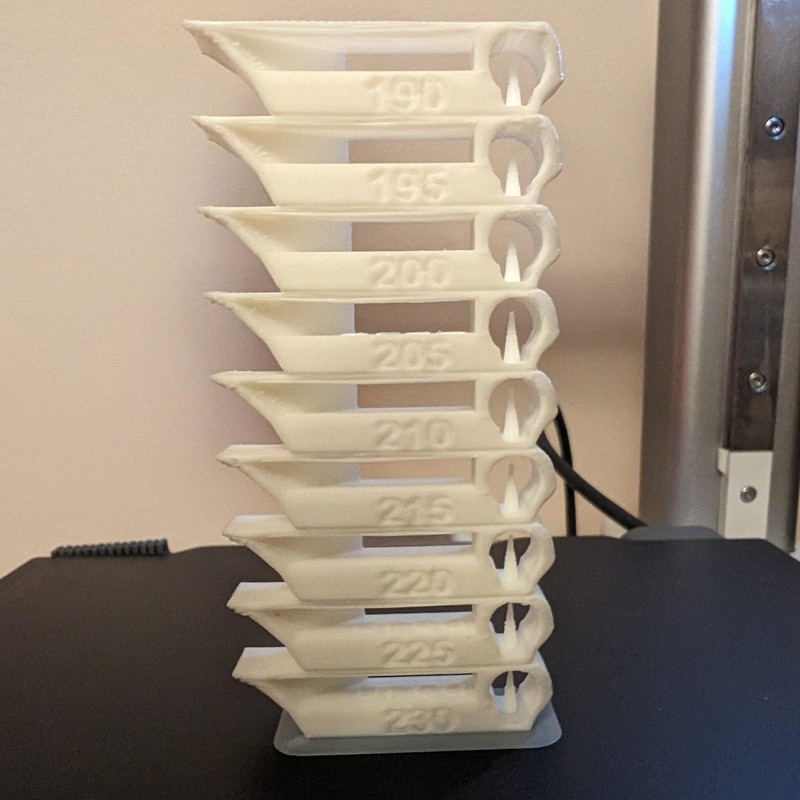
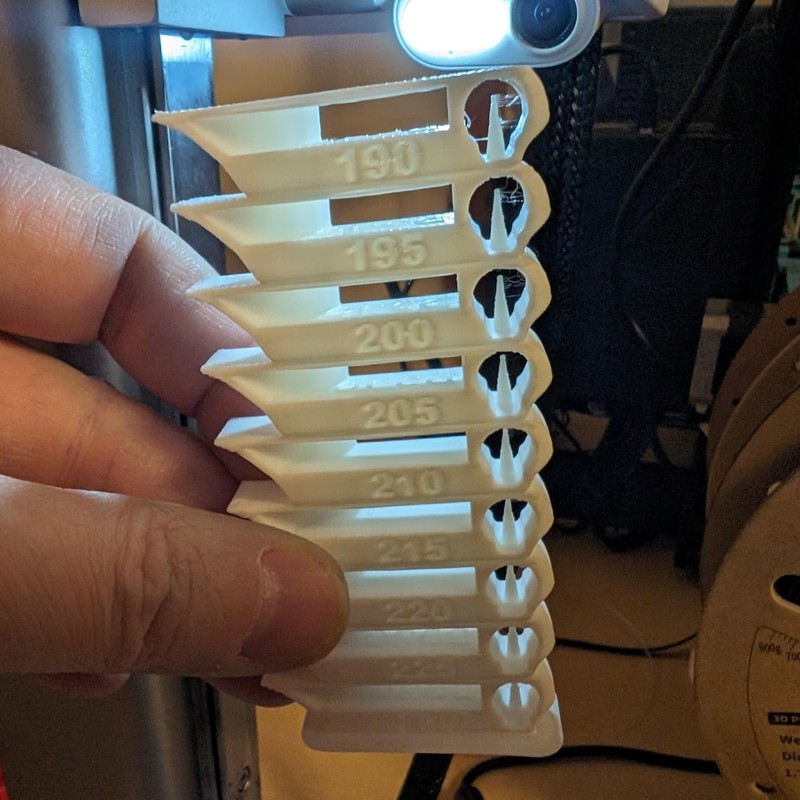
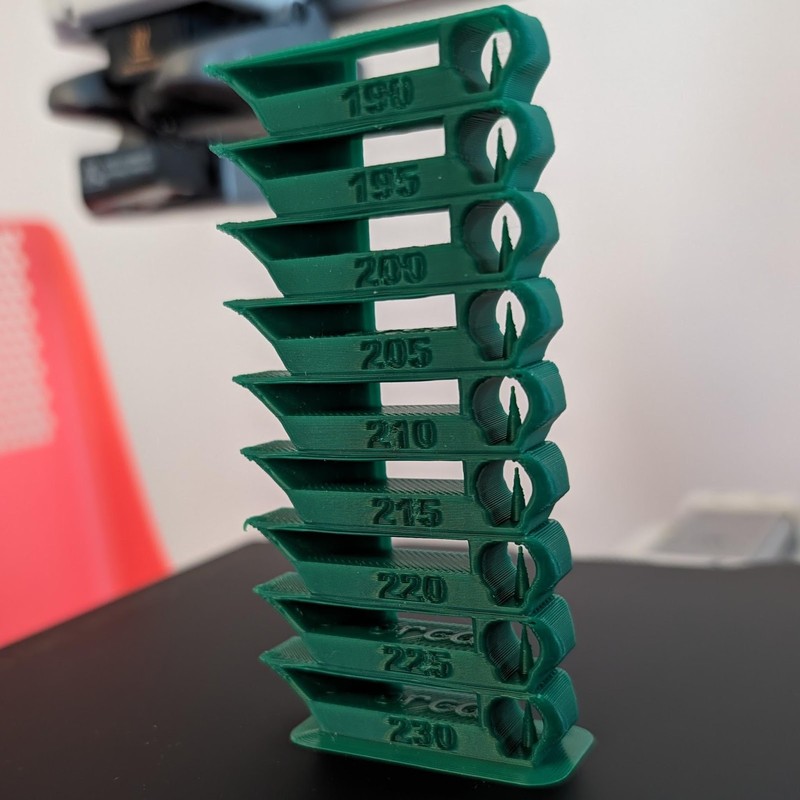
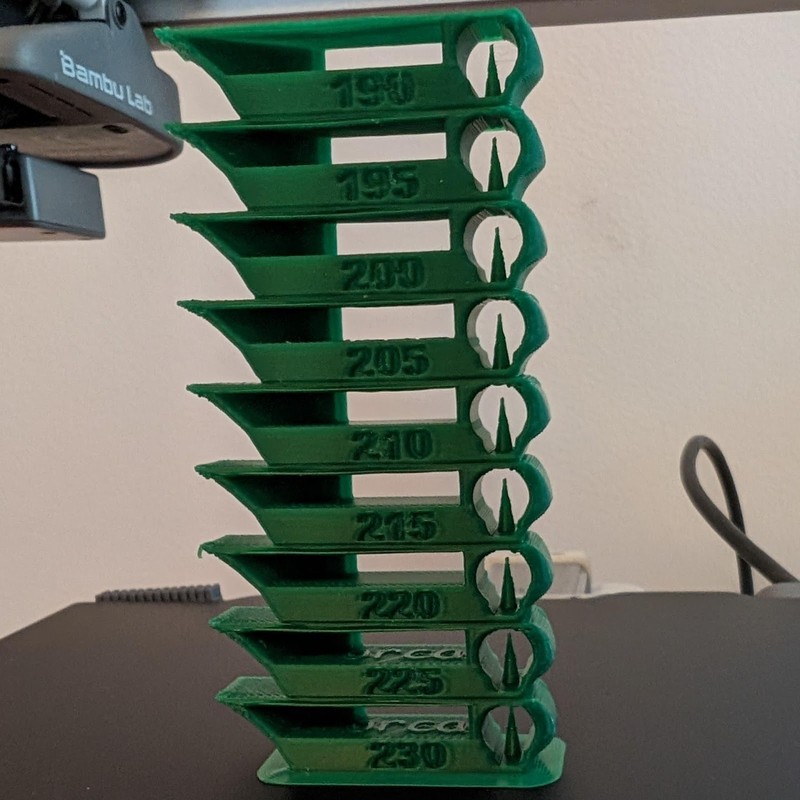
Bambu Lab Basic white PLA temperature tower generated by OrcaSlicer
PETG
There are horror stories about the stringiness of PETG. How does the Bambu Lab A1 mini handle it?
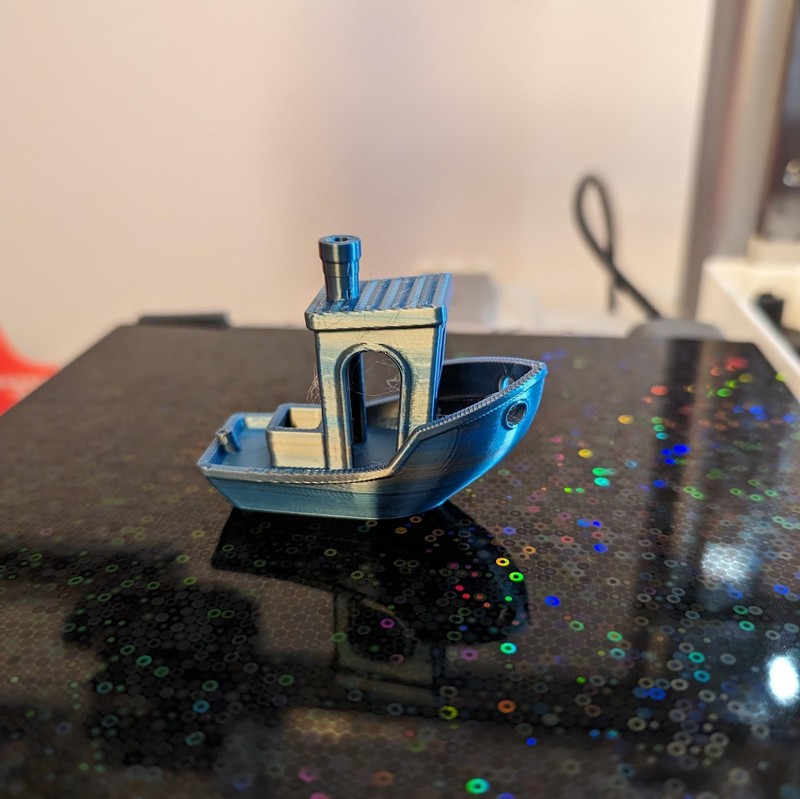
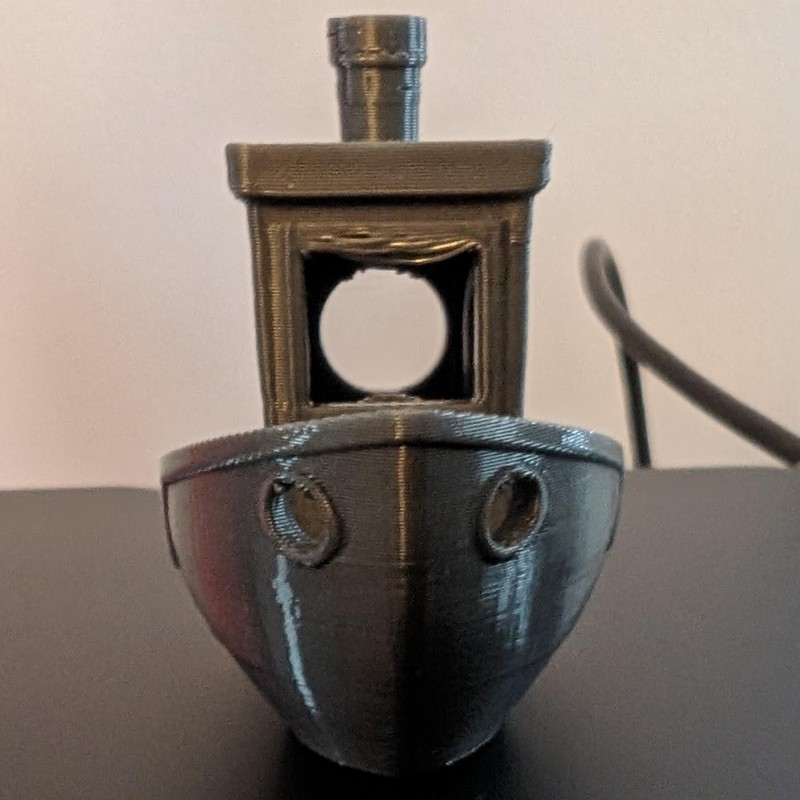
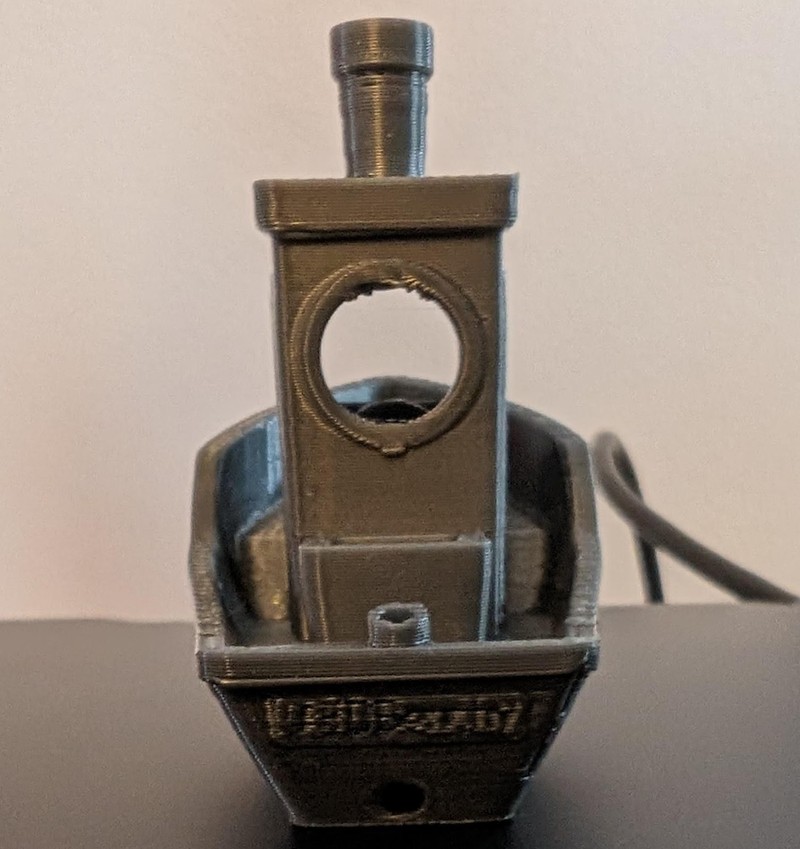
You’d never even know. This is Bambu purple PETG and it made a nearly flawless Benchy. No calibration or tuning necessary.

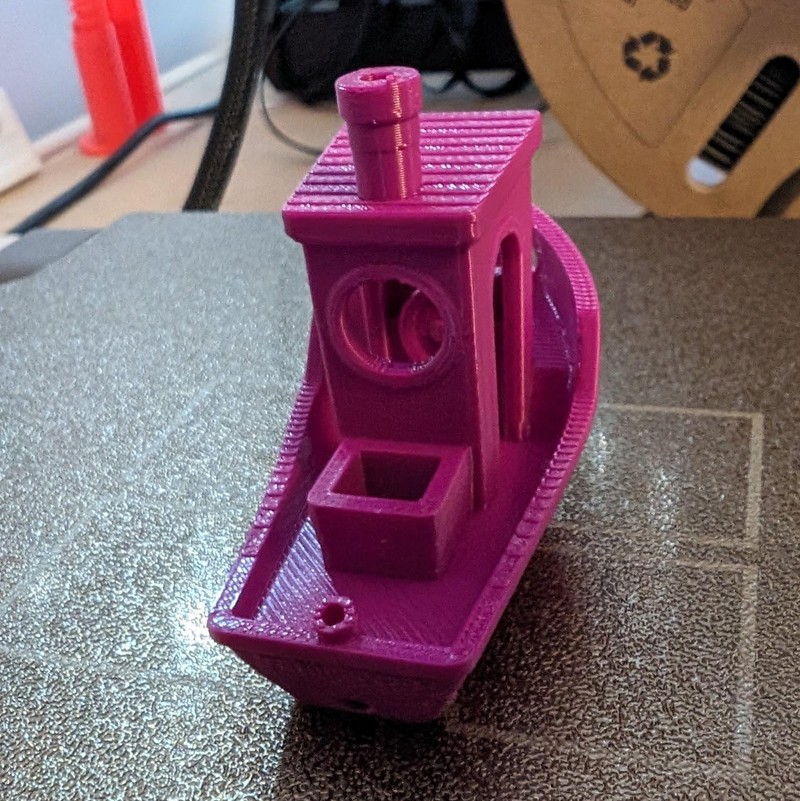
No stringing at all
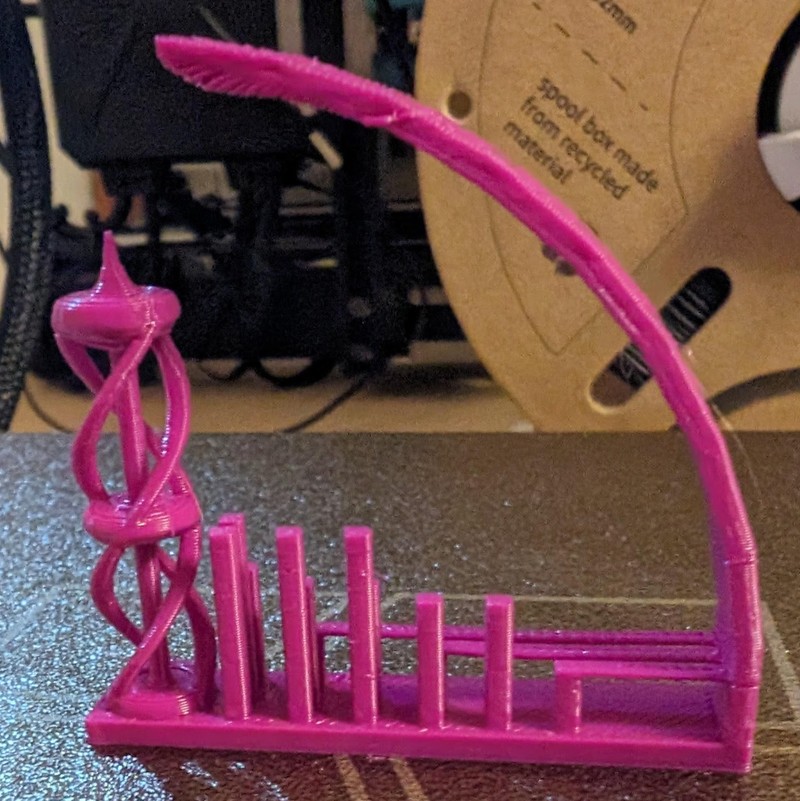
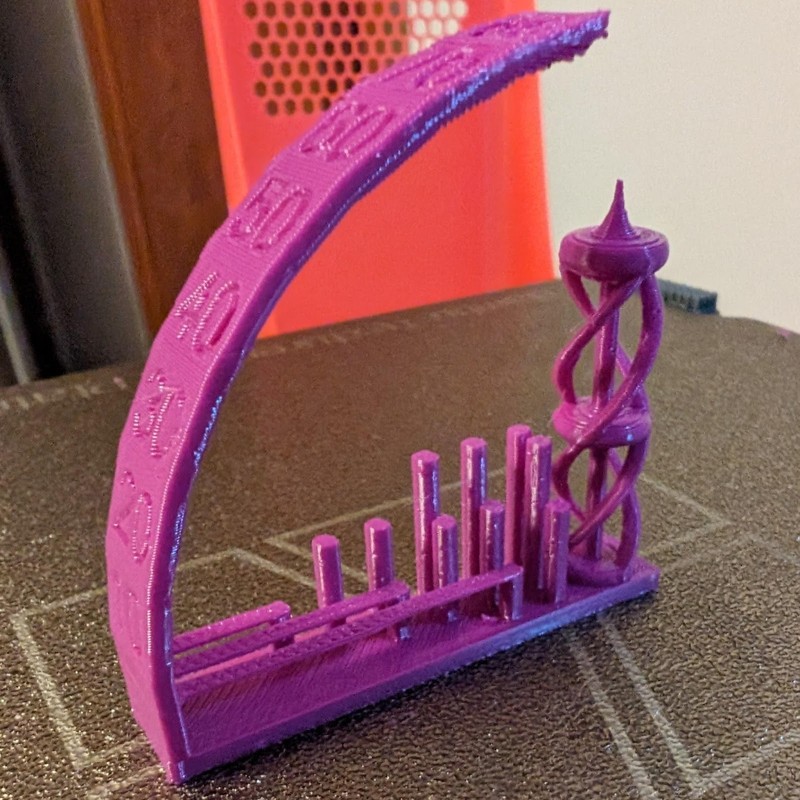
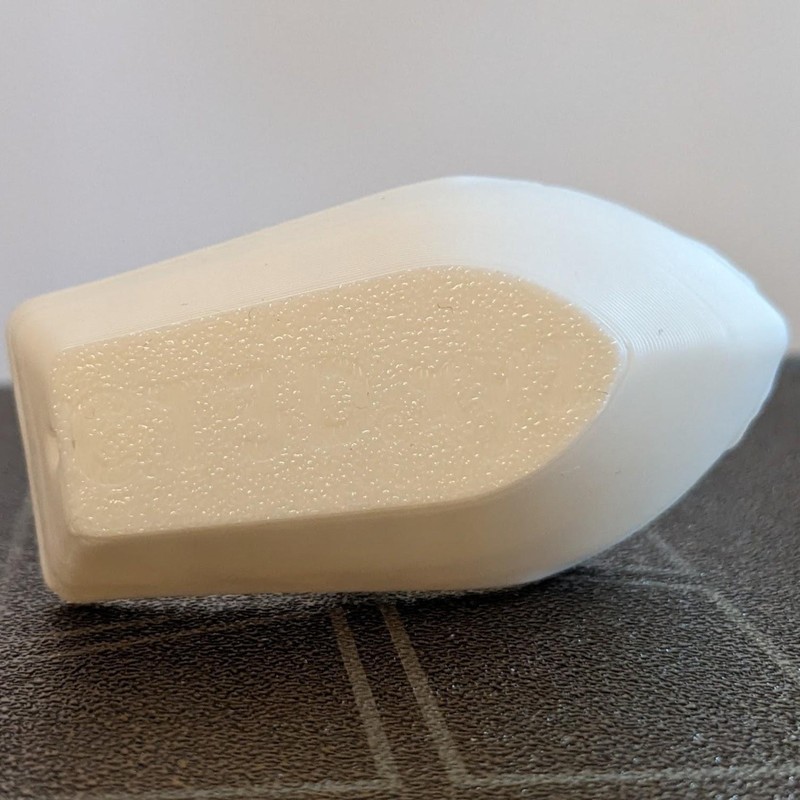
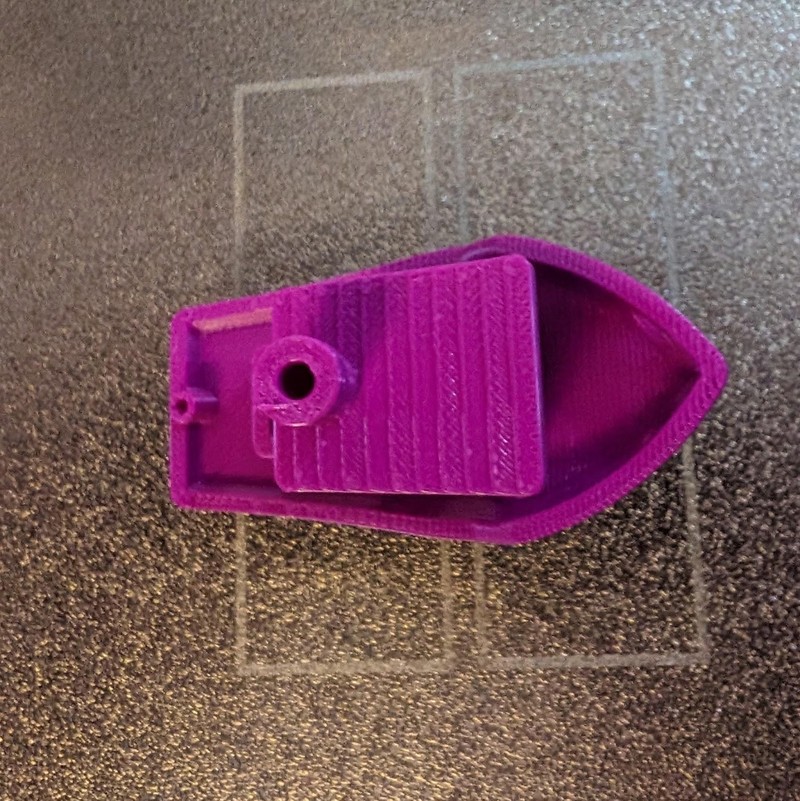
Bridging is quite good - there is no sagging although the solid layer above the bridges has some gaps. There are slight gaps in the posts caused by the filament not flowing in fast enough after a retraction. The alternative is the appearance of stringing, so it is an acceptable balance.
There are certainly no stringing concerns - check the spiral tower. The retraction settings are appropriate although maybe too conservative - there is occasional underextrusion after a retraction.
Default PETG Settings
Temperature Settings
- Nozzle Temperature: 255°C
- Bed Temperature (Smooth PEI Plate): 70°C
- Bed Temperature (Textured PEI Plate): 70°C
Cooling Settings
- No Cooling for the First 3 Layers
- Minimum Fan Speed Threshold: 10%, Layer Time: 30 seconds
- Maximum Fan Speed Threshold: 40%, Layer Time: 12 seconds
- The part cooling fan will run at the minimum fan speed when the estimated layer time is longer than the threshold value. When the layer time is shorter than the threshold, the fan speed will be interpolated between the minimum and maximum fan speed according to layer printing time. The part cooling fan will run at maximum speed when the estimated layer time is shorter than the threshold value.
- Fan Speed for Overhangs: 90%
Retraction Settings
- Retraction Length: 0.8mm
- Z Hop When Retract: 0.4mm
- Retraction Speed: 30mm/s

Regarding bed adhesion, note that we’re using textured PEI. For large, flat objects not needing brims or supports, it works well. The stiffness of thicker layers of PETG and the small amount of air trapped in the PEI texture will overcome the high adhesion when the bed is flexed underneath, detaching the parts. Unfortunately, brims are very hard to remove. They flex and will not detach from the bed. They have to be scraped off very carefully.
Given these difficulties, we’ve started using a glue stick to prevent damage to the bed and allow for easier removal. This provides a barrier layer between the PETG and the bed and works every time. It should even be safe for smooth beds but we have not had the courage to try yet.
TPU
TPU is an especially tricky filament to print. It is, of course, flexible, which sometimes causes jams in extruders and does not thread well in PTFE tubes. It is nearly impossible to print in Bowden extruders, where it’s like trying to push a string up a tube. It’s even difficult to print in direct extuder printers with reverse Bowden PTFE guide tubes - it has a tendency to fold over and jam in curved tubes. More than this, it is also elastic. This means that if an extruder pulls on it hard, it will stretch and its diameter will decrease, causing slippage as the gears will lose contact. And it’s also stringy!
Specific to the Bambu Lab A1 mini, Bambu Lab does not recommend TPU be printed from the AMS lite due to the drive gears and the long PTFE tubes curved in several places. It may jam in the tubes and tangle around the gears. It has to be printed from the external spool, but this also presents a problem. This thread on the Bambu Lab forum discusses what can happen. The thin external spool post does not allow the comparatively large spool hub to roll well - the filament is pulled until the spool falls forward, unspools filament and allows tension to build again until it falls forward once more. The filament stretches as the tension builds and underextrusion may occur. The PTFE guide tube adds drag, making the situation worse. That thread’s solution was a carbon fiber rod running on twin needle bearings but we tried a simpler adapter for an AMS lite spool holder.
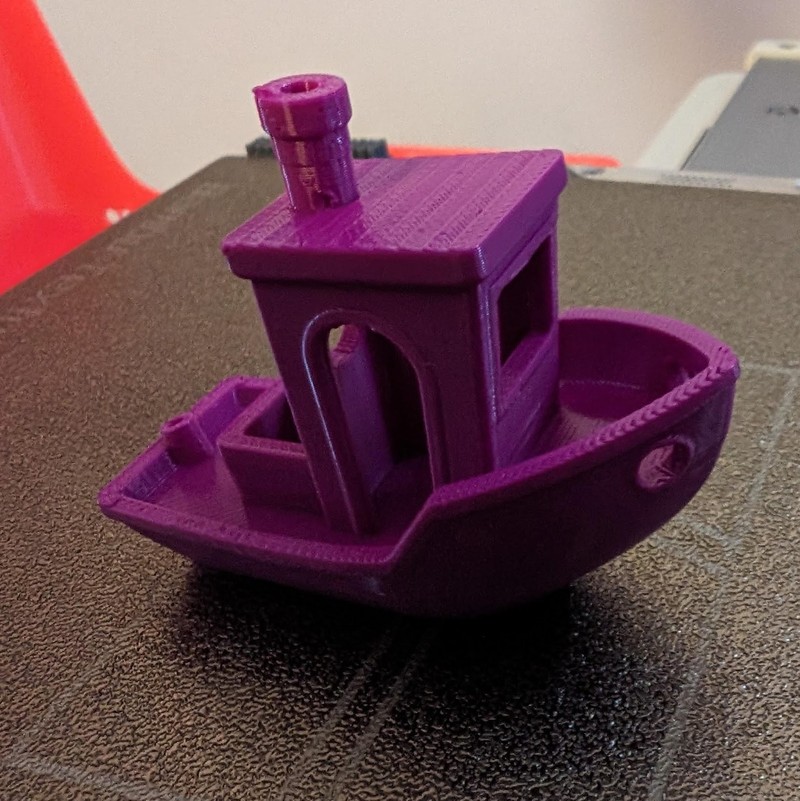
We loaded some “space gray” Overture TPU, held our breath, and…
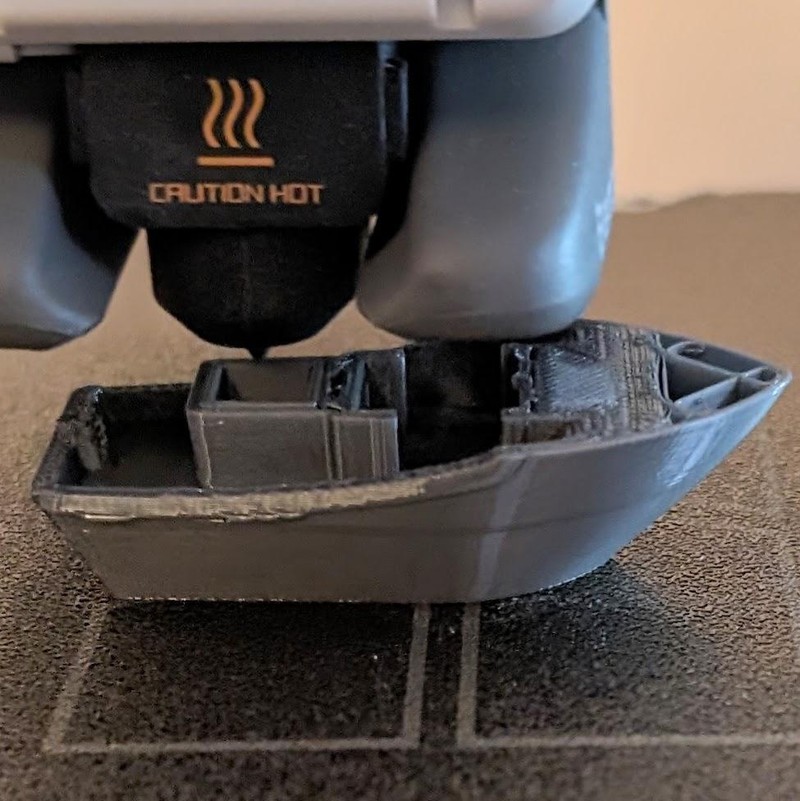

A nice TPU Benchy. No stringing
A word on TPU if you’ve never encountered it before - perhaps you were intimidated like we were. PLA is strong but brittle. PETG is actually weaker than PLA but it is much more flexible and will flex without breaking. It also has higher inter-layer bonding so it feels much stronger than PLA overall. TPU is on another level though! It is so flexible that it absorbs any energy you put into it and springs back into its original shape. Even very strong people will not be able to tear it. It must be cut and cannot be torn. Inter-layer bonding is extreme, as is bonding to the bed.
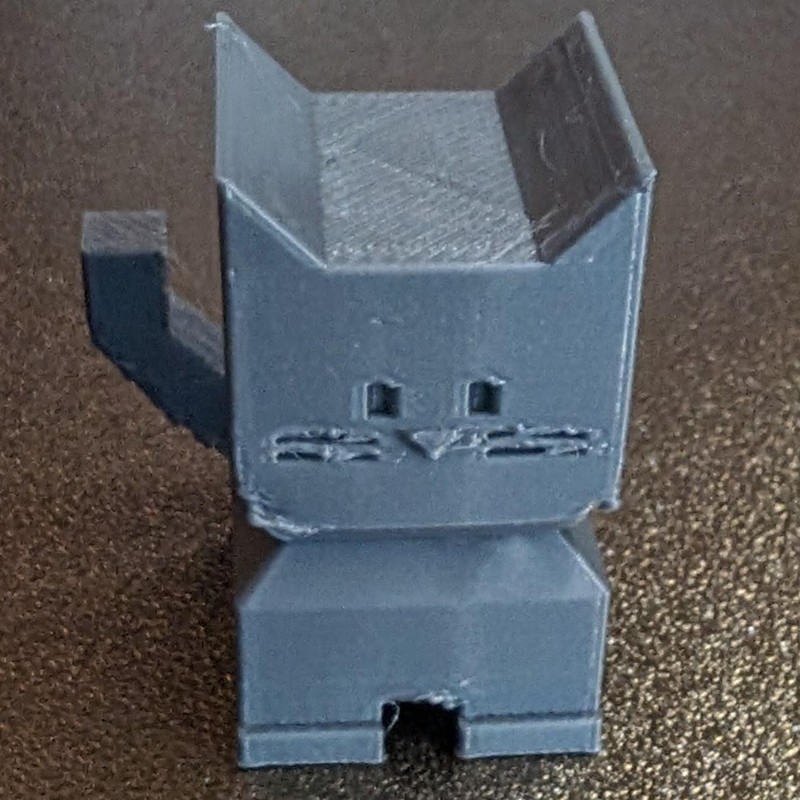
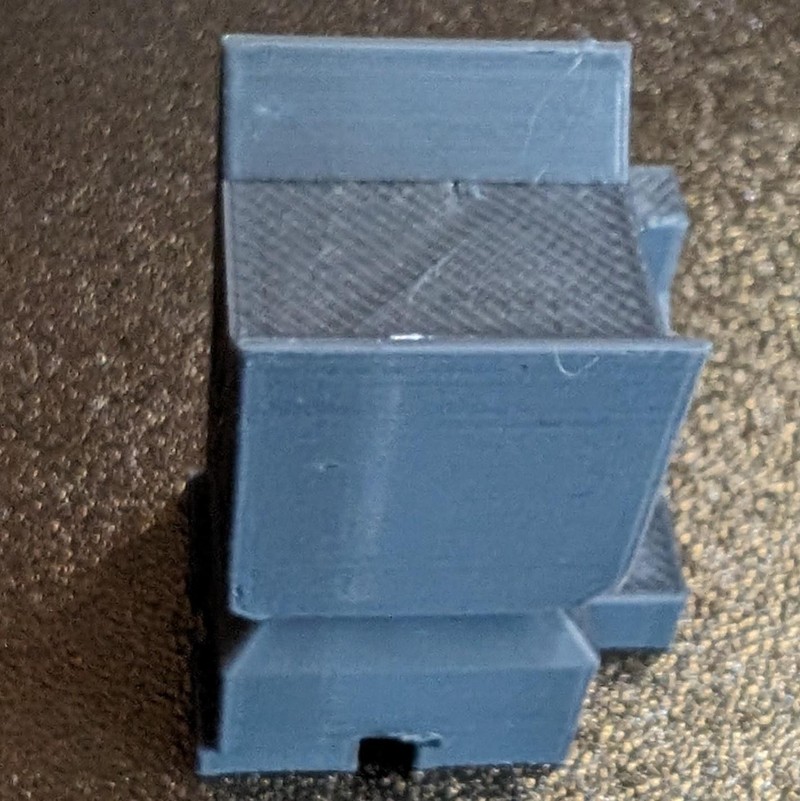

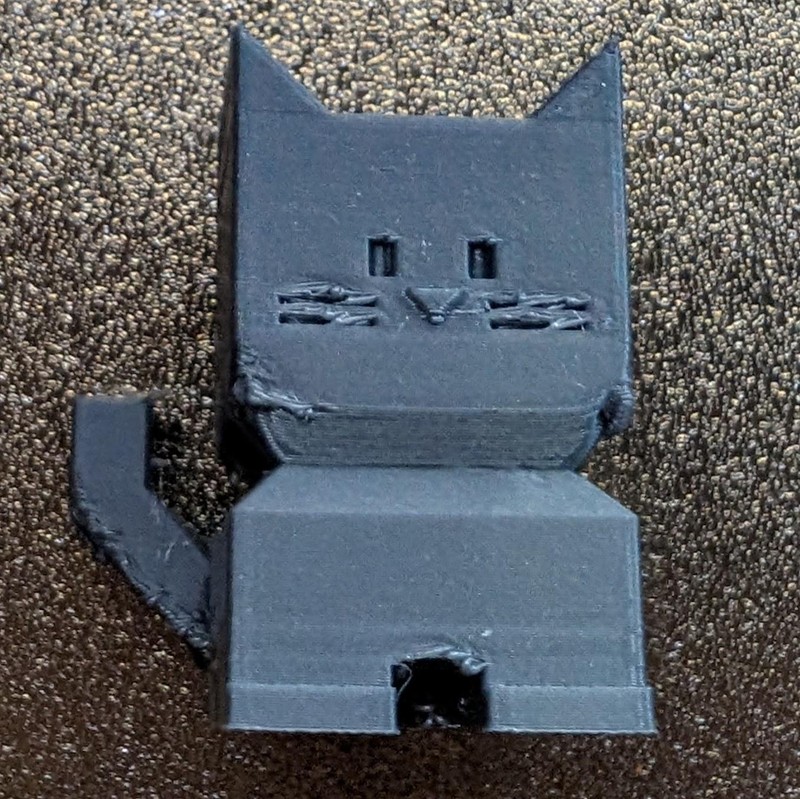
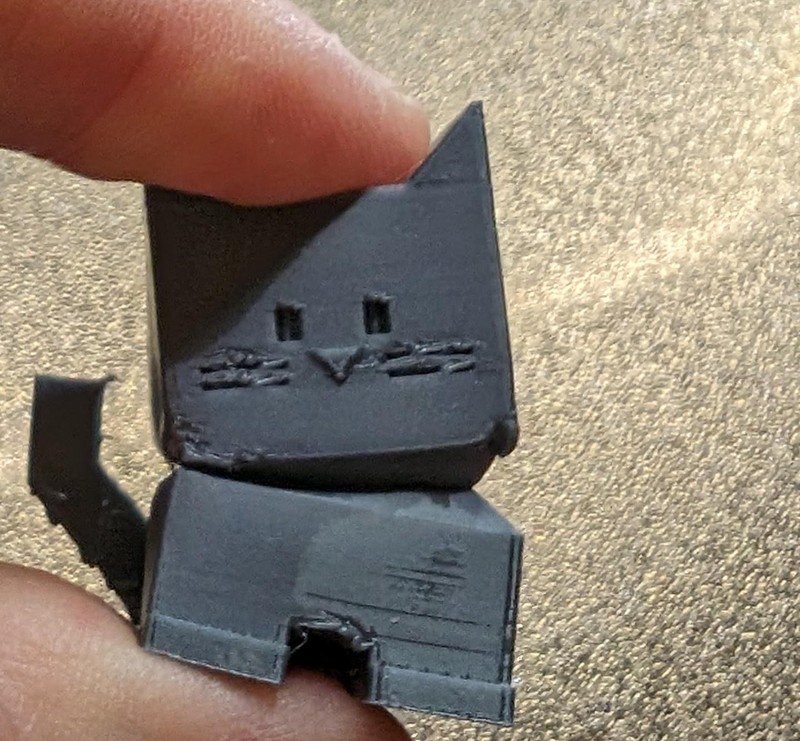
Cali Cat shows that TPU is not great at showing detail. Stringing doesn’t look too bad from here.
Default TPU Settings
Temperature Settings
- Nozzle Temperature: 230°C
- Bed Temperature (Smooth PEI Plate): 30°C
- Bed Temperature (Textured PEI Plate): 30°C
Cooling Settings
- No Cooling for the First Layer
- Fan Speed Thresholds:
- Minimum and Maximum: 100%, Layer Time Adjustments:
- Minimum Layer Time: 100 seconds
- Maximum Layer Time: 8 seconds
- Explanation: The part cooling fan will run at minimum speed (100%) when the estimated layer time is longer than 100 seconds. For layer times shorter than 8 seconds, the fan speed remains at maximum (100%). The fan speed will be interpolated between these two thresholds according to layer printing time.
- Minimum and Maximum: 100%, Layer Time Adjustments:
- Fan Speed for Overhangs: 100%
Retraction Settings
- Retraction Length: 0.4mm
- Z Hop When Retract: 0.4mm
- Retraction Speed: 30mm/s
Bed adhesion with TPU is extreme. The bed does not need to be heated - the default setting for TPU is 30°C, which is just barely heated. Once the print is completed and cools, it feels utterly fused to the bed. It requires so much force to pull it off that the spring steel may be permanently bent. Conversely to PLA and TPU, heating the bed before removal helps by making the TPU softer and more flexible. However, printing TPU on a smooth sheet, where a thin film of PEI or some other thermoplastic has been applied to steel, will almost certainly result in tearing the film right off the steel. It will easily overcome the adhesive holding the film to the steel. Textured PEI may survive but it will be under great strain. Always use a glue stick to form a barrier layer on the sheet.
Conclusion
The Bambu Lab A1 mini does amazingly well at handling different filaments. Its results are mostly perfect without any calibration. It’s obvious that Bambu Lab has done research and experimentation into building these profiles. You don’t have to worry about testing and tweaking and calibrating.
Unsurprisingly, PLA works best, but the results are also very good with PETG and even TPU. Don’t be intimidated by the reputation of these more difficult filaments. The Bambu Lab A1 mini is very capable and will surprise you. You might be able to improve the built-in filament profiles for PETG and TPU, but they do form a solid beginning and will get you printing with these filaments right away.