If you make a purchase using a shopping link on our site, we may earn a commission. Learn More
Bambu Lab A1 Mini Review: Brush with Perfection

Published: 2024-03-08
Bambu Lab has only been around for a short time, but in that time they have revolutionized 3D printing and have quickly become one of the leading 3D printer manufacturers. Other manufacturers have been preoccupied coming up with new printers trying to compete with Bambu Lab, particularly in terms of speed. Bambu started with their 500mm/s CoreXY flagship, the X1, then their more downmarket yet still equally as fast P1P, then the P1S.
Bambu Lab famously writes on the X1 product page “no more bed-slingers” (cartesian XZ head printers, where the bed is the Y axis and moves backwards and forwards) but in September 2023, they teased “Tomorrow, we confess” and announced their first bed slinger, the A1 mini, on September 20th, 2023.
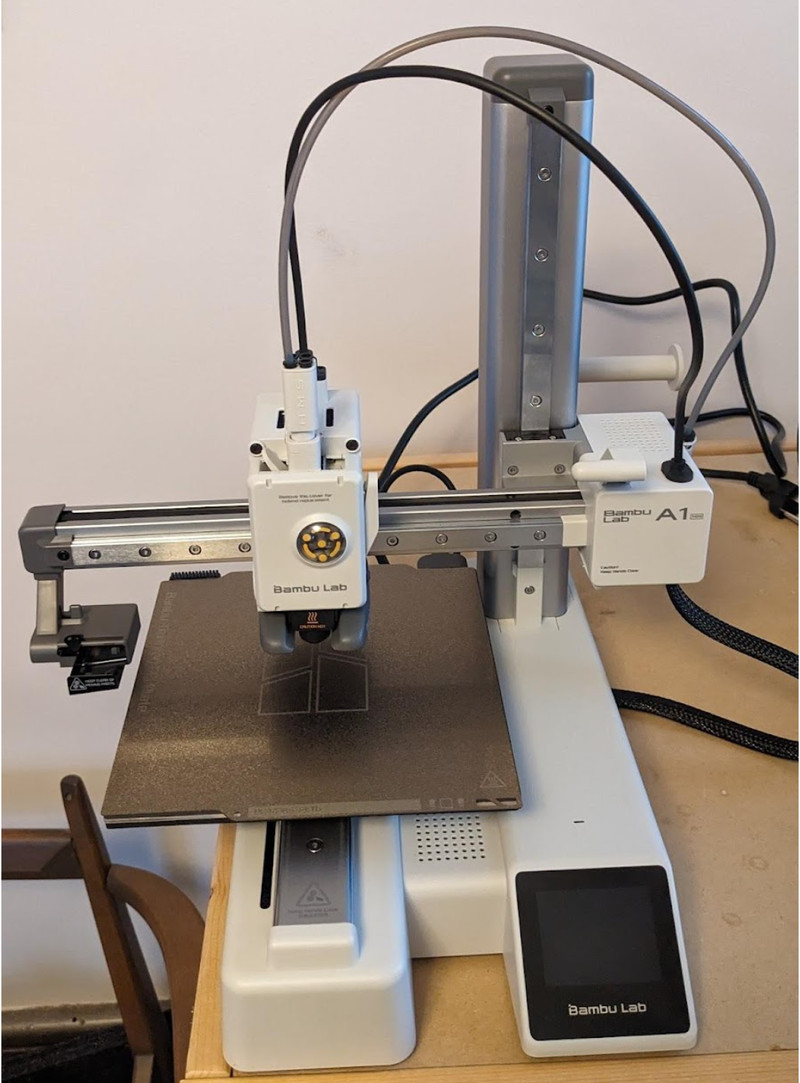
The A1 mini is a cantilever-gantry XZ head printer. It has only one vertical gantry support. This design was once popular but fell out of favor as non-cantilever printers such as the Creality Ender 3 started appearing at low prices. There are a few other cantilever machines, such as the Kingroon KP3S and the Prusa MINI+, but there have been no new cantilever printers for years and the idea seemed to be abandoned…until now!
Feature Overview
The Bambu A1 mini is…mini, with a 180 X 180 X 180mm print volume. This reduces cost and power consumption for bed heating, keeps the bed lightweight, the acceleration high and the cantilever arm short to maintain stability. Nominal max speed is 500mm/s and acceleration is 10,000 mm/s2. All axes ride on linear rails. There is a very large direct extruder with a powerful 5015 (50mm diameter, 15mm thick) part cooler blower fan and a large, prominent cooling duct resembling pontoons that directs air on either side of the nozzle.
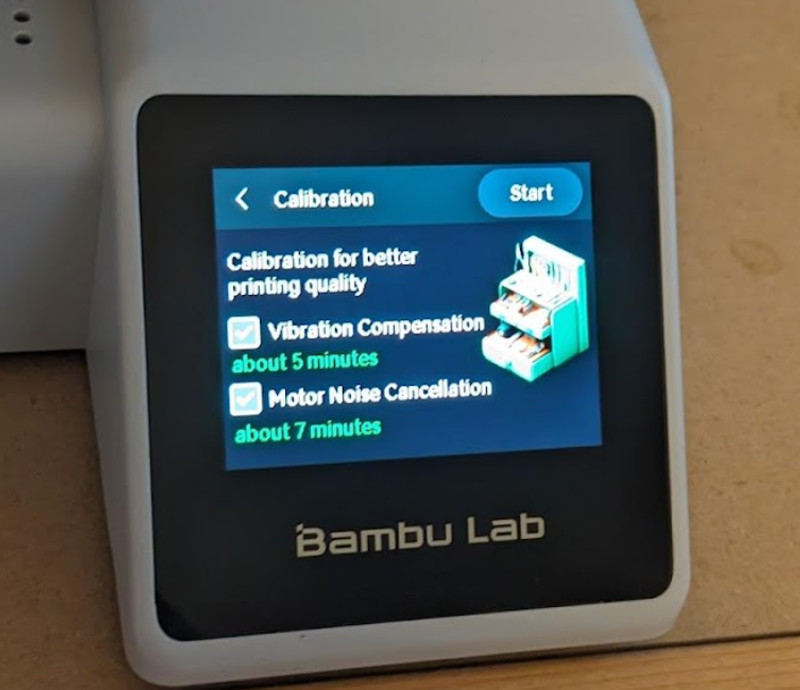
The magnetic, flexible steel build plate has a textured PEI surface - a smooth PEI plate is optional. Tabs align it on the bed for easy installation. The control system features active flow rate compensation (reducing extruder pressure on sudden nozzle direction changes to keep corners sharp), vibration compensation, and an eddy current flow detector to allow flow calibration.
This printer is the first in Bambu Lab’s lineup to feature active motor noise cancellation to keep motor noise down by pulsing the motors at frequencies which do not resonate with the print surface and environment. Since it has such precise control over the motor frequencies, it has the ability to cause the motors to hum and play simple tunes without using a loudspeaker.
There are two nozzle wipers, one a silicone brush and the other of heated, perforated stainless steel. The printer features 36-point (6 x 6) nozzle strain bed leveling. It has a 1920 X 1080p camera and an LED light to illuminate the camera feed when the room is dark.
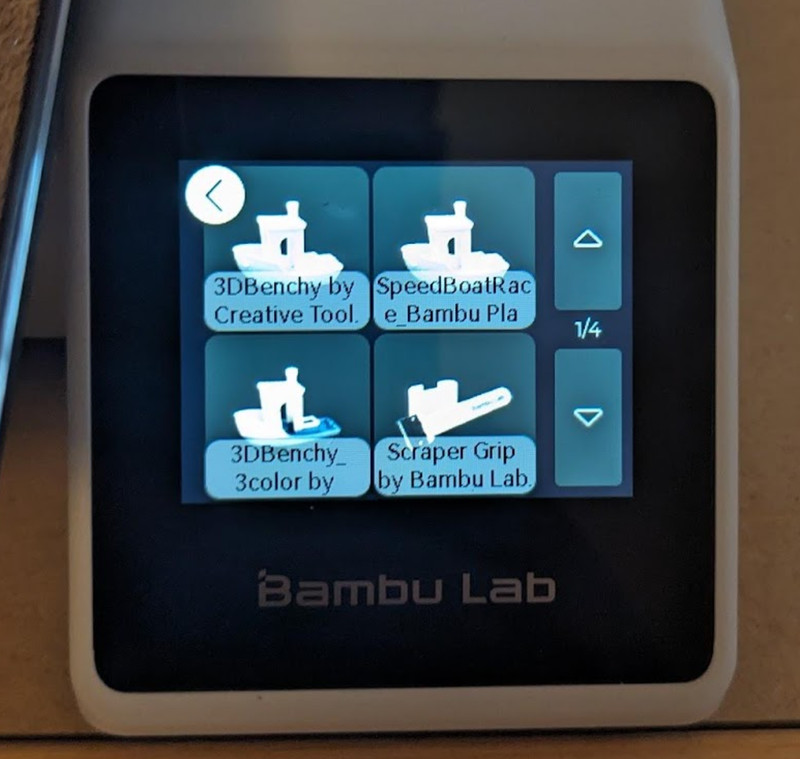
The printer is controlled by a 2.4 inch 320 X 240 full color IPS touchscreen and connects to a network by 2.4 GHz WiFi. Print files can be sent over the network or loaded onto a microSD card.
Another standout feature of the A1 Mini is its support for the Bambu AMS Lite. The AMS Lite holds 4 filament spools, allowing easy multi material printing. We will not be reviewing it in this article, but it’s a unique add-on for the A1 Mini that sets apart from most other 3D printers.
Click here to view the Bambu A1 Mini on the Bambu Lab website.
Packaging and Assembly
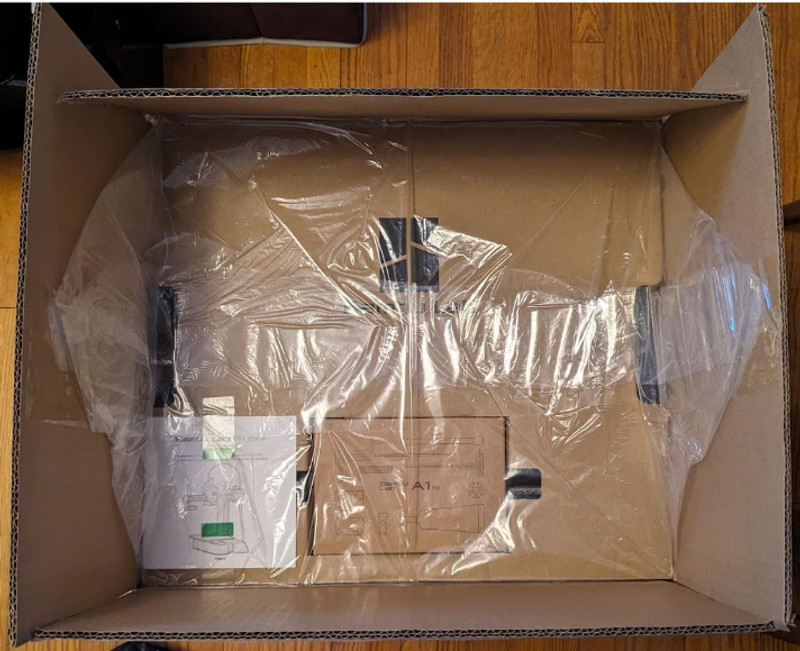
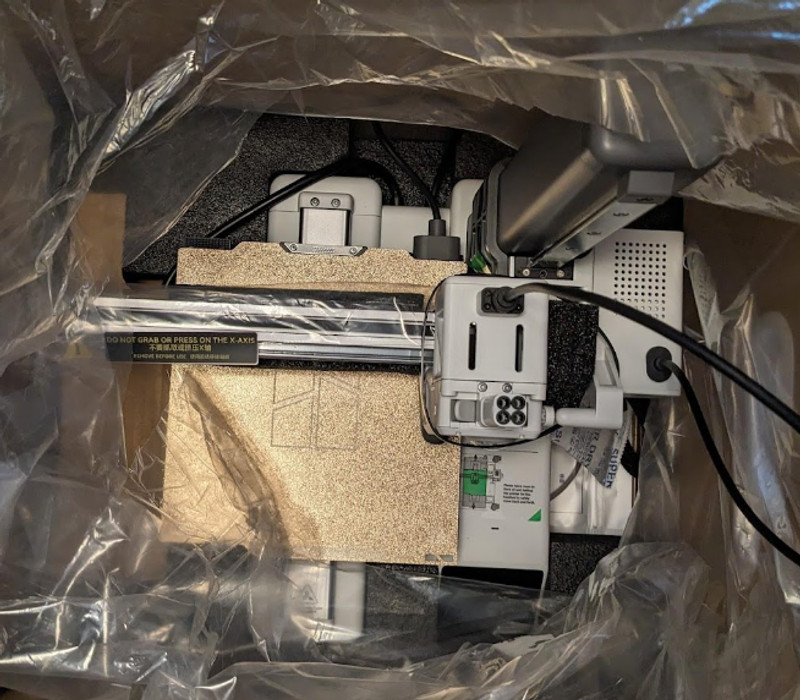
The A1 Mini arrives in a large, tall box. It is extremely well packed, surrounded by large pieces of thick foam.

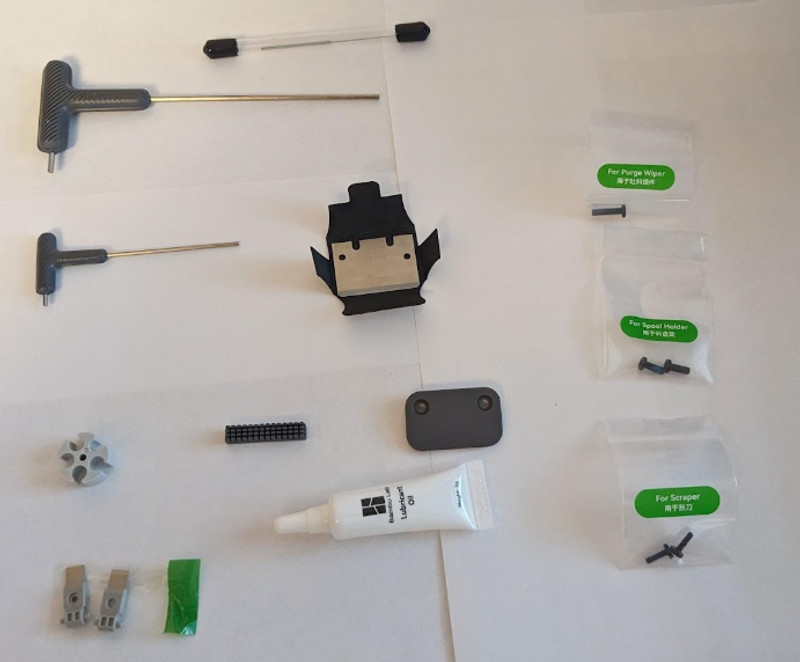
The accessories and tools are packed into a tray in a box and consist of:
- 2 T-handle hex wrenches
- Nozzle cleaning needle
- Razor blade (for scraper)
- PTFE tube clip
- Spare nozzle wiper pad
- 2 spare filament cutters
- Oil
- Spool holder bracket
- Screws for purge wiper, spool holder and scraper
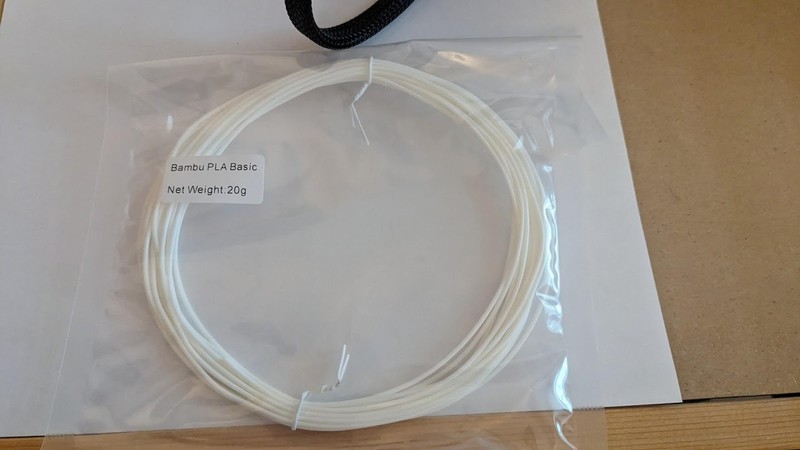
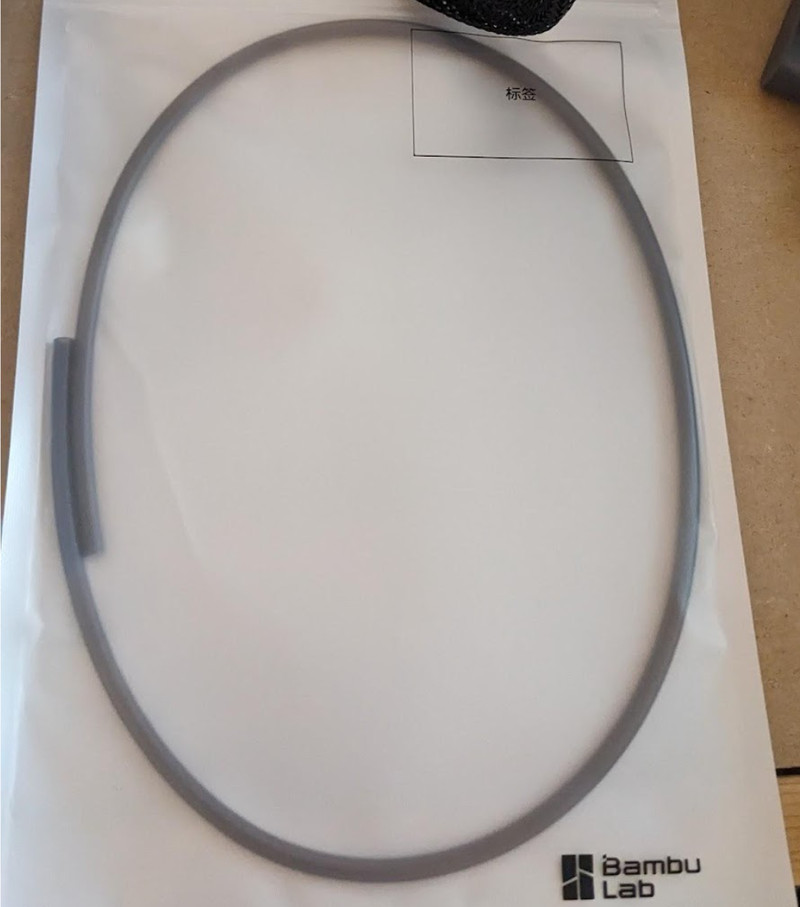
There’s also a paltry 20g of sample filament (enough for a Benchy and a scraper or two), a section of PTFE tube and the spool holder.
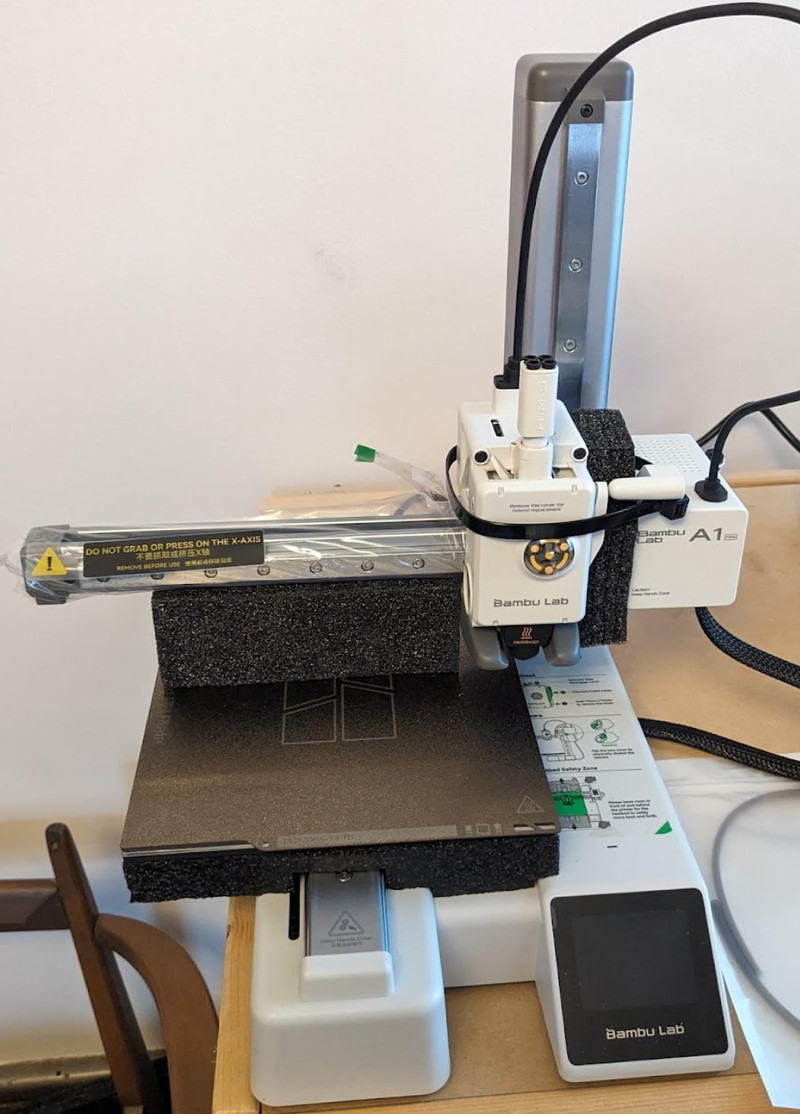
It is effectively fully assembled, but there are a few things to do.
The extruder is locked into place by pieces of foam, a cable tie, and a large plastic Z axis limiter piece secured with screws. These all need to be removed.
Then 3 screws under the bed need to be tightened.
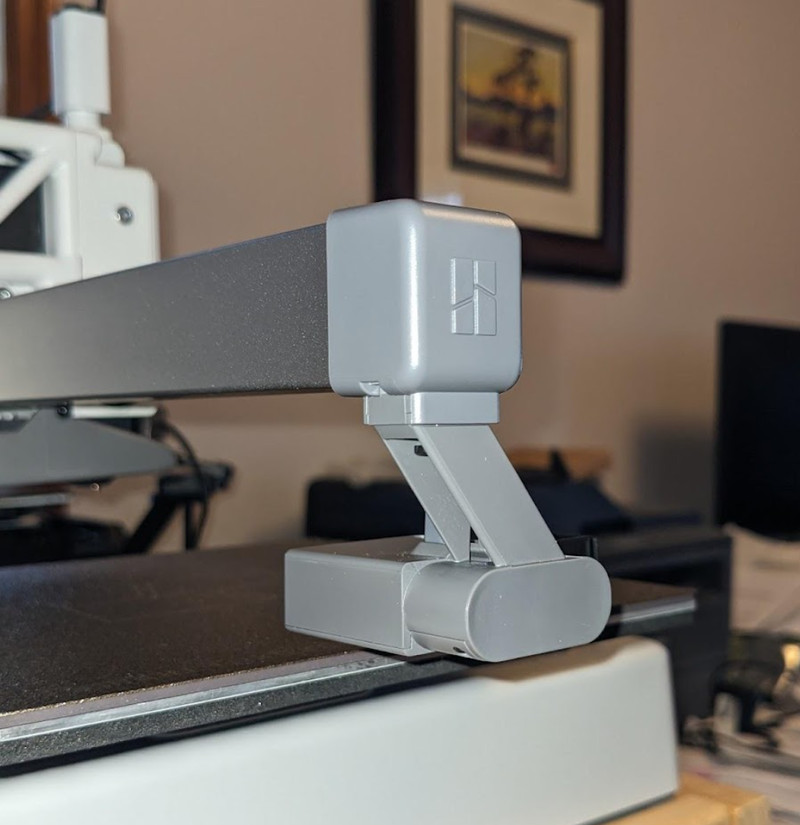
The purge wiper is then installed onto the end of the Z axis using a screw from underneath.
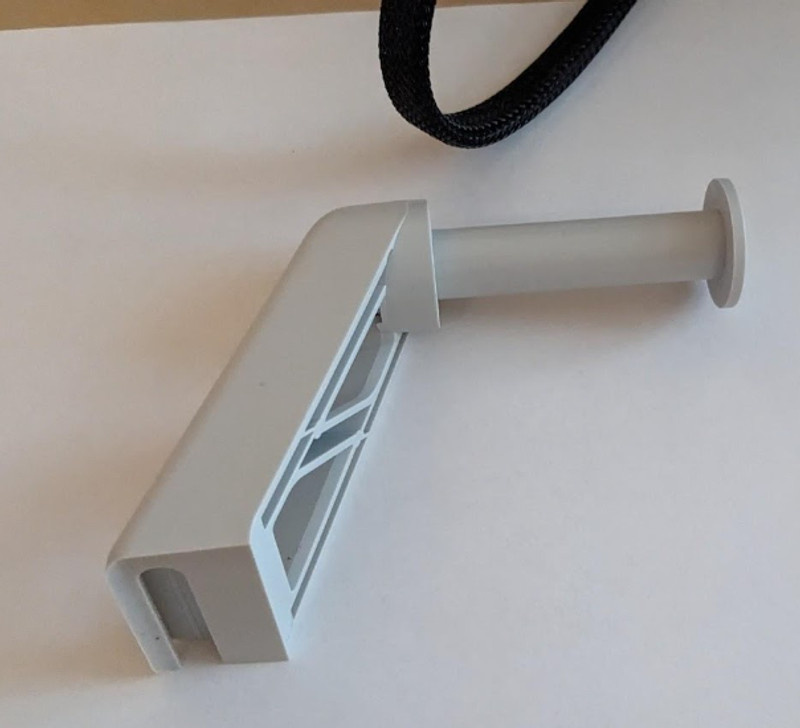
Spool holder bracket installed

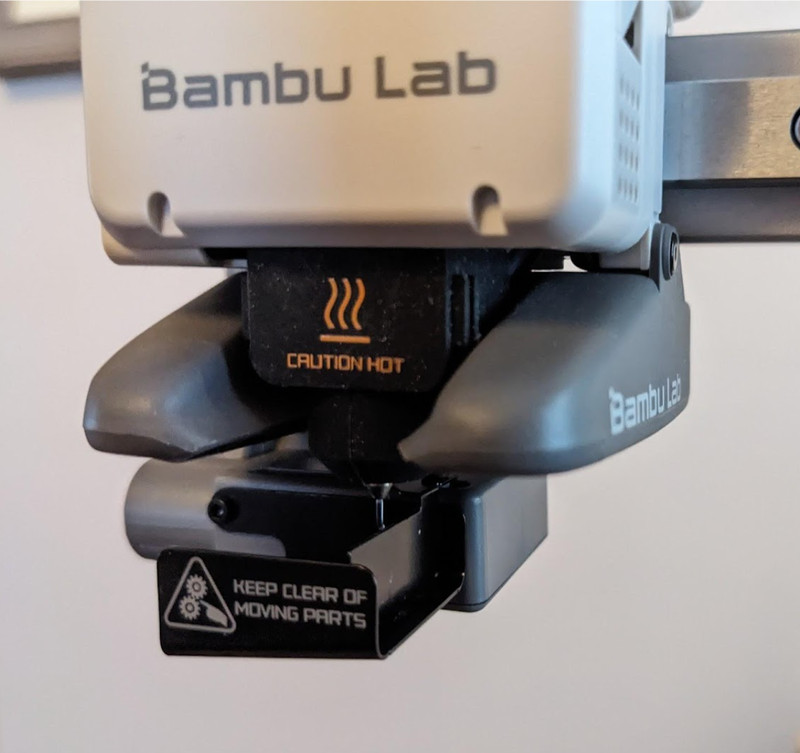
Extruder and Hotend
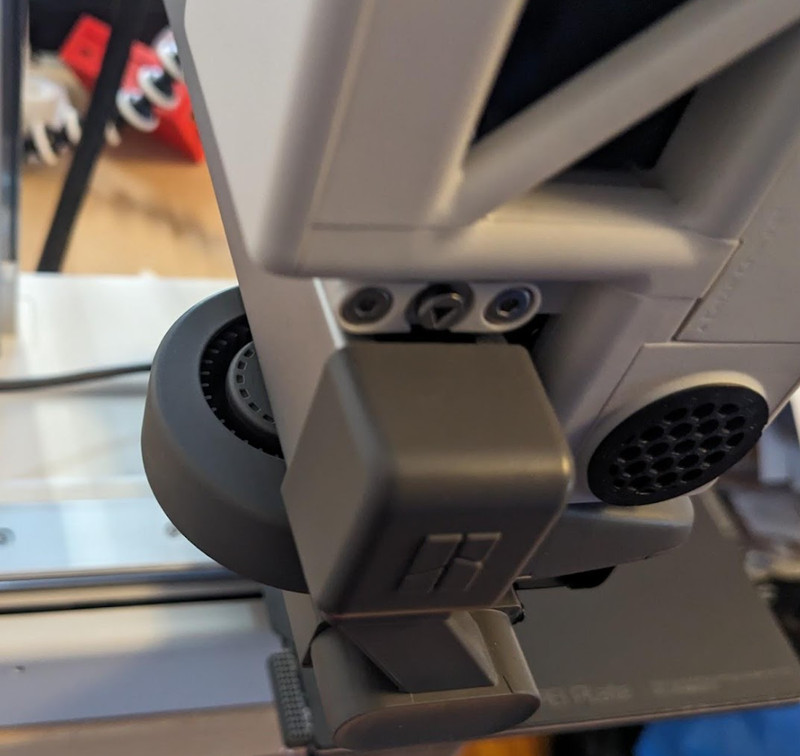
The direct extruder seems quite large and especially tall for such a small printer. It is all metal and has a hardened steel drive gear. A prominent drive indicator spins at the front of the extruder, indicating flow. Many users customize this part to add some character to the printer.
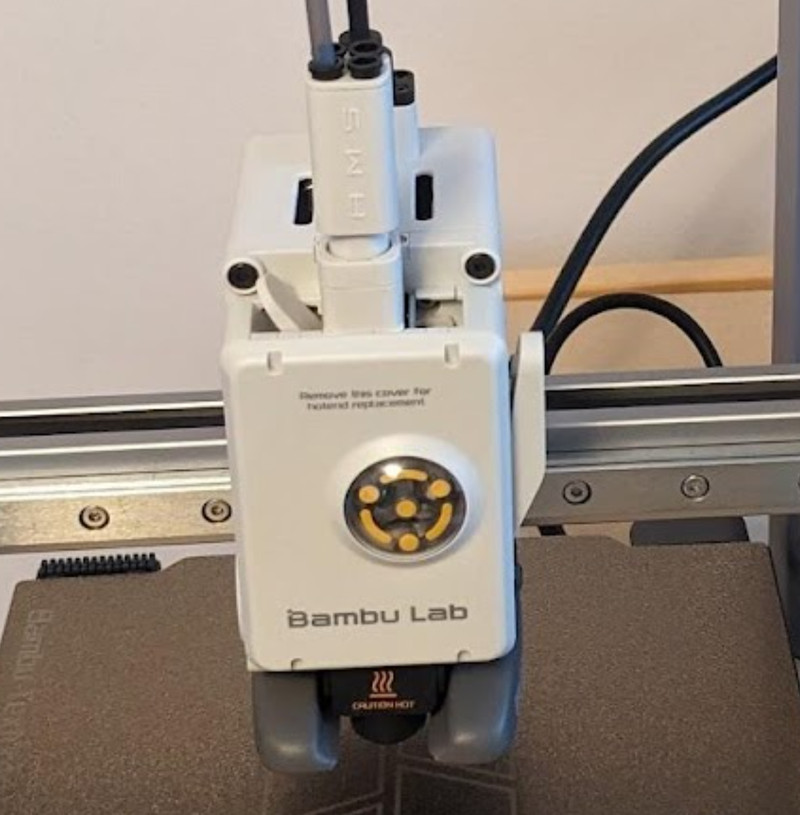
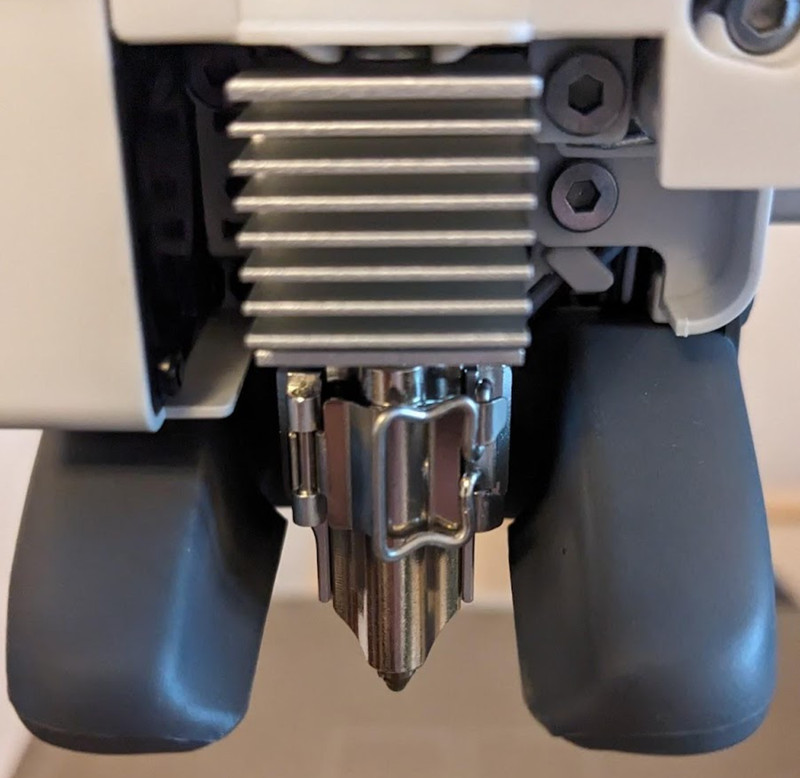
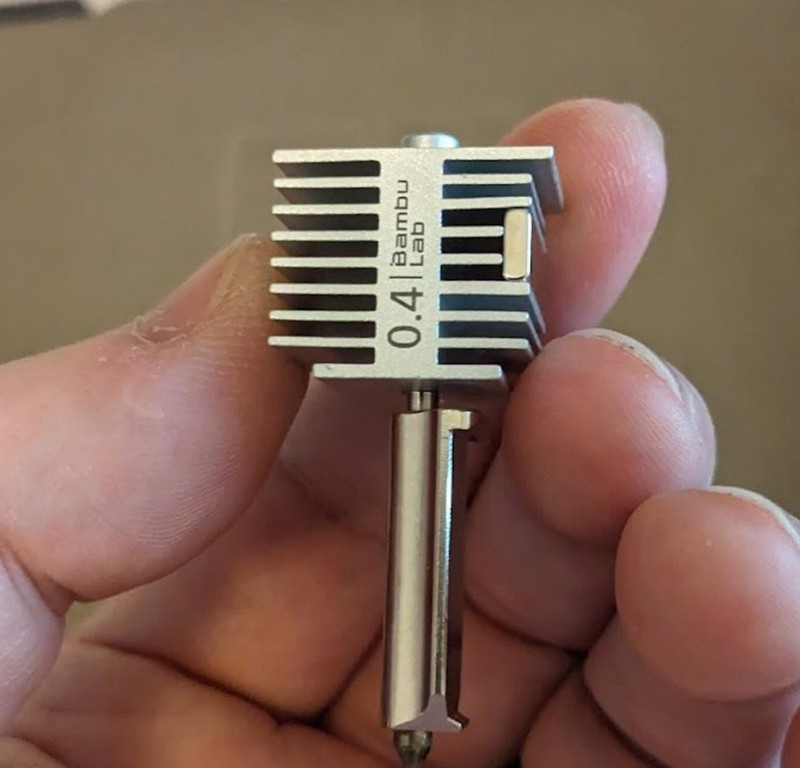
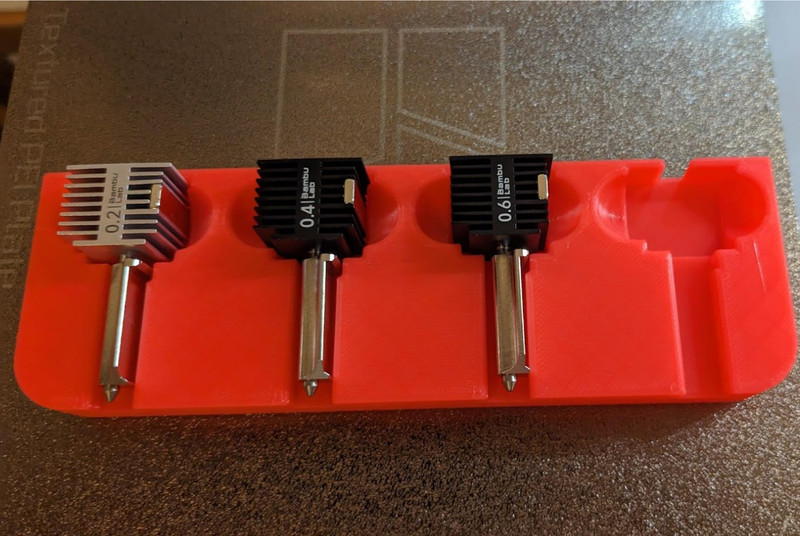
The nozzle, heartbreak and cooling fins are integrated into a single component which is held in place magnetically and secured with a latch and buckle. The nozzle is not screwed in and does not require any tools to change. The entire assembly can be removed and replaced by opening the latch and pulling the entire assembly off the magnet. This is very simple and makes nozzle changes extremely easy, prompting new users to try different nozzles. The printer is equipped with a 0.4mm stainless steel nozzle. A 0.2mm stainless steel nozzle is available as well as 0.4mm, 0.6mm and 0.8mm hardened steel nozzles.
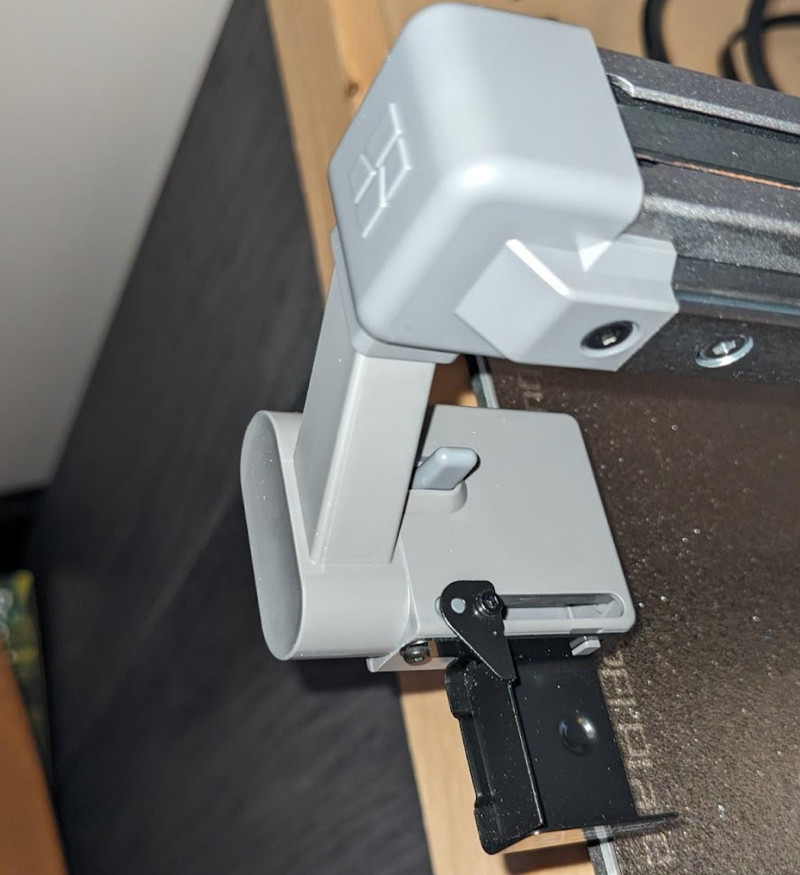
The extruder will position itself beyond the left side of the print bed to place the nozzle over the attached purge wiper assembly. This has a lever which pushes a spring-loaded metal gate right as the extruder moves left. On the right of the extruder is a large lever which is connected to a filament cutter inside the extruder. When the extruder moves to the right beyond the print bed, it pushes the lever onto a large pin built into the end of the gantry crossarm, cutting the filament. This easily and cleanly detaches filaments when they are changed.
The large print cooling fan is a 5015 blower fan, mounted horizontally behind the nozzle with the intake facing up so it does not pull in air from directly over the heated bed. It is mounted in a arge bulbous curved duct which exhausts air on either side of the nozzle.
Printing with the A1 Mini
Of course the first print is going to be a Benchy from the presliced models on the microSD card, but here Bambu Lab already shows how different this printer is by presenting two Benchys. The most interesting one is the “speed” Benchy, designed to show off the printer’s speed, but there’s also a regular speed version and a multicolor one. We started with the speed Benchy.
First we loaded the sample filament. This is nearly fully automated and very simple. The extruder moves to the end of the crossarm and positions itself over the purge wiper tray. The nozzle heats to 250° C. The next step “checks filament position” - you should push the filament up the PTFE tube until it triggers the filament sensor in the extruder and the assistant will remind you until you do. The extruder then advances and the assistant comes up again and asks if filament is coming out of the nozzle - you can select “retry” if not or “done” if filament is coming out of the nozzle. Next the extruder purges any old filament in the extruder by extruding a surprisingly large blob of filament into the purge wiper tray, then tapping the end of the purge wiper 3 times, which forcefully ejects the blob (commonly referred to as “Bambu poop”) and wipes the purge wiper’s metal gate across the tip of the nozzle.
The printer starts each print with a cheery little melody, played not with a loudspeaker but by vibrating the motors at the appropriate frequencies. It will also play a different melody when it completes a print, and you can load your own tunes into the start and stop end G-code. This can be turned off but adds to the friendliness and approachability of the printer.
After the musical announcement, the printer then goes through a complex startup sequence, consisting of:
- Homing
- “Mech sweep” where it vibrates at certain frequencies, probably trying to detect if belts are tight and all mechanical components are working
- Setting Z offset by tapping the nozzle to the bed 5 times in several locations
- Heating the nozzle to 150°C
- Quickly wiping the nozzle on the silicone brush then the heated, perforated stainless steel nozzle wiper
- Resting the nozzle on the stainless steel nozzle wiper
- Turning off the nozzle heater
- Heating the bed up to printing temperature
- Heating the nozzle up to 140°C
- Homing
- Bed leveling, 36 points (6 X 6), tapping the nozzle 3 times at each point
- Parking the nozzle back on the steel nozzle wiper
- Heating the nozzle up to 180°C
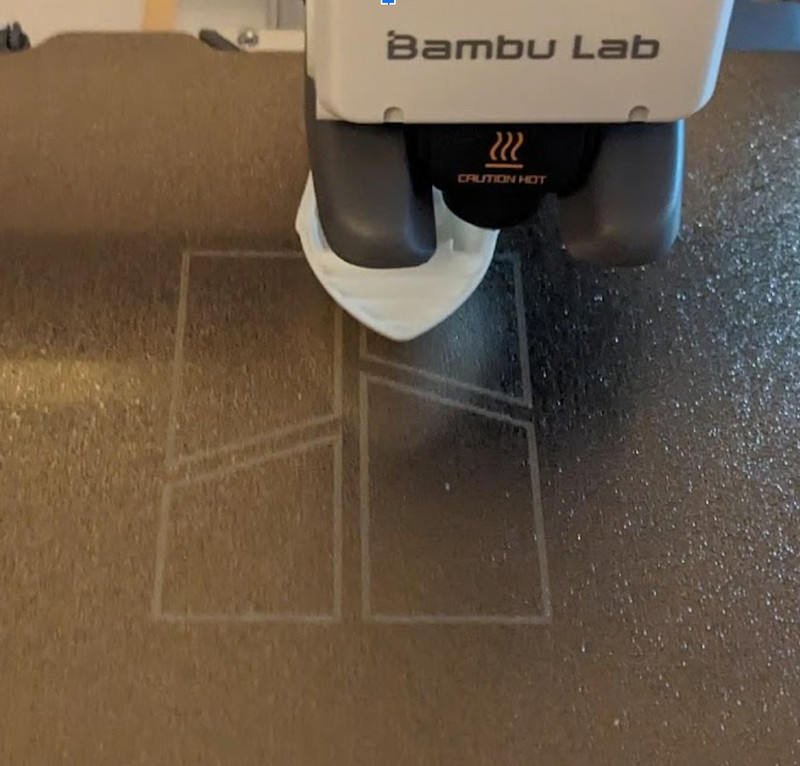
- Wiping a strip of filament in a special unprintable area at the front of the bed
- Parking the nozzle in the purge wiper tray
- Heating the nozzle up to printing temperature, 220°C by default for PLA
- Purging a large amount of filament at different extrusion speeds - this is flow calibration
- Ejecting the purged filament
- Wiping a strip of filament at the front of the bed, just slightly behind the first wipe line
After all this, it starts printing. No brim or skirt is printed, the various purging and wiping procedures prime the extruder and nozzle and wipe the nozzle, so it gets right to it! This speed Benchy prints the first layer very quickly with eerie silence - the motor noise cancellation is very effective and you can only hear light ticks as the nozzle changes direction. On the second layer, the very loud part cooling fan kicks in.
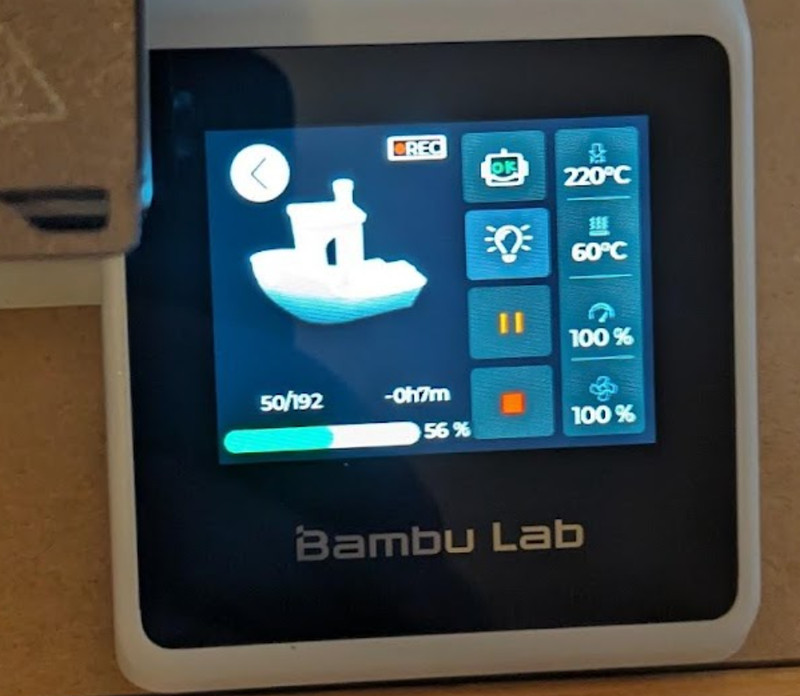

The print proceeds with this jaw-dropping speed, completing layer after layer. This print finished in 17 minutes according to the display. Our Creality Ender 3 V2 Neo typically completed a Benchy in about 1 hour 45 minutes at 50mm/s, and a Sovol SV06 Plus completed a Benchy in 1 hour 28 minutes at 150mm/s. So this is a completely different speed tier.
This produced an excellent Benchy, with a perfect first layer and no stringing. There is one odd defect - a blob formed on the port (left) side of the cabin rear window arch which then got pulled over to the starboard (right) side, disrupting the arch. Other than that, you would never know how quickly this Benchy was printed. It seemed to be printed with great precision.
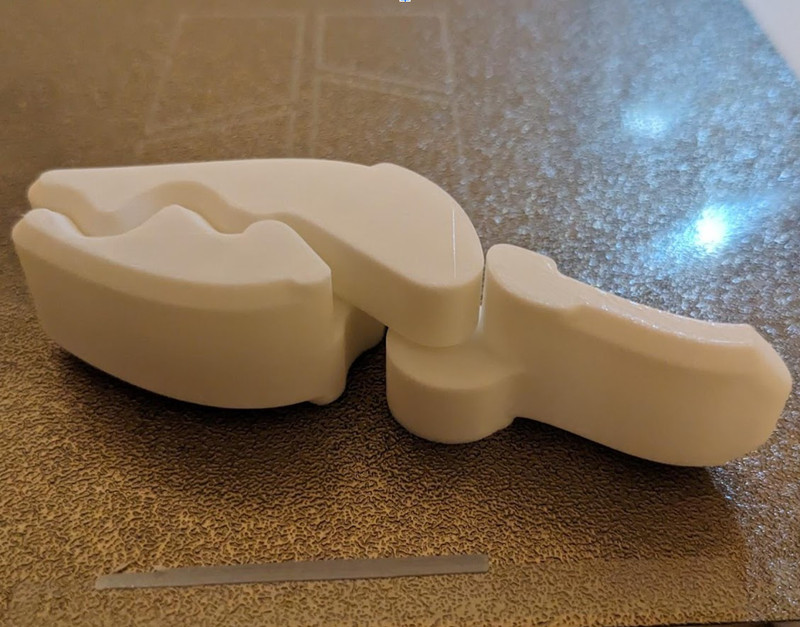
We printed other prints off the microSD card. One was a 3-part scraper which holds the blade included in the parts box. This took over an hour and oddly printed each part separately. It looked good but there are a few finish issues on the top layer. The next print off the card was a simple scraper which printed flawlessly in about 15 minutes. Next we tried a bag clip which has a cam lever with a print-in-place mechanism and joints, which was extremely solid and worked perfectly.
The small bed seems to take a long time to heat up, as compared to the nozzle heater which is very quick. But we timed it and it takes less time to reach 60°C than a Sovol SV06 Plus bed, which is much larger but has a much more powerful bed heater. So it’s proportionally a bit better and it probably seems slow since the nozzle heater is so fast.
The first prints gave us increasing confidence that this printer can print anything we could throw at it.
Software
MakerWorld, Bambu Studio and Bambu Handy
MakerWorld is Bambu Lab’s online model database. This is similar to most other model databases, except there are “print profiles” customized for each Bambu Lab printer model. Selecting an A1 Mini print profile will give you detailed information about what type of filament is used, what nozzle is used, how many plates will need to be printed, how long the print will take and how much filament will be used. Opening this print profile directly in Bambu Studio (Bambu Lab’s slicer program) will have the part properly oriented and all settings set as the print profile requires. It’s ready for slicing and Bambu Studio can send the sliced file directly to the printer, opening the monitoring tab so you can monitor and control the printer. You can watch the low framerate video taken from the camera here.
Bambu Handy, Bambu Lab’s phone app, simplifies this even further. You can browse MakerWorld models and if a print profile exists for your printer, you can send the file directly to the printer! The file is sliced in the cloud and the printer starts right up. Bambu Handy then shows a monitoring screen which is almost identical to the Bambu Studio monitoring tab.
Let’s try it!
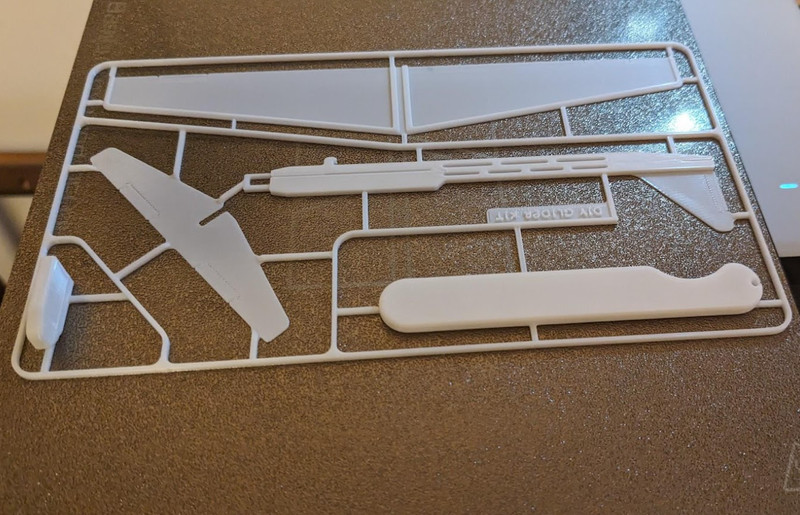
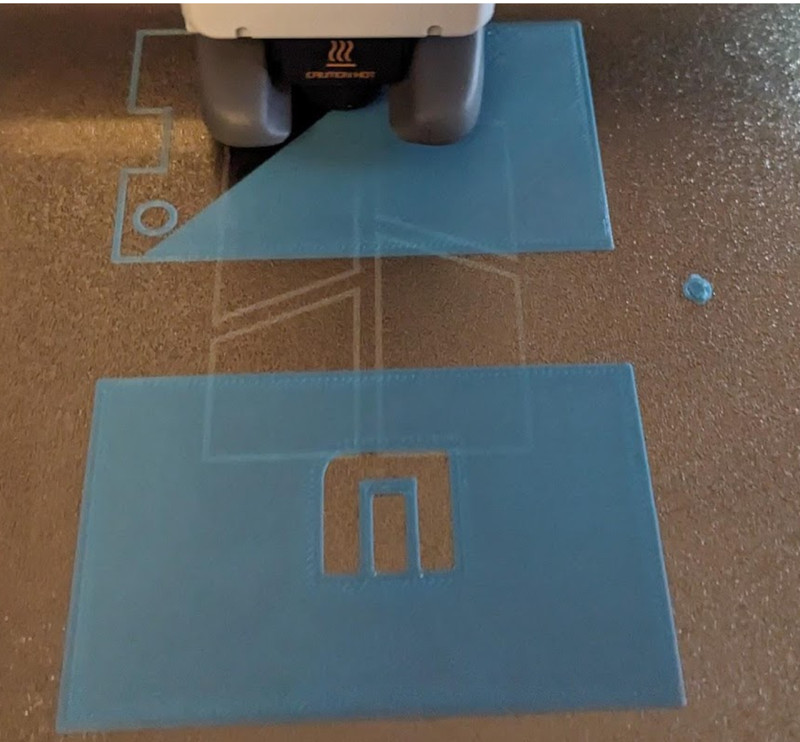
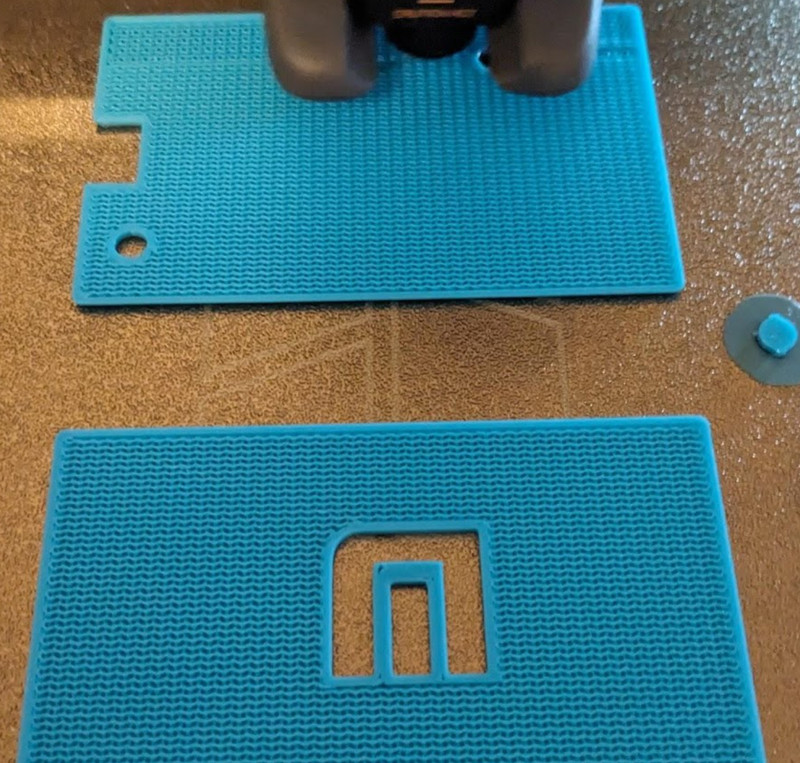
This glider kit card is a small model but one with thin layers that must be printed perfectly and very fine lines which would be difficult to print well on other printers. We would not dare to try this print without a brim on other printers, but this printed perfectly with no brim, skirt or any adhesion assistance at all. Wow.
Recommended Upgrades for the Bambu A1 Mini
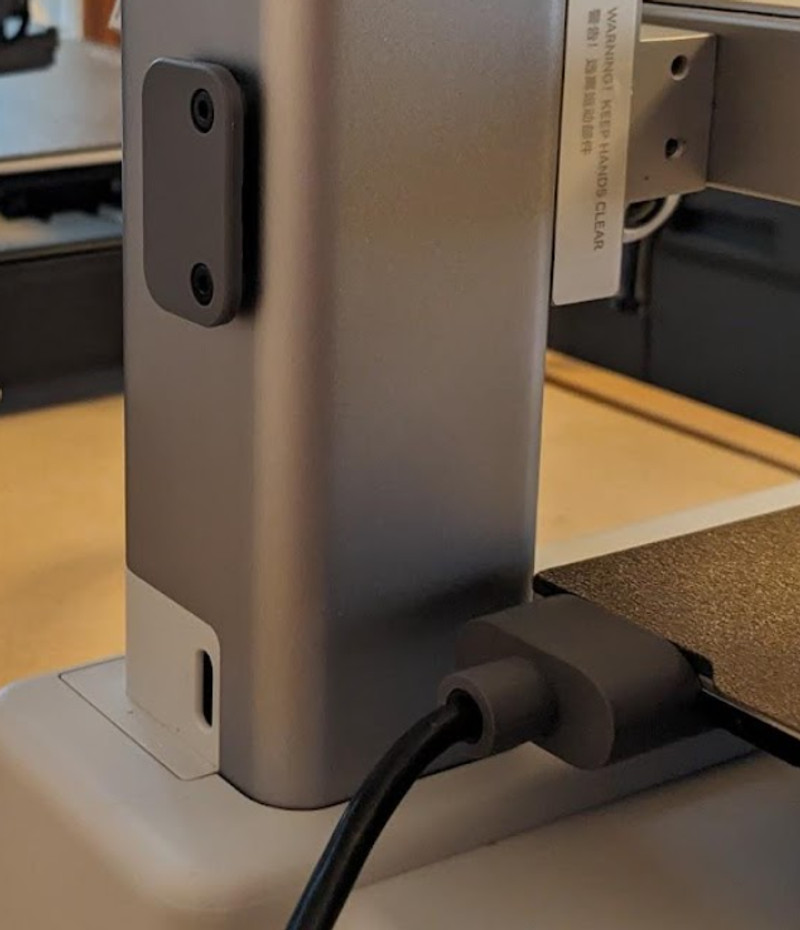
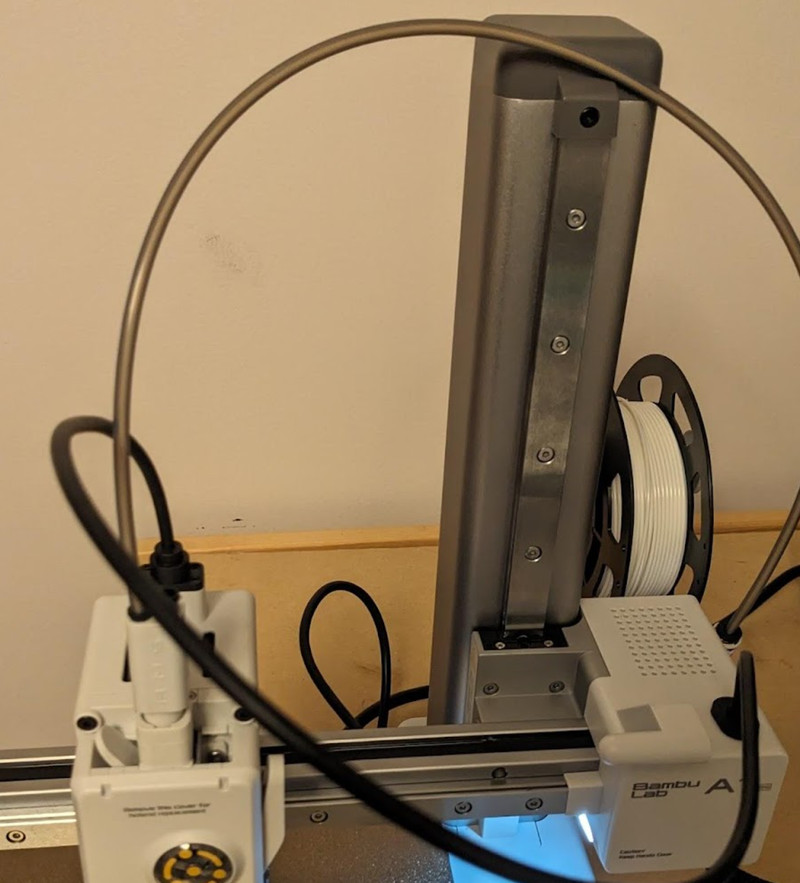
There aren’t too many essential user-printable upgrade parts or third party upgrades for the A1 Mini since the printer’s parts are proprietary. We found that the PTFE tube was not well secured and flopped around with the high speed, jerky printer movement. It often hit the top of the vertical upright and we had concerns that a sudden quick movement could snag it and tear it off.
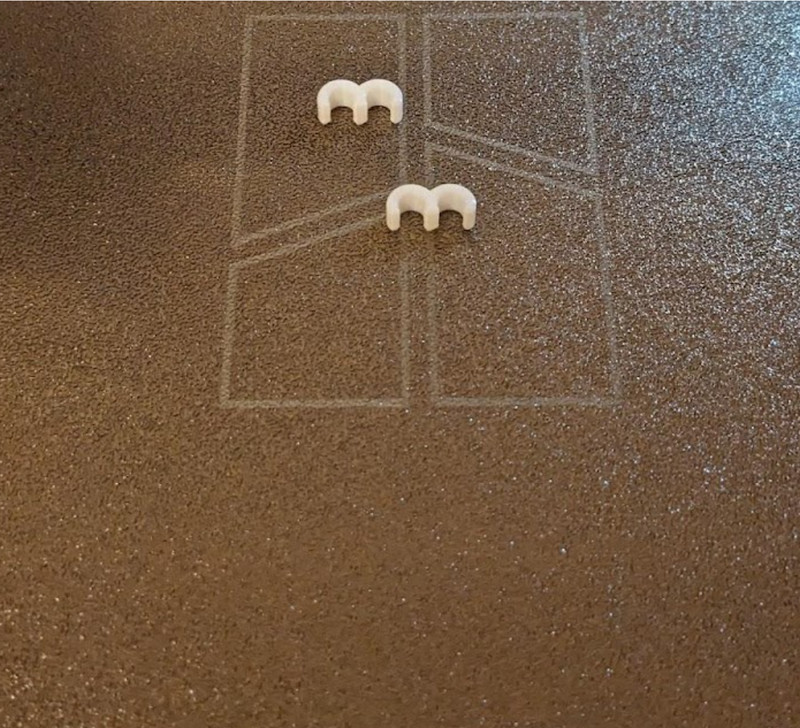
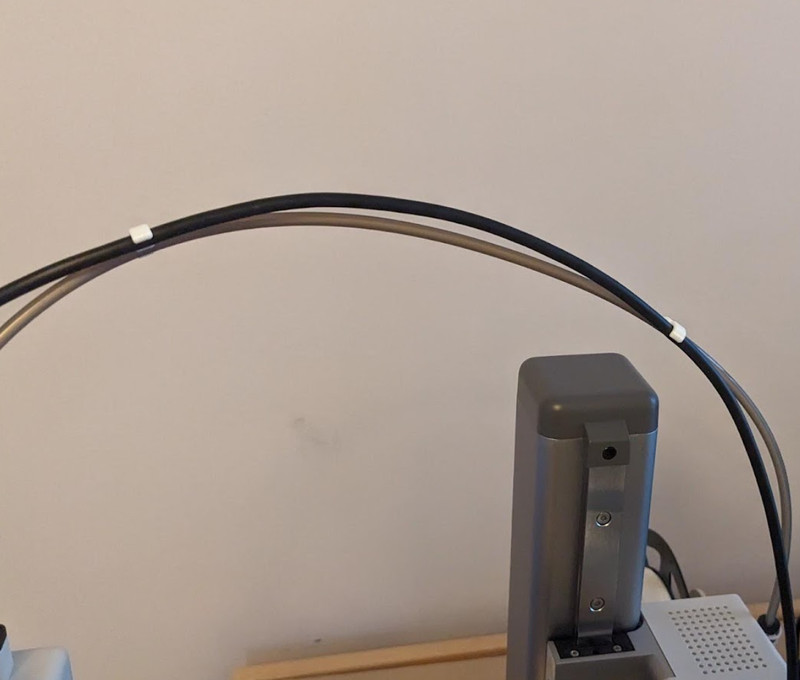
We printed these tiny clips which secure the PTFE tube to the extruder cable in two places.
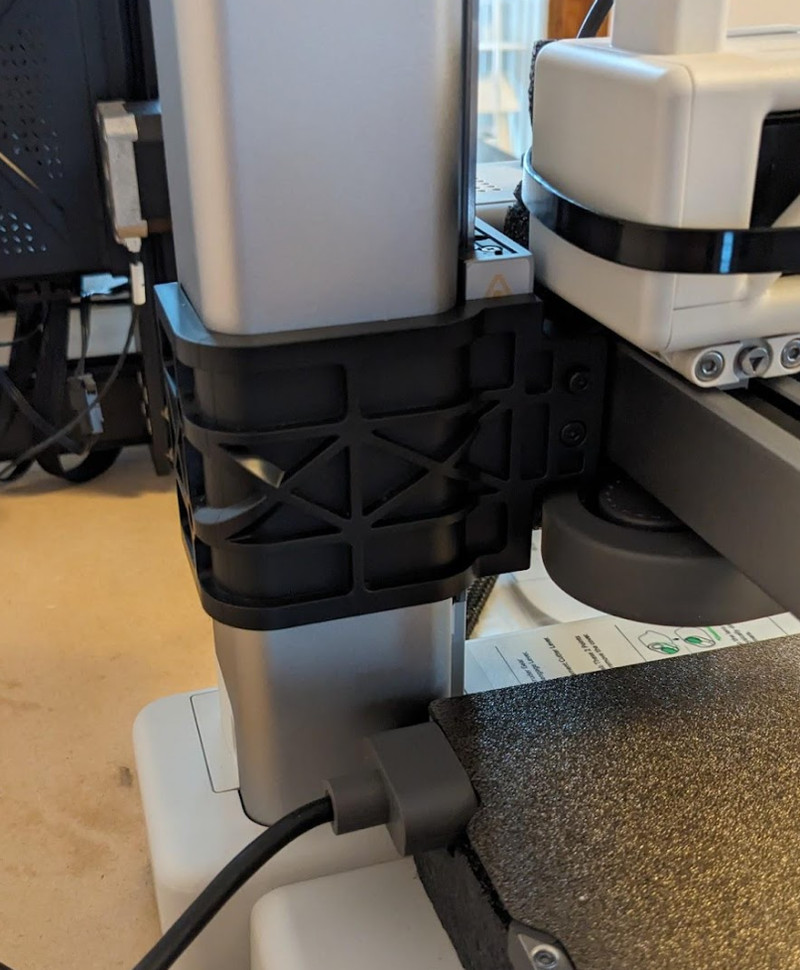
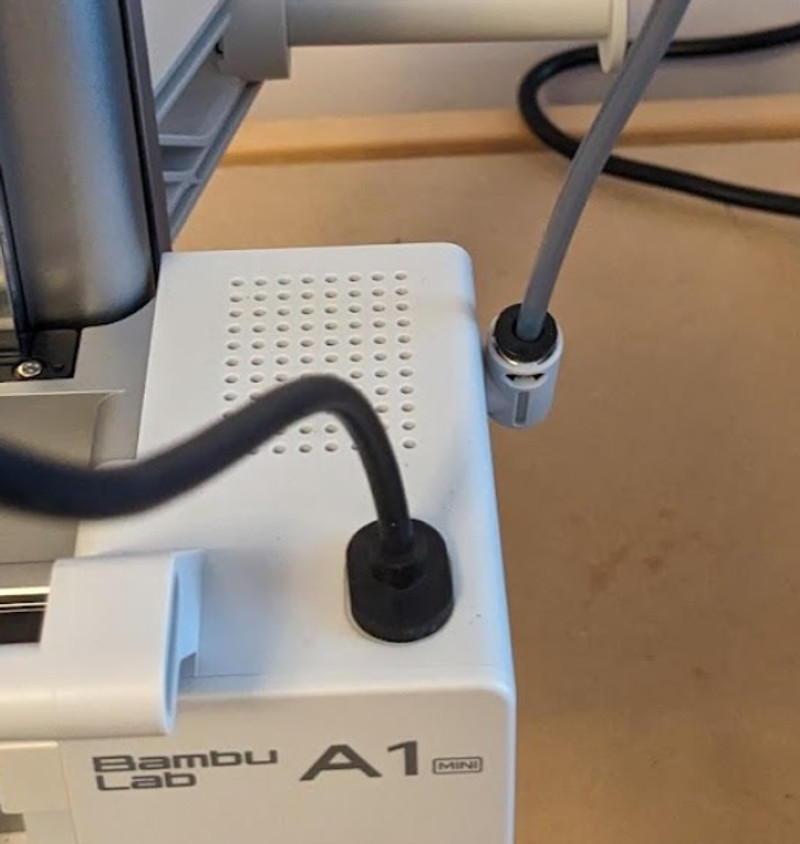
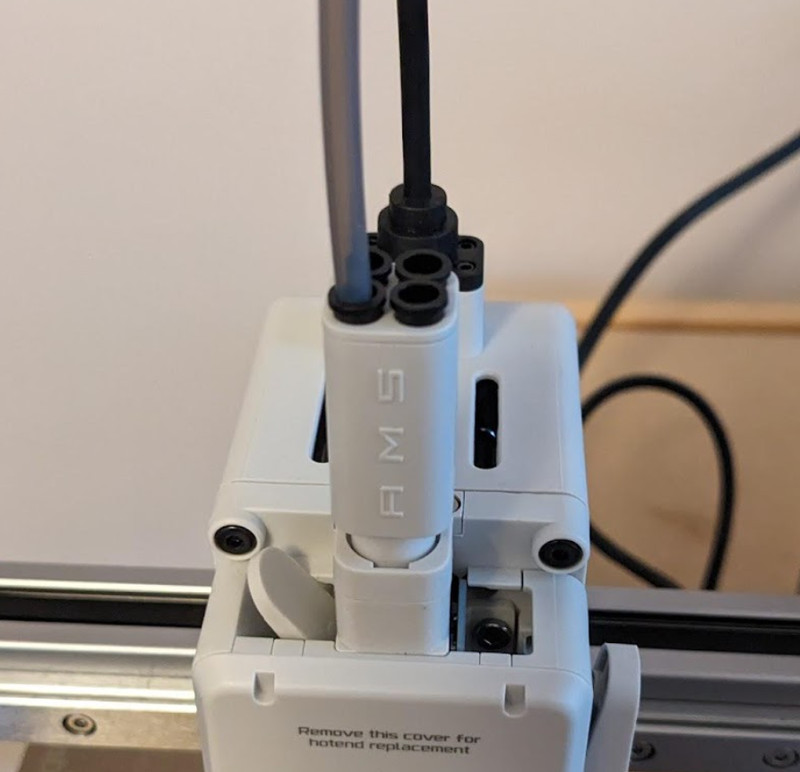
The Quick Start Guide now instructs the user to install the “organizer” which is normally used for the AMS Lite and has slots for the extruder cable and four PTFE tubes - our printed Quick Start Guide did not contain this step.
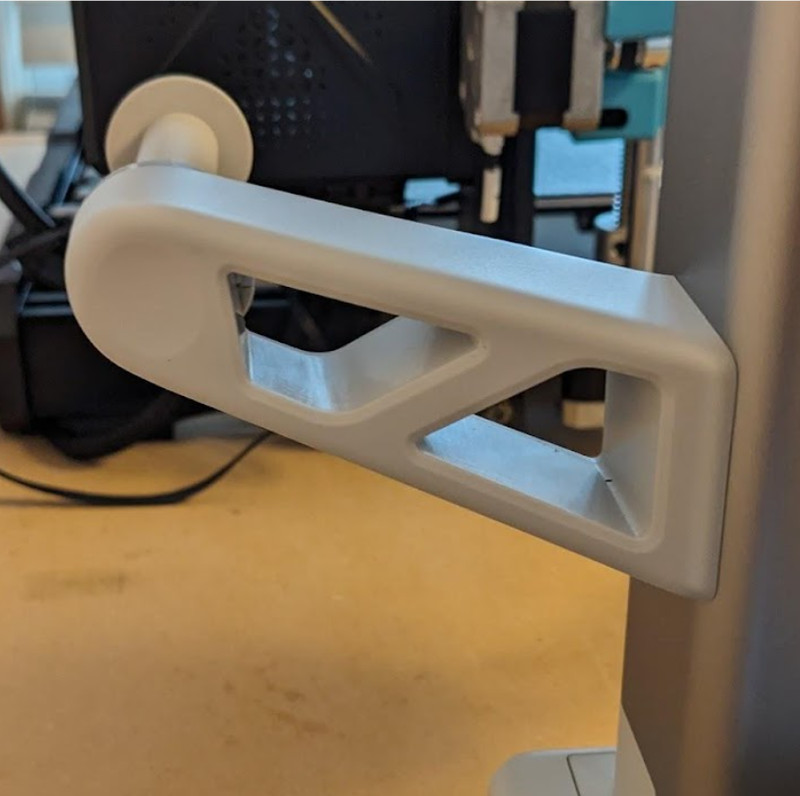
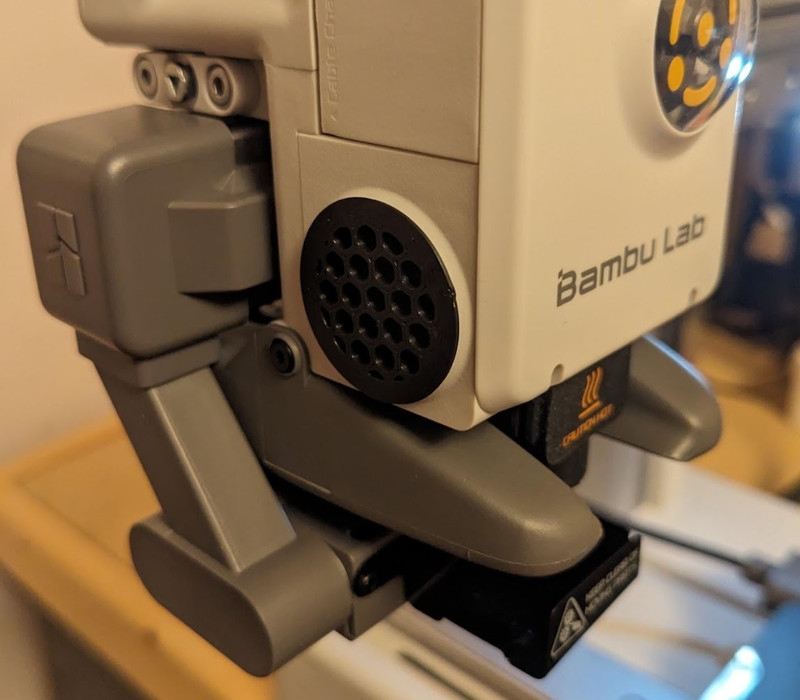
The hot end fan is oddly exposed. It’s easy to inadvertently press very hard on it with a thumb while trying to remove the extruder cover. This may damage the fan. So we printed and installed a fan cover to protect it.
For standalone A1 Mini users, the AMS Lite multi material system is probably the ultimate upgrade. It is a second-generation AMS and apparently solves the jamming issues and cardboard spool incompatibility the original AMS units have. When the printer released, it was only available in a kit with the printer, but now the AMS Lite is available separately on the Bambu Lab store.
Aside from replacement parts, a dual-sided smooth PEI plate is available as an upgrade. There are also 0.2mm stainless steel (unhardened) nozzle/heatbreak/heatsinks as well as 0.4mm, 0.6mm and 0.8mm hardened steel nozzle assemblies. The Mega Combo Accessories Kit includes the smooth PEI plate and the 0.2mm, 0.4mm and 0.6mm nozzle assemblies as well as 3 extra silicone nozzle covers.
Almost perfect, but there are some issues…
Though the Bambu A1 Mini seems perfect and is much better than most other 3D printers we’ve tried, there are a few issues that deserve mention.
Noisy part cooling fan
For the most part, the A1 Mini is extremely quiet. The mainboard cooling fan and heatsink fan are thermally controlled and virtually silent at all times. The motor noise cancellation feature is quite effective. But the part cooling fan can be quite noisy. Bambu Studio operates the fan at 80% by default for normal speed (200mm/s) but the fan will ramp up to 100% speed when the nozzle is bridging.
Occasional nozzle wiping and adhesion failures
We had two mysterious failures after changing filaments. On two separate occasions, there were signs of poor adhesion and inconsistent Z offset. This was a concern because this printer is so automated that correcting these issues becomes complicated - you can’t adjust the Z offset, for example. We observed that the multi step filament change procedure did not always adequately clean the nozzle even with multiple passes over both the silicone and heated metal nozzle wipers. If the bed leveling procedure occurred with filament stuck to the nozzle, the bed level mesh would be inaccurate. Further evidence for this was the fact that the bed level was worse in places and better in others - this would be as the filament residue was pushed around the heated nozzle. We manually wiped the nozzle and the problem resolved itself after the next bed leveling procedure.
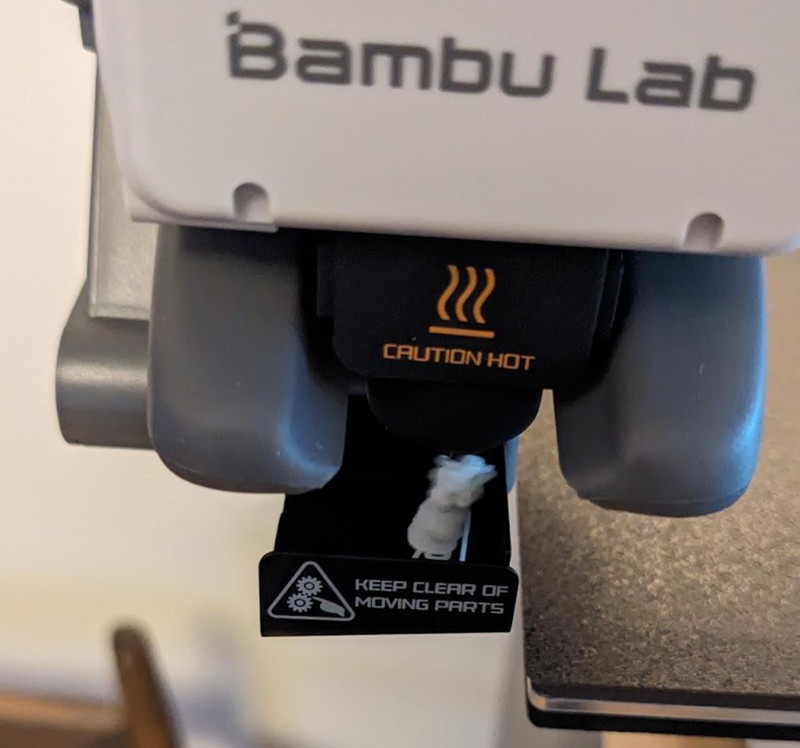
It was during one of these poor adhesion incidents that we attempted to print a temperature tower for the new filament. The tower detached from the bed and a lot of unadhered filament piled up.
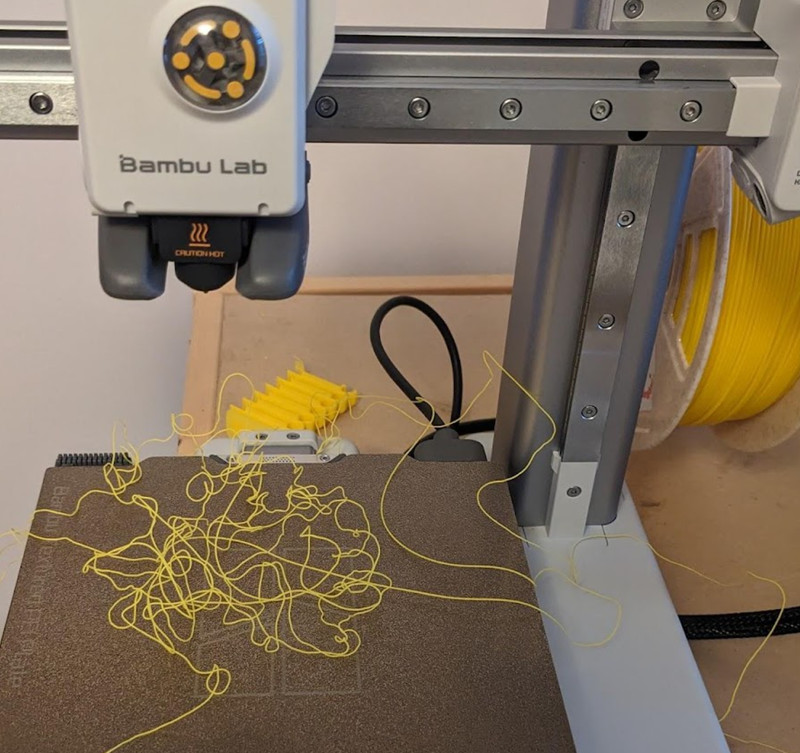
Thinking this was a rare failure, we tried again. More layers printed but it detached a second time - fortunately we caught it before too much filament was wasted. It seems these problems were caused by poor bed adhesion but also by the tower orientation - sideways (X direction). The nozzle and bed move very quickly, with the tower being pulled backwards and forwards. As the temperature drops and the filament gets stiffer, it pulls harder and harder on the top of the tower, the lever force gets stronger and stronger, and eventually it overcomes the adhesion, even with a brim. We will experiment with temperature towers reoriented in the Y direction and also at lower speeds to reduce forces - 100 - 150mm/s should be better.
Poor quality camera
While the printer components all seem to be of excellent quality, the camera is an exception. It is 1920 X 1080 (HD quality) but it transmits video images at a very low framerate. With a printer this fast, most images are a blur. Straight edges appear tilted as they move. Image quality is lacking. The field of view is overly wide, showing more of the room than the print and the bed. The built-in LED light does not illuminate the print and bed well and doesn’t help much with the image quality. A cheap webcam is a huge improvement.
Small touchscreen
The touchscreen is quite small but bright and functional, with an adjustable screen off timer. Triggering a button is sometimes a little tricky because the area is so small. Some use a stylus to help. The touchscreen’s small size was a real issue only once - entering the WiFi passphrase. The letters and numbers are truly tiny. This only needs to be done once though.
Filament waste
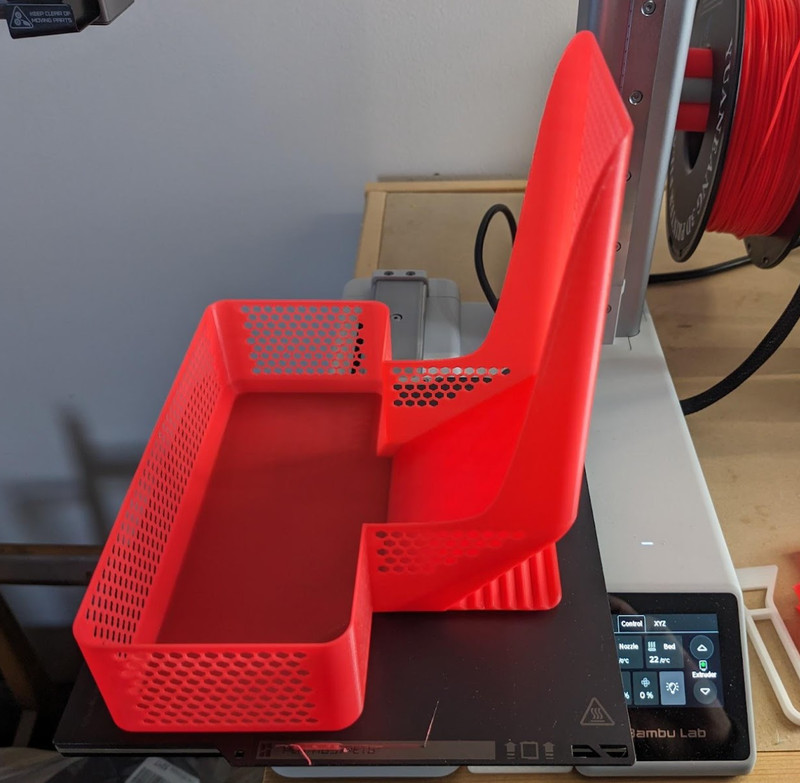
This printer wastes a lot of filament, like all other Bambu Lab printers. Each time it changes filament, it purges the old filament into the purge wiper tray and ejects it - the “Bambu poop” we referenced earlier. The nozzle is long and includes the heat break and heatsink - this is a large volume to purge. The problem is greatly expanded with the AMS Lite - a multi color print with 20 or 30 filament changes can create a lot of waste. The flow calibration wastes even more filament than a purge. The printer flings all these squiggly bits at high speed, attempting to get them away from the print bed, but it ejects them with such force they can bounce off objects or adjacent walls and land back on the print bed. Or the purge wiper snags the softened filament and flings it in the opposite direction, right towards the print bed. There are many, many “Bambu poop box” designs on Maker World, designed to catch and contain this debris.
A shift for more experienced users
Bambu Lab does everything differently, and a lot of it is their “secret sauce”. For example, users debate about the mysterious and complex start-up procedure - why does it do all those strange steps? There must be a very good reason, but whatever it is, Bambu Lab doesn’t say. And it can’t be changed. The printer’s sheer performance is a good argument that Bambu Lab does this for a good reason, backed by research and experimentation.
This requires an adjustment in thinking and working for the intermediate user. What worked before with other 3D printers may not work with a Bambu Lab printer. For example, although the A1 mini can follow standard G-code, this is the only way a well-established slicer like Cura can work with the printer. Getting Cura to take full advantage of the advanced capabilities of the printer takes a lot of work - look at the startup G-code! This profile’s author does not recommend using Cura. Even if you did, Cura can’t take advantage of the A1 Mini’s killer feature - the AMS Lite.
You do have to follow where Bambu Lab is leading you in order to use the printer most effectively. OctoPrint or Klipper won’t work with it, the only portable interface to the printer is the Bambu Handy app. Although it can print any model sliced into G-code, models from MakerWorld with an appropriate print profile can be opened in Bambu Studio and sliced immediately, then sent directly to the printer, or sliced in the cloud through Bambu Handy and sent directly to the printer from there, with no further interaction from the user.
The printer’s extensive self-calibration capabilities mean that it works with any filament we’ve thrown at it. We’re used to printing a temperature tower, then a retraction tower, then a retraction test. The default temperature for Bambu Lab PLA (set in the filament menu) is 220°C, with a bed temperature of 65°C. Since it was able to use the sample Bambu Lab PLA to print the speed Benchy nearly perfectly with no stringing, this was obviously correct. The temperature seems a little high but this is probably to reduce the viscosity. The bed temperature is also a little high, increasing adhesion but risking elephant’s foot - where the bottom layer softens and spreads outwards. But this didn’t occur, and we certainly can’t argue with the results.
We then tried some leftover Sovol PLA with the generic PLA setting, also 220°C/65°C, and achieved perfect results as well. Then eSun PLA+ with a little bit of stringing, then JAYO PLA+ with no stringing, then BIQU matte PLA, then YUANGEANG PLA, all with perfect results. This is another adjustment in workflow - maybe extensive calibration prints aren’t necessary and maybe the presets in the printer are good enough, at least for PLA.
There’s the issue of lack of control. And yes, many firmware functions are not exposed to the user. The A1 Mini just does what it does and no adjustment is possible. Data is also potentially exposed to the Internet, although it is encrypted. But cloud printing does involve sending data over the Internet, and any model printed off MakerWorld does go over the Internet. Many functions of Bambu Handy rely on this. We should mention that the printer can operate in LAN only mode, where files can only be sent to it from Bambu Studio operating on the same network. You should think about this a little if it might bother you, but if the tradeoff is perfect 3D prints at high speed, it may be worth it for you.
Everything is proprietary
3D printers came from an open-source movement, the RepRap. Prusa Research took this concept further and made open-source 3D printers a thriving business. Many of the newer Chinese manufacturers have also open-sourced their printers. So the 3D printing community was suspicious of Bambu Lab, whose 3D printers are closed-source and proprietary.
This was a conscious choice on Bambu Lab’s part. They knew the implications of taking everything closed source and believed it would lead to greater quality. They are not opposed to open source but they had to choose a direction and closed source and proprietary is the path they chose.
The parts in the Bambu Lab A1 Mini are proprietary. However, they are all available for reasonable prices on Bambu Lab’s website. It does not look like they are taking advantage of their customers. But the situation is changing - some “easy” third party unofficial components have already appeared in the market, mostly PEI build plates. BIQU (BigTreeTech) has just announced some unofficial upgrades for the X1 and P1 series. And Bambu Lab recently revealed that they officially collaborated with E3D to produce ObXidian high flow nozzles for the X1 and P1 series. Can such parts for the A1 series be far behind, or collaborations with other high end third parties? This is something we hope to see.
Bambu Lab’s printers are so popular they are attracting attention from many alternate suppliers and parts are being developed and released at a rapid pace. We are sure to see more of this very shortly.
More Prints with the A1 Mini
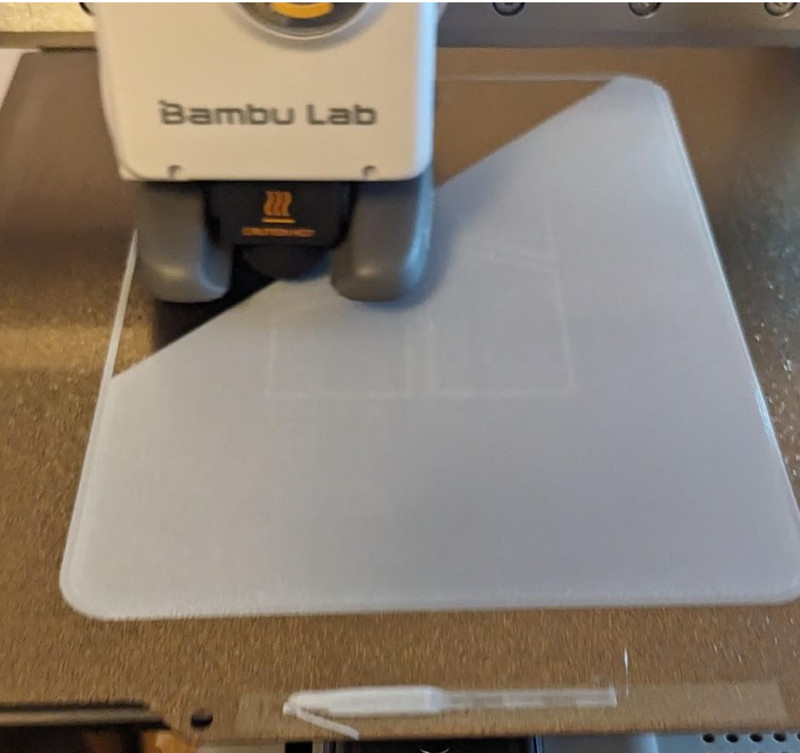
This is a base for a box for the accessories and tools, again printed directly from Bambu Handy, no slicing required. It starts as a perfectly even layer covering almost the entire bed, so thin as to be translucent.
We ran out of the Sovol PLA here. The runout was detected properly, we switched to JAYO PLA+ and resumed printing which worked without incident. You can barely see the transition line and the entire box was strong and well-bonded.
Here’s a Raspberry Pi 5 case, which was the first model we sliced ourselves in OrcaSlicer, an open-source derivative of Bambu Studio. The first attempt was going well, including the tiny power button, but the power button came off and got dragged around the print. So we tried again, this time with a brim only around the power button. Note the 50% gyroid infill - this print is strong!
Final Thoughts on the Bambu A1 Mini
The Bambu Lab A1 Mini is an amazing printer. It is fast. It is quiet. It is precise. It is self-calibrating. It produces perfect prints almost every time. You do not need experience with a slicer and can print directly from your phone with near-perfect precision and high speed.
It is ideal for beginners. But even for intermediate users, its speed and precision impresses. The nozzle system integrated with the heat break and heatsink is innovative and makes the nozzle easy to change, encouraging experimentation with different nozzle sizes.
It is not absolutely perfect with its mediocre camera, tiny touchscreen and high level of filament waste, but these are minor complaints in comparison to the incredible speed and print quality. We’re pleased with the machine and it’s an easy printer to recommend for users at all experience levels.
Click here to view the Bambu A1 Mini on the Bambu Lab website.