If you make a purchase using a shopping link on our site, we may earn a commission. Learn More
Sovol SV06 Plus Review

Published: 2024-03-08
The Sovol SV06 was released on October 10, 2022. It is a clone of the Prusa MK3S+ and copies its motion system by using linear rods exclusively - 2 on the X axis, 2 on the Y axis, and one on each side of the Z axis. It also uses dual Z axis motors, sensorless homing and a direct extruder. It has a conventional “Ender 3 size” 220 X 220 X 250mm print volume.
The printer was very well received and tops many “best” lists from reviewers. On February 20, 2023, Sovol followed up this successful printer with the larger SV06 Plus. It is not only larger at 300 X 300 X 340mm print volume, it is faster at 150mm/s (versus 80mm/s). To enable the higher speed, it uses a longer volcano-style high flow nozzle. The monochromatic LCD screen is replaced with a 4.3” touchscreen. For higher strength, the linear rods are 10mm in diameter on the SV06 Plus as opposed to 8mm on the SV06. The problematic spool holder was upgraded with bearings, a filament sensor was added and it is equipped with a higher capacity power supply in order to accommodate the larger heated bed.
Why the SV06 Plus?
With the much faster Klipper-equipped Sovol SV07 and SV07 Plus now available, why get an SV06 Plus now? The SV07 is faster than the SV06 Plus because it runs Klipper which uses input shaping and pressure advance and has an upgraded part cooling fan. It uses the same high flow volcano-style nozzle and the same planetary geared direct extruder. The main difference is that the SV07 uses wheels in V-slot extrusions while the SV06 Plus uses high diameter, strong linear rods. Simply put, the SV06 Plus uses a superior motion system.
V-slot wheels wear, and as they wear they wobble and increase resistance to motion. This progressively worsens part quality since the printer can no longer position the print head or bed accurately. At high speeds, this wear will occur much faster.
By contrast, linear rods and bearings similar to those used on the SV06 Plus have been used for over two decades on Prusa printers, with tens of thousands of users and hundreds of thousands of hours of operation. Wear is minimal.
The SV06 has a good track record with a lot of experienced users and help available, and the SV06 Plus corrects the worst issues. The remaining deficiencies are well-known and printable upgrade parts and workarounds are available. The SV07 and SV07 Plus do not have this level of community support yet.
Equipping the SV06 Plus with Klipper is well-documented, and an easy part cooling upgrade will bring it up to the level of the SV07 but with a better motion system. Fine tuning input shaping and pressure advance may lead to an even faster printer than an SV07.
The SV06 Plus has had many of its initial bugs worked out and the price has dropped as well, although for Klipper it helps to have a Raspberry Pi on hand. If not, adding a Sovol Klipper Screen, Creality Sonic Pad or BIGTREETECH Pad 7 would net you a Klipper printer with a full Klipper Screen and a better motion system than the SV07.
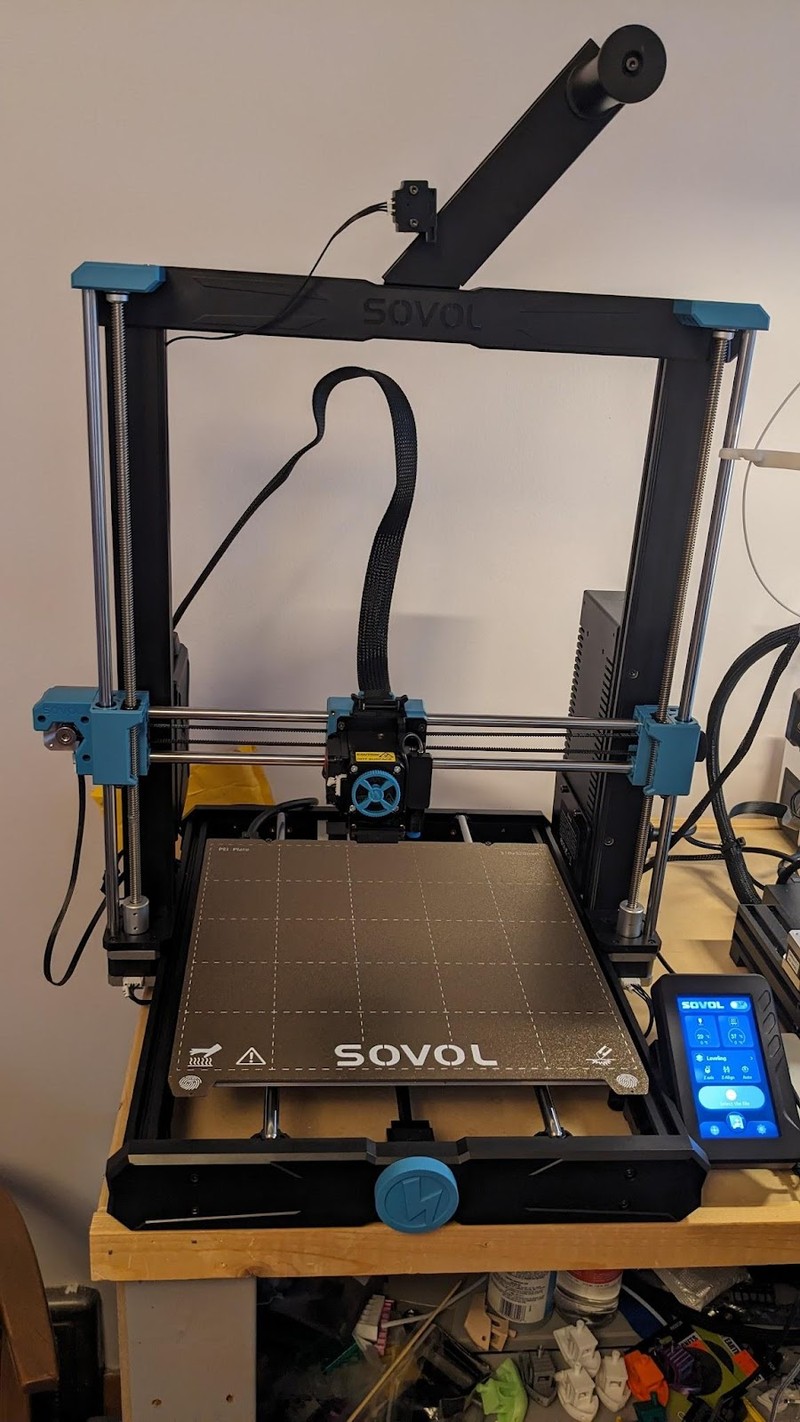
First Impressions
One of the most unique features of this printer is the linear rod motion system. Rather than V-slot wheels used on other budget printers, this printer uses linear rods like the Prusa MK4 - and like extremely high speed printers like the Creality K1 and the Bambu Lab X1C, P1S and P1P. This motion system is more precise and has lower maintenance requirements than V-slot wheels, especially at high speed. It uses cylindrical linear bearings with ball bearings retained in lines along the inside of the cylinder. These require lubrication and Sovol does not supply these lubricated, except for the Y axis. They do supply a tube of grease. Unfortunately these rods are quite long and there are 6 of them - the small tube is only good for one lubrication. The grease does not really get into the bearings unless the printer is disassembled, the rods are unmounted, the linear bearings are removed from the rods and grease is applied from the inside, directly to the ball bearings. The bearings do make some noise - sometimes a scratching sound like a pen dragging across paper and sometimes a rumble.
Other than that, the printer is quite quiet. The TMC2208 stepper motor drivers operate the motors quietly. The control board fan is silent. The power supply fan does create some noise and is not thermally controlled but it is not too bad. Some users swap out this power supply for a more reliable Meanwell power supply with a thermally controlled fan. A 4010 (40mm diameter 10mm thick) blower fan is used as a hot end cooling fan and it’s fairly quiet because its flow is directed behind the heatsink using a sealed duct. Oddly, it’s completely unprotected.
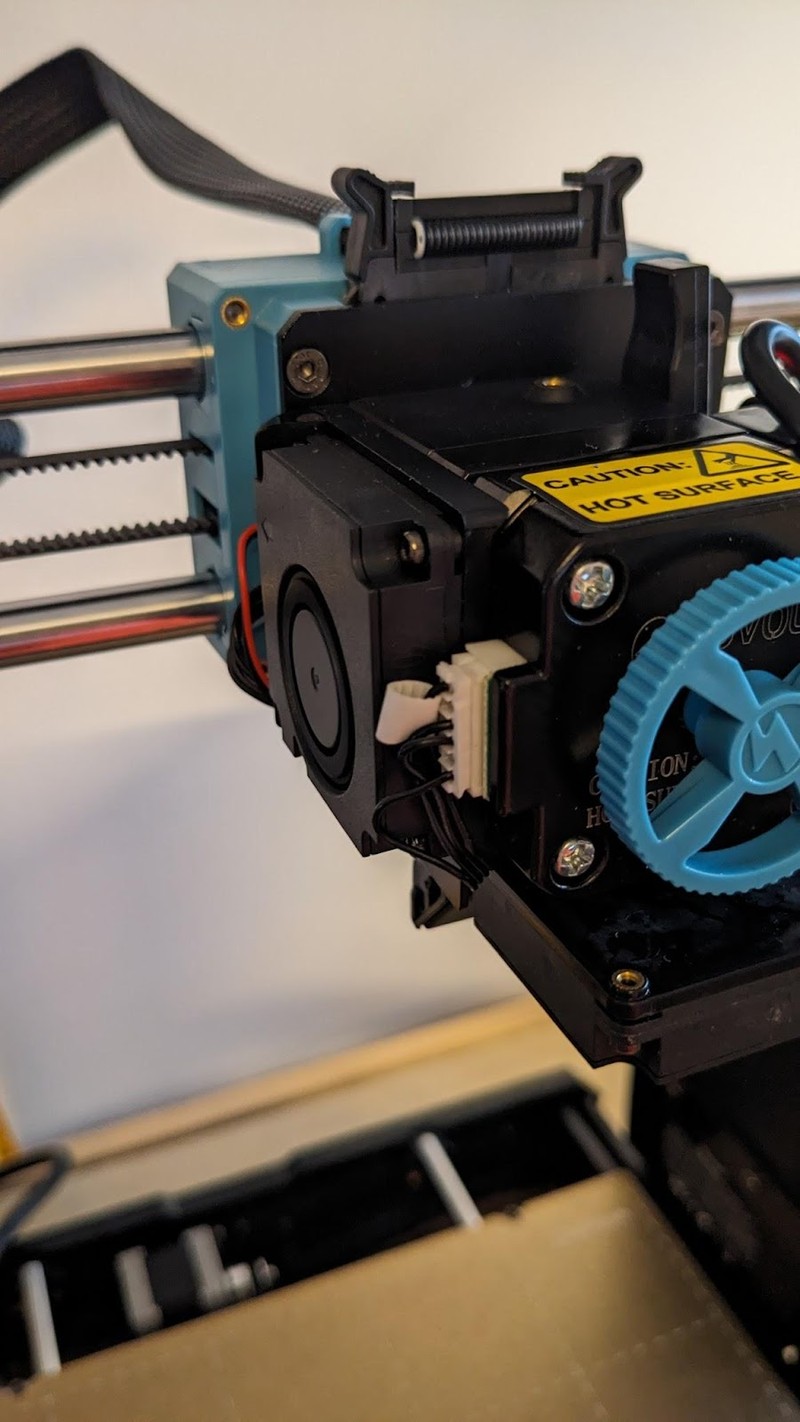
Another 4010 blower fan is used as a part cooling fan which is much noisier. It uses a well-designed duct which directs the airflow directly to and on both sides of the nozzle. It’s also unprotected and its intake faces the bed, drawing in warm air. Despite that, it is effective.
The extruder cable is excellent. It is resilient and stiff, bent upward so that it will not drag on the bed. All extruder components are plugged into a breakout board at the back of the extruder. Replacement of any of the extruder electrical components is easy since cables do not need to be run - they use short wires and standard JST connectors. Plus there is an extra, unused 5VDC plug on the breakout board. The filament sensor can be relocated here but this can also be used for LED lighting.
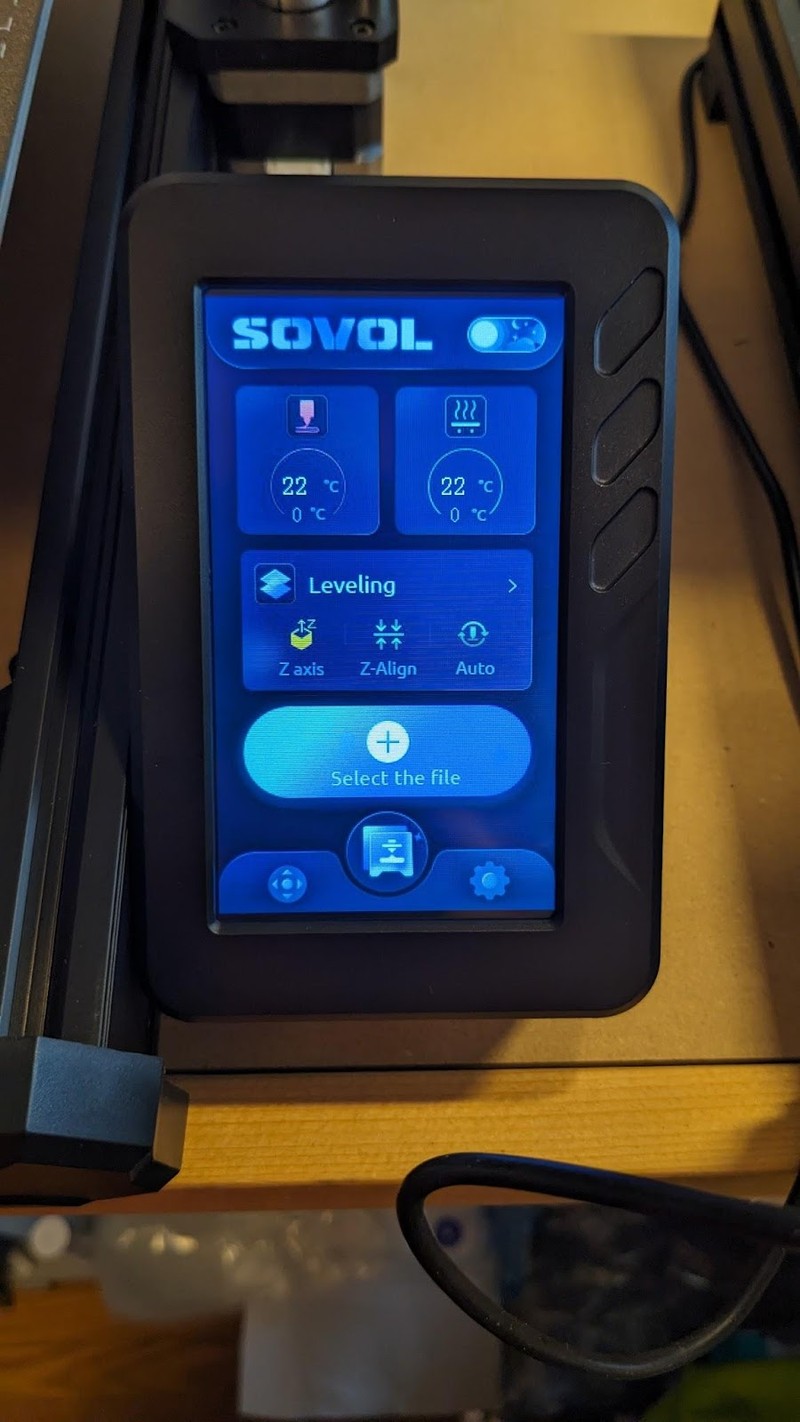
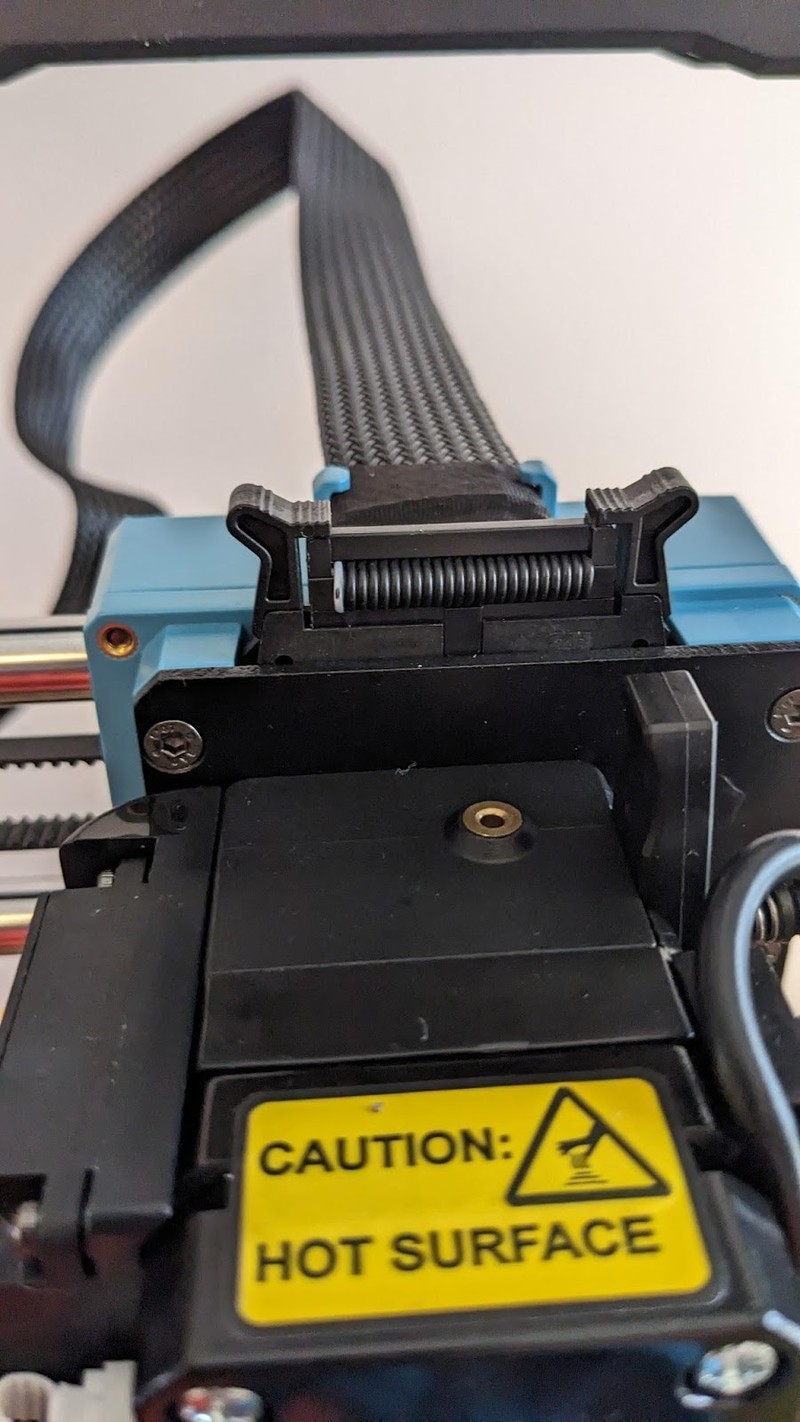
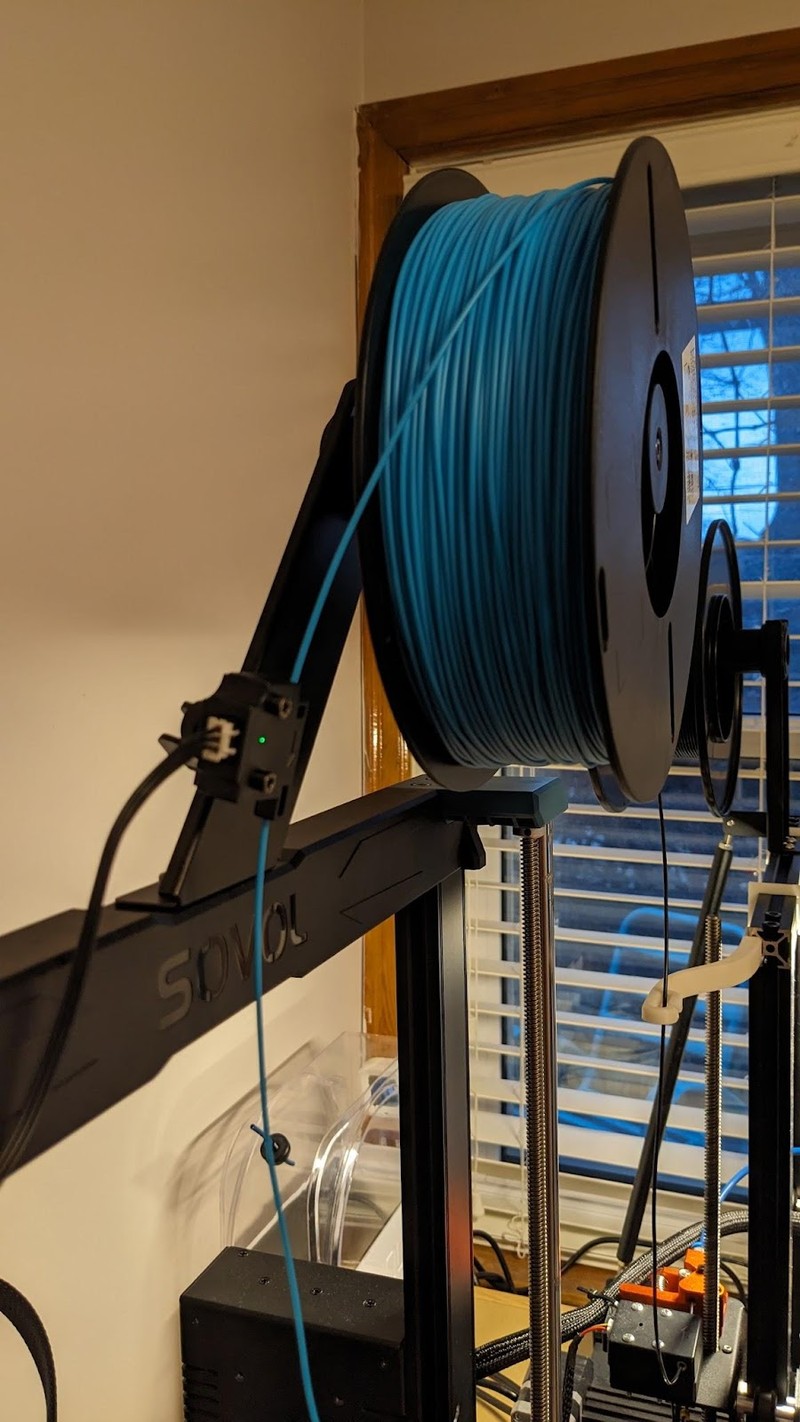
There’s a lot of little niceties that would be upgrades on other printers. It is pre-equipped with bed insulation. The Z axis threaded rods are held in place at the top with bearings to prevent wobble. There are belt tensioners for both the X and the Y axes. At the top cross piece, there’s a pivoting filament runout sensor. The spool holder runs on a very nice bearing with a smooth, dampened motion. The bright touchscreen is responsive and informative, showing quite a few advanced settings. It has a light mode and a dark mode. There’s even adjustable linear advance implemented in the Marlin firmware.

The control board is mounted in its own easily removable box with a lockable hinged door and the power supply has a simple cover over the end housing the power plug, power switch, fuse and wiring. These two components are mounted on each side of the printer and allow easy access. Usually these are mounted underneath the printer, requiring the printer to be flipped on its side to work on these components. This also means this already tall printer doesn’t need to be any taller than necessary.
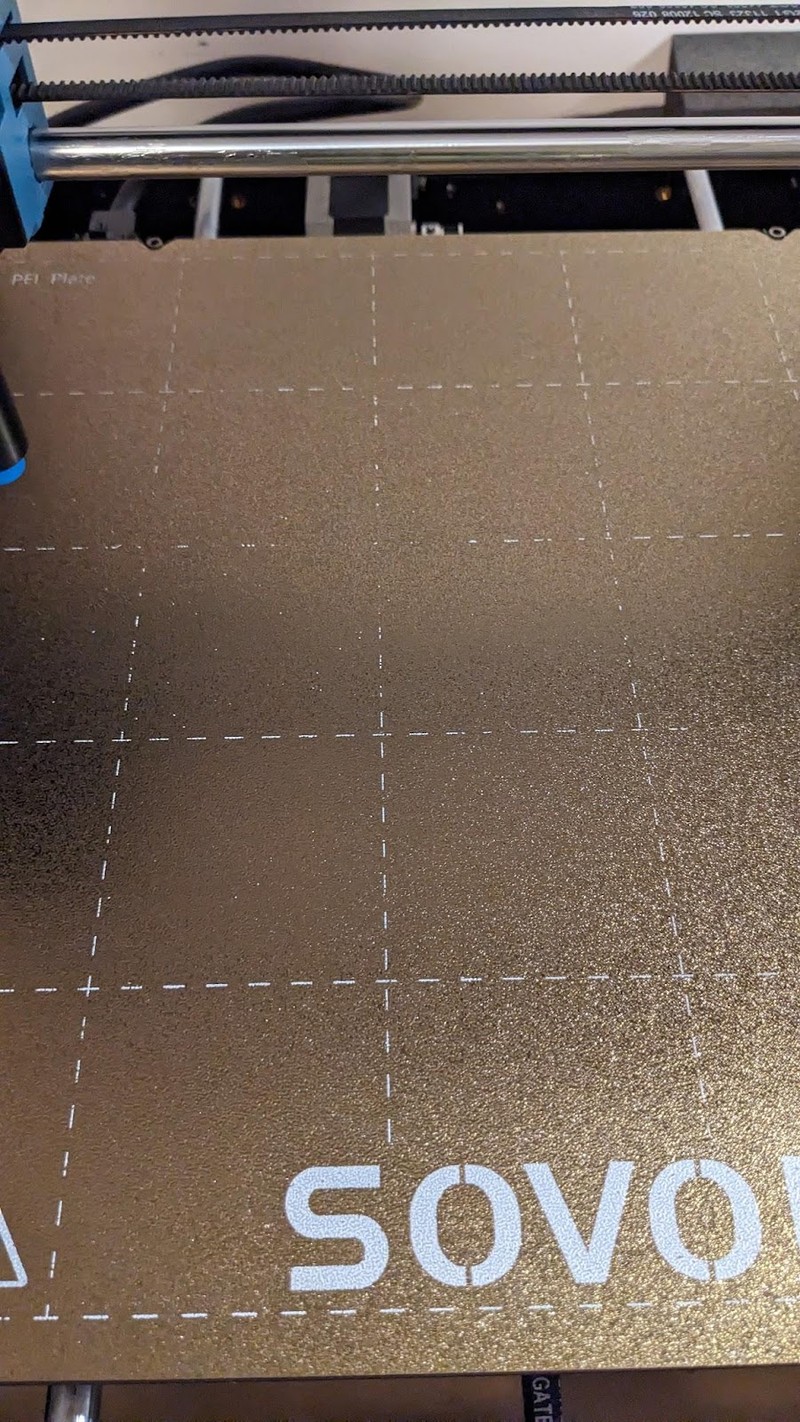
The large, textured PEI bed has great adhesion - good enough for fine first layer details and continued adhesion throughout a print, yet most prints pop off on their own once the bed is cool. The notches in the bed material line up with protruding screws at the back of the bed plate which makes alignment of such a large plate very easy.
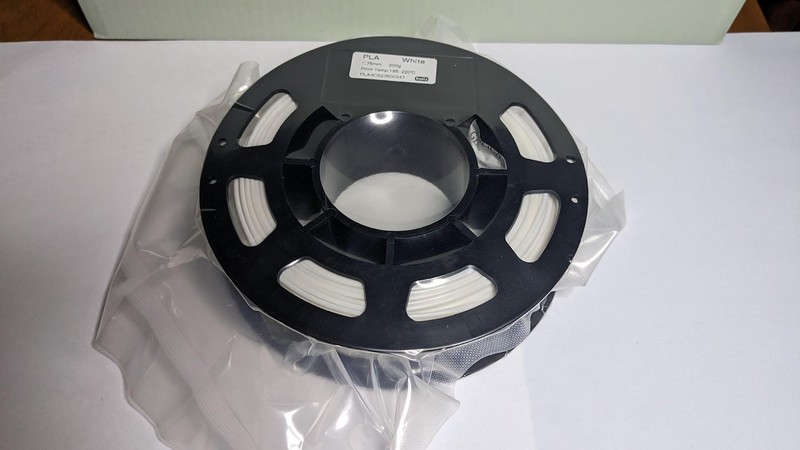
There’s a large 200g sample of PLA filament provided on a small spool that’s well sealed in thick plastic with a desiccant packet, just like a retail spool. This is more generous and shows more care than with some other manufacturers.
The large bed does take longer to heat up than a typical 220 X 220mm Ender 3-size bed, but it’s not too bad to heat from room temperature to 60°C.
The extruder is so unusual that it needs its own section!
The Extruder
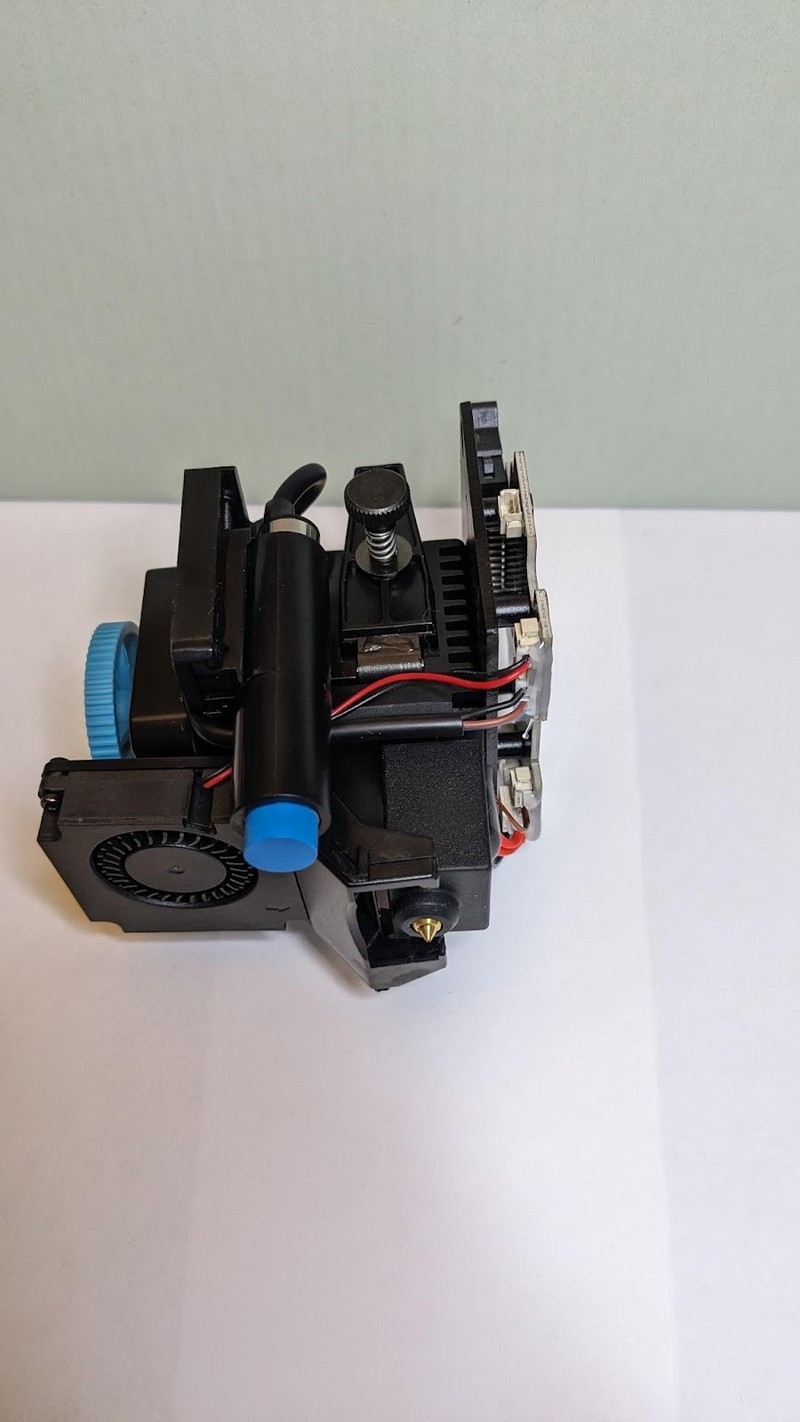
Besides the all-linear-rod motion system, the best thing about the printer is the extruder. It is a very unusual design developed by Sovol and used on the SV06 Plus and SV07/SV07 Plus printers. Key to this whole system is the planetary gearing powering the double gears pushing the filament. Planetary gears increase torque while taking up much less space than other gear systems. In the SV06 Plus, they allow the extruder motor to apply a lot of force to the filament without making the extruder too large or too heavy.
Like other 3D printers, the nozzle is screwed into the heating block from one end and the heat break is screwed into the heating block from the other end. The SV06 Plus uses a regular heat block like the Creality Ender printers but mounted on its end with a long volcano-style nozzle threaded into it. This longer melt zone means higher flow, which allows for higher speed printing.
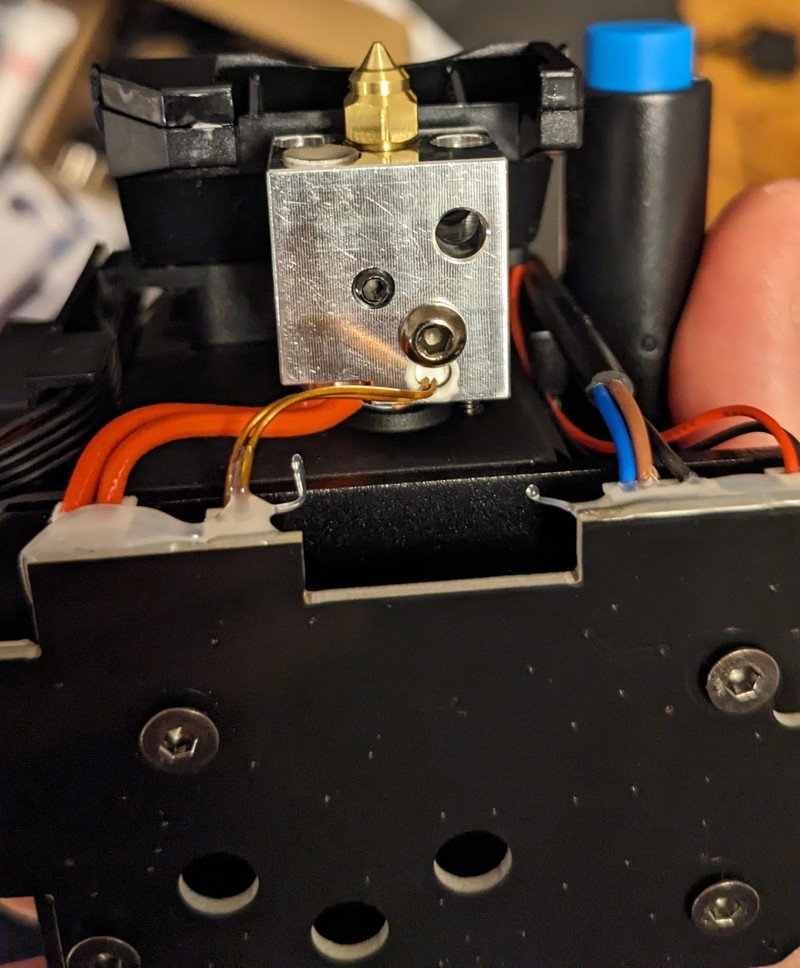
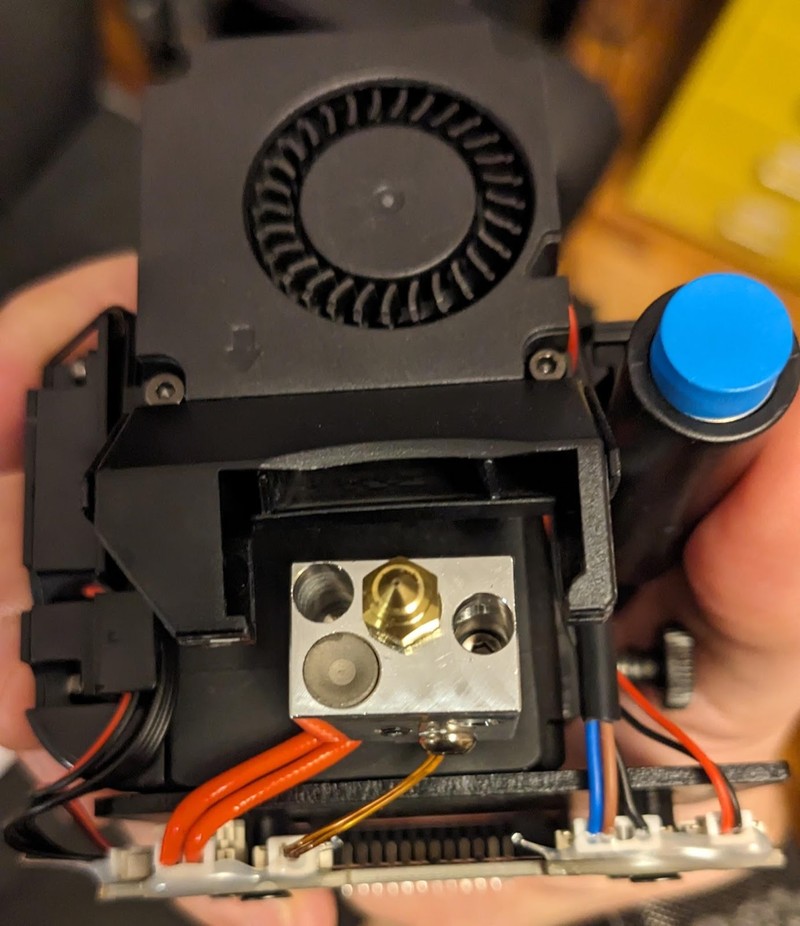
The heatsink is also unusual. It’s a big cast metal block which also forms the extruder body. It has fins on the side near the heat break. The hot end cooling fan duct blows air over these fins. There are various holes and pockets machined into the block where the gears, fans, levelling probe and extruder motor are mounted. This forms a very large thermal mass which can absorb a lot of heat without getting too hot itself. There doesn’t have to be many fins and the fan can be small and quiet since it doesn’t have to move much air to keep the heatsink cool enough.
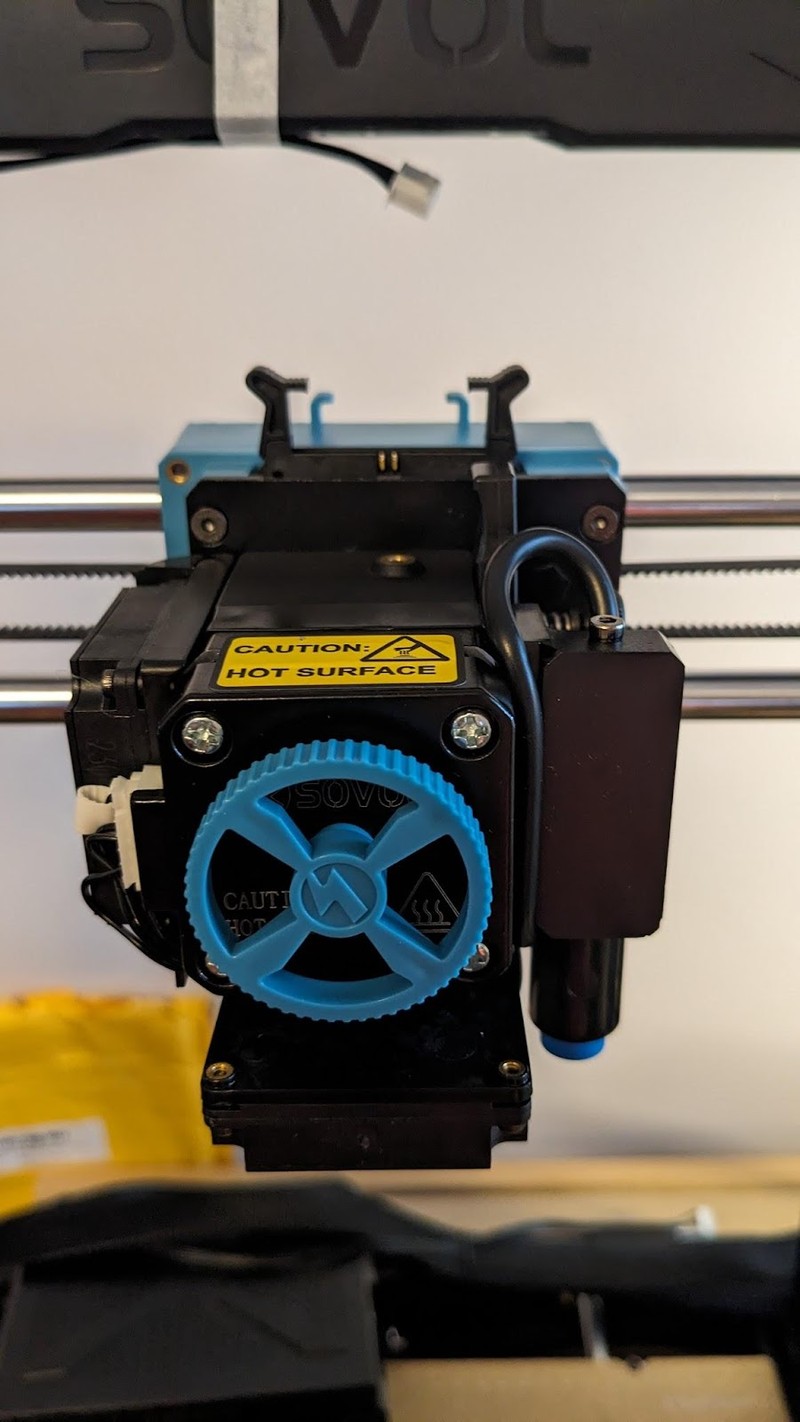
The filament is fed through a brass grommet at the top of the heatsink block, which keeps it away from sharp edges.
Printing Experience
First we tried to print the two included files off the manufacturer-supplied microSD card, as we would for any new printer. These are files specifically designed to show off the printer’s capabilities and work with the supplied sample filament.
Something unusual happened here though. The first file, a Benchy, caused the printer to perform long, slow movements, and then to try extruding while the nozzle was cool. This caused our first clog. We shut down the printer, cleared the clog, and tried the second file. This one caused the bed to move to the back and keep going until the stepper motor stalled. It kept stalling until we shut the power off.
To check the printer for proper operation and to determine if there was any damage, we sliced a standard XYZ calibration cube in Cura and printed it using OctoPrint. This worked perfectly and assured us that the printer was working well.

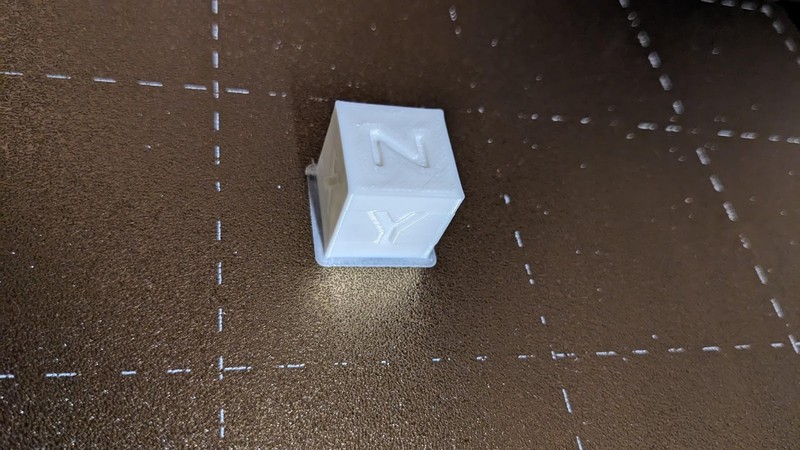
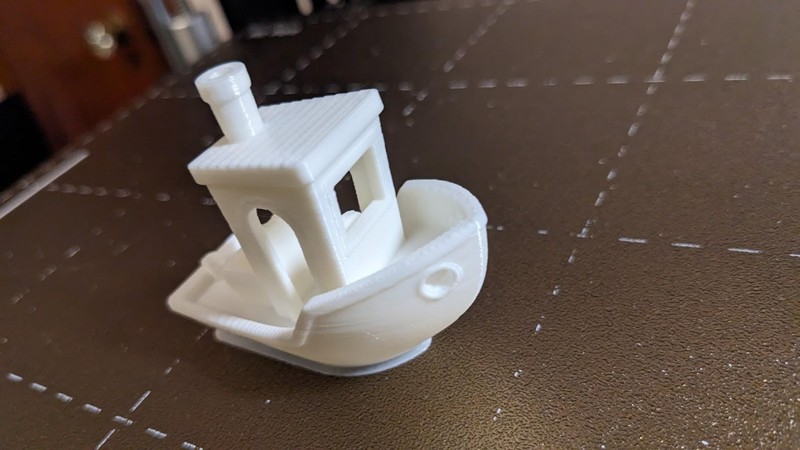
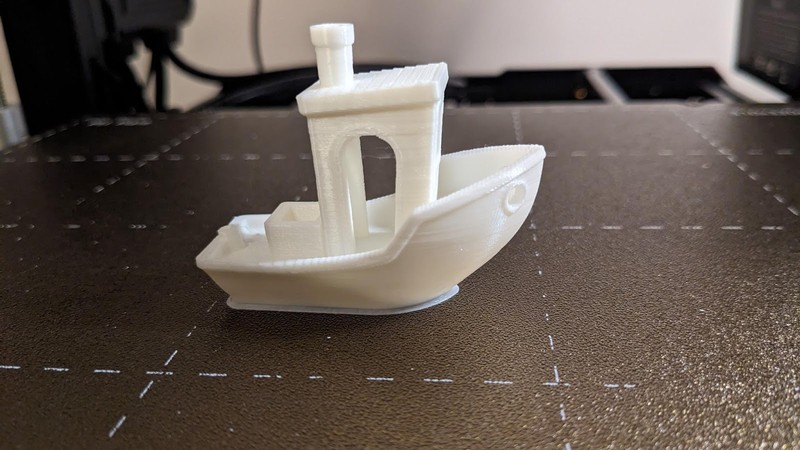
We noticed that the skirt was unusual since it was attached to the print, forming a small brim. Another unusual choice was that the infill was gyroid, a wavy pattern that’s derived from recent research into natural, strong shapes. Gyroid infill makes prints equally strong in all directions while consuming a minimum of filament. It’s hard on a printer, requiring repeated, small movements. It seems like Sovol chose it to show their confidence in the printer and even uses it on the default Cura profile.
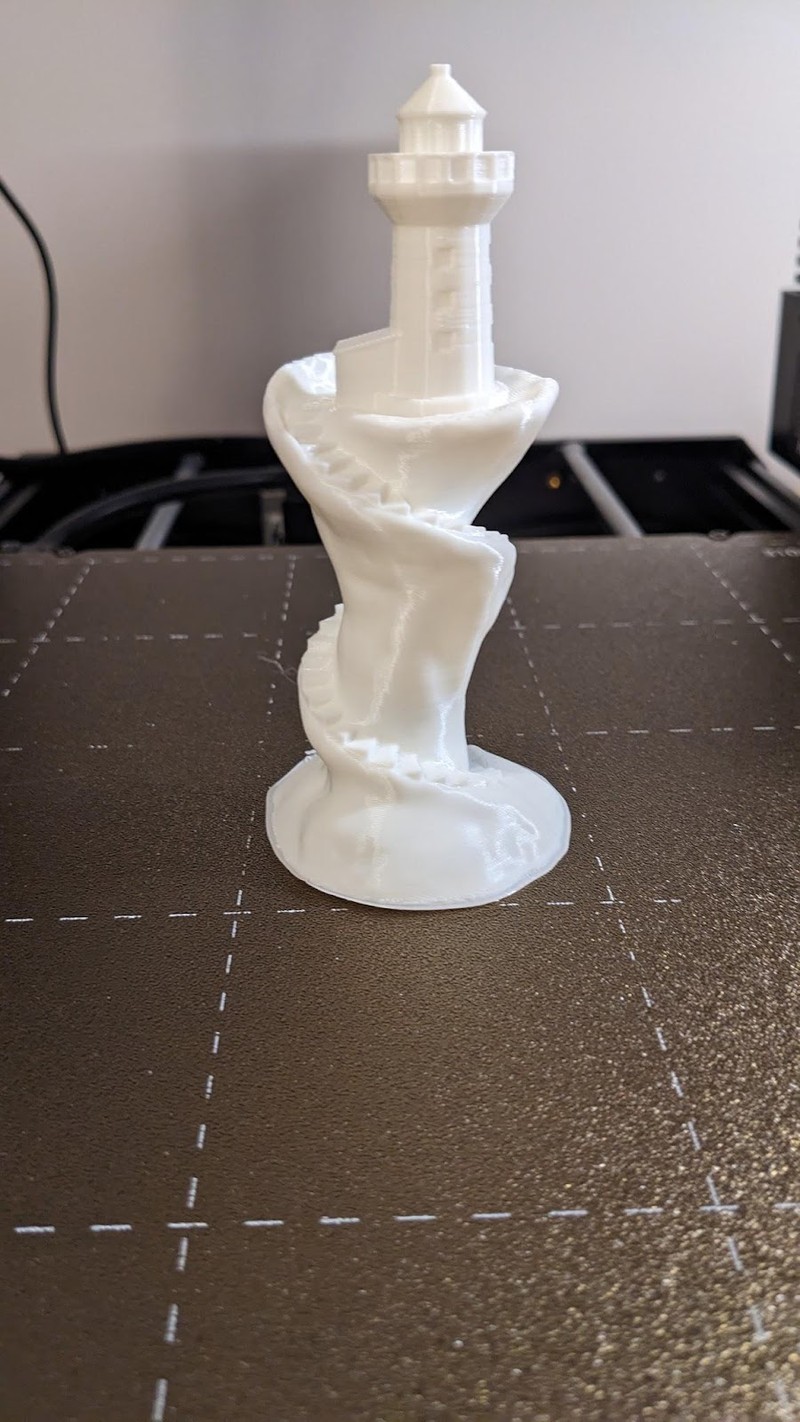
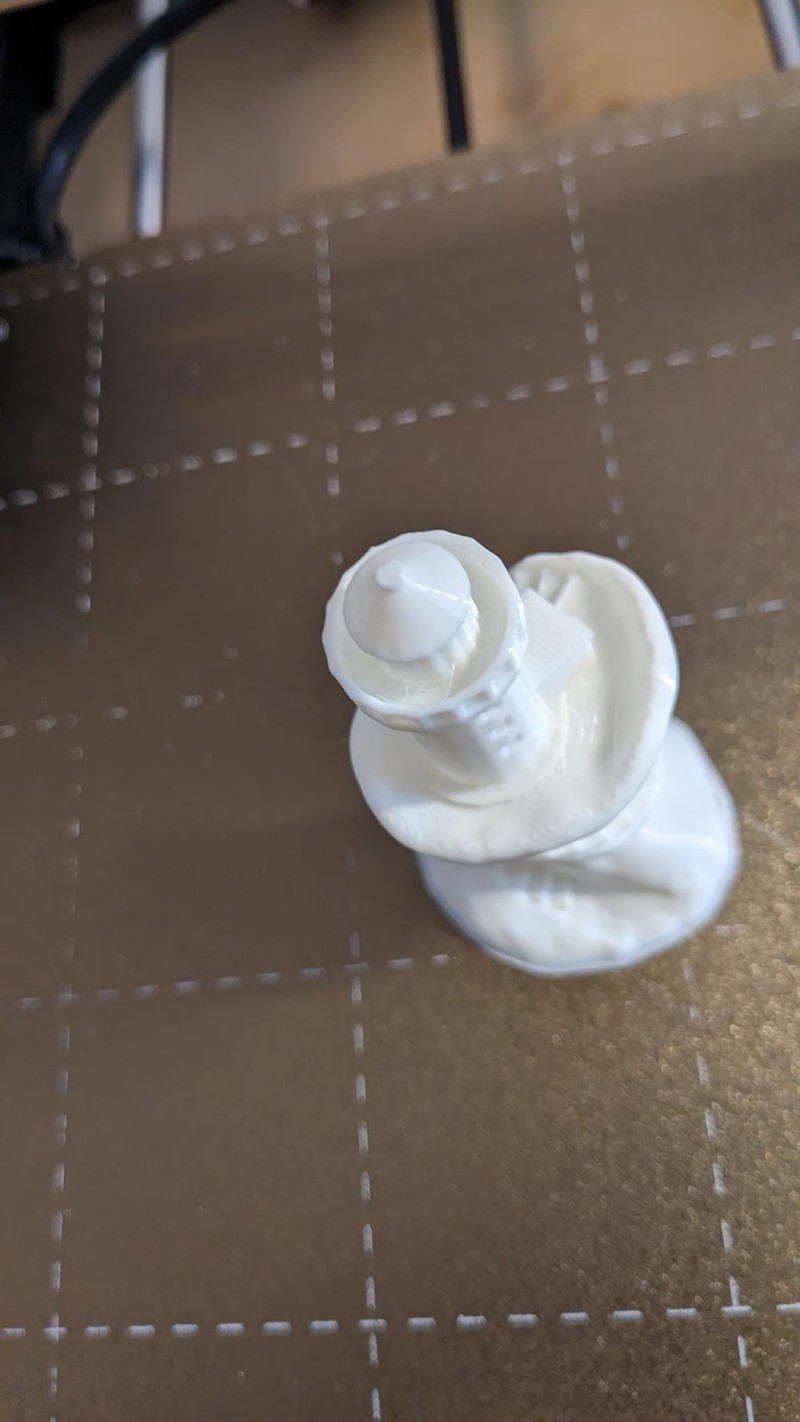
This is a very nice Benchy, showing no stringing or even much of a “hull line”. The first layer is perfect and we can almost read the license plate at the rear. This is very impressive and shows the fine, accurate control the motion system provides.
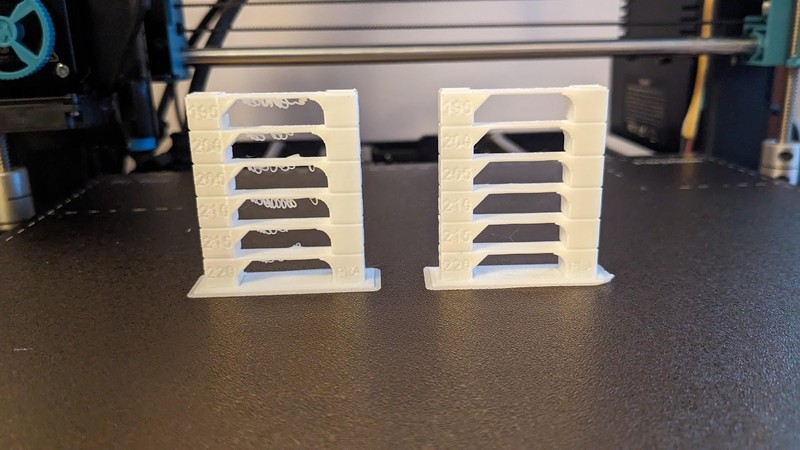
The temperature tower printed with the sample filament showed that “enable bridge settings” had been deactivated. With bridge settings enabled, it made a very nice temperature tower, showing no stringing anywhere.
It’s possible but somewhat complicated to extract the profile from the custom yet outdated Cura program Sovol provides on the microSD card. With the changing of these problematic settings, it may not be necessary.
The retraction tower shows that the extruder hardly produces any stringing at all, even with the sample filament. It is actually when the retraction distance is increased to 1mm and beyond that stringing becomes apparent. 0.25mm retraction has proven ideal.

OctoPrint’s bed visualizer shows this particular bed is fairly flat but not perfect. It’s unrealistic to expect a bed this large would be totally flat. Since there are no bed level adjustment wheels, we have to rely entirely on the bed levelling system to compensate.
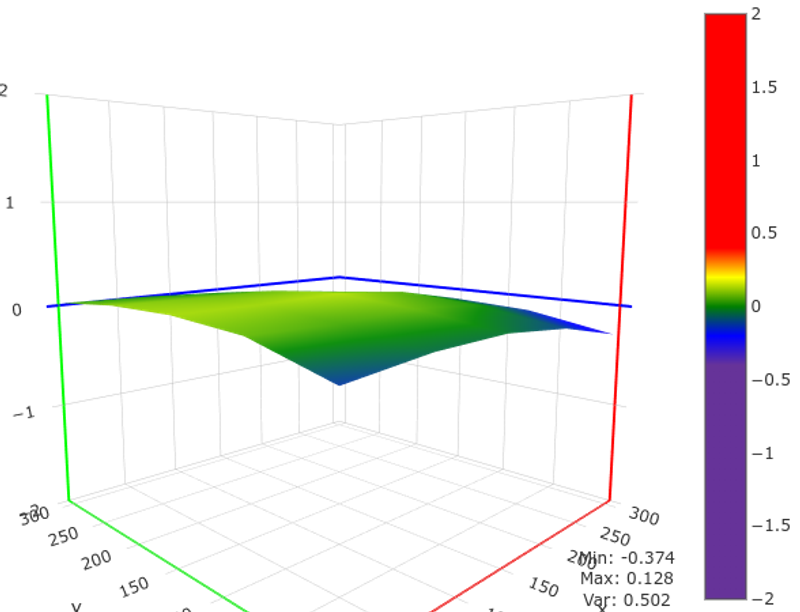
In practice, it does work well. Adhesion is always good and first layers come out great.
Filament Loading/Unloading
Filament loading and unloading requires some practice due to the unusual extruder. The manual advises using the “Refuel” procedure on the touchscreen. This makes sure the nozzle is heated to 200°C before any filament can be extruded. Once the nozzle is hot, pull the gear release to bypass the gears and push the filament in. This is the hardest part. The chamber housing the planetary gears is large, but the hole leading to the heat break and the nozzle is small. It has to be lined up perfectly or it will not go through. This requires a lot of straightening of the filament, recutting the 45 degree angle, and many attempts. Once it goes in, filament extrudes from the nozzle. Finally, you can then extrude filament 10mm at a time through the Refuel procedure. Don’t extrude more than this at once or the nozzle may jam - the extruder pushes the filament through at high speed and putting too much through at once may cause the softened filament to fold over and jam.
To unload filament, the manual advises to use the Refuel procedure, again heating the nozzle up to 200°C - it will not continue with the operation until the nozzle is heated so that the filament is liquid enough. The online manual then instructs to set 60mm in the “Retract” field (50mm in the printed manual) and press “Retract”. The filament is retracted smoothly and fairly quickly, popping free with a noticeable jolt when it clears the gears. Sometimes it drags out a big long string which is concerning because the other end of the string is stuck in the gear chamber. Over time, these may accumulate and bind the gears or cause clogs.
Do not pull the gear release and pull the filament! This pulls out the melted end but also a segment of softened filament which may catch on the edges of the hole between the gear chamber and the heat break and break off, plugging the extruder just above the heat break. If it breaks off here, it can’t be pulled up, but it can’t be pushed out either since this spot is too cool to soften the filament enough to allow it to be pushed into the heat break. Sovol supplies a larger diameter push rod specifically for this purpose, but it may not work because the filament is no longer soft enough to be pushed through. You’ll have to take apart the extruder to access this small piece and pull it out with tweezers.
Only allow the gears to pull the filament through. They pull smoothly and in a straight line.
50mm and especially 60mm is too much retraction, the extruder will spin for 30 seconds or more, well after the filament pops out of the gears. 40mm is more than enough.
Cons
Sovol listened to the original SV06 users and made many improvements on the SV06 Plus, but there are still some areas that need improvement.
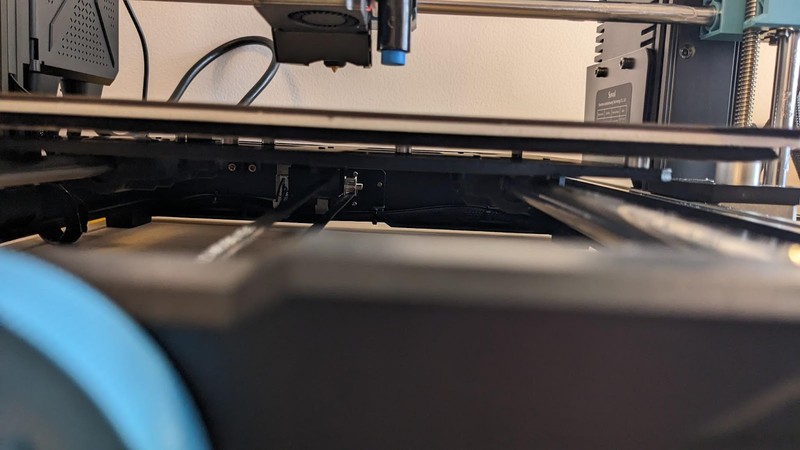
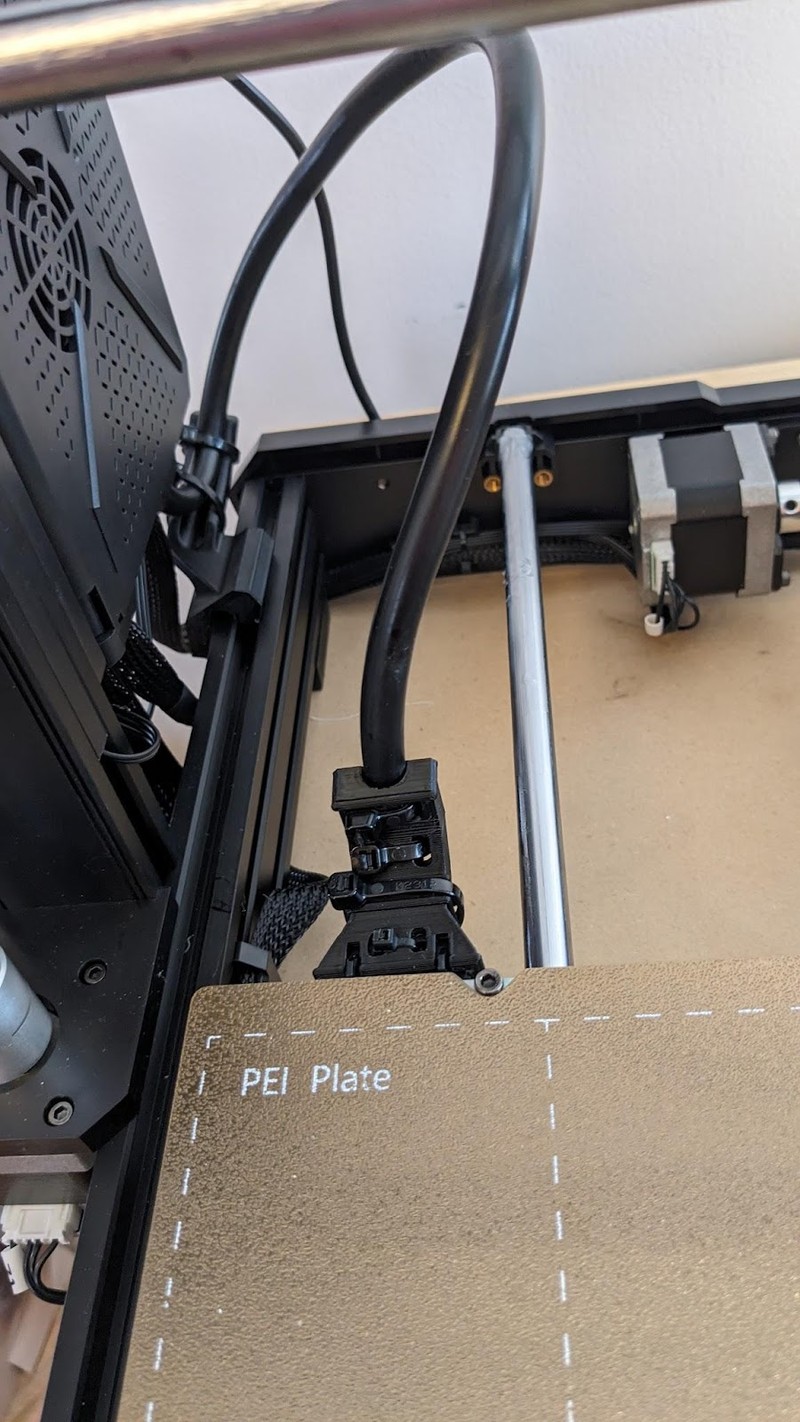
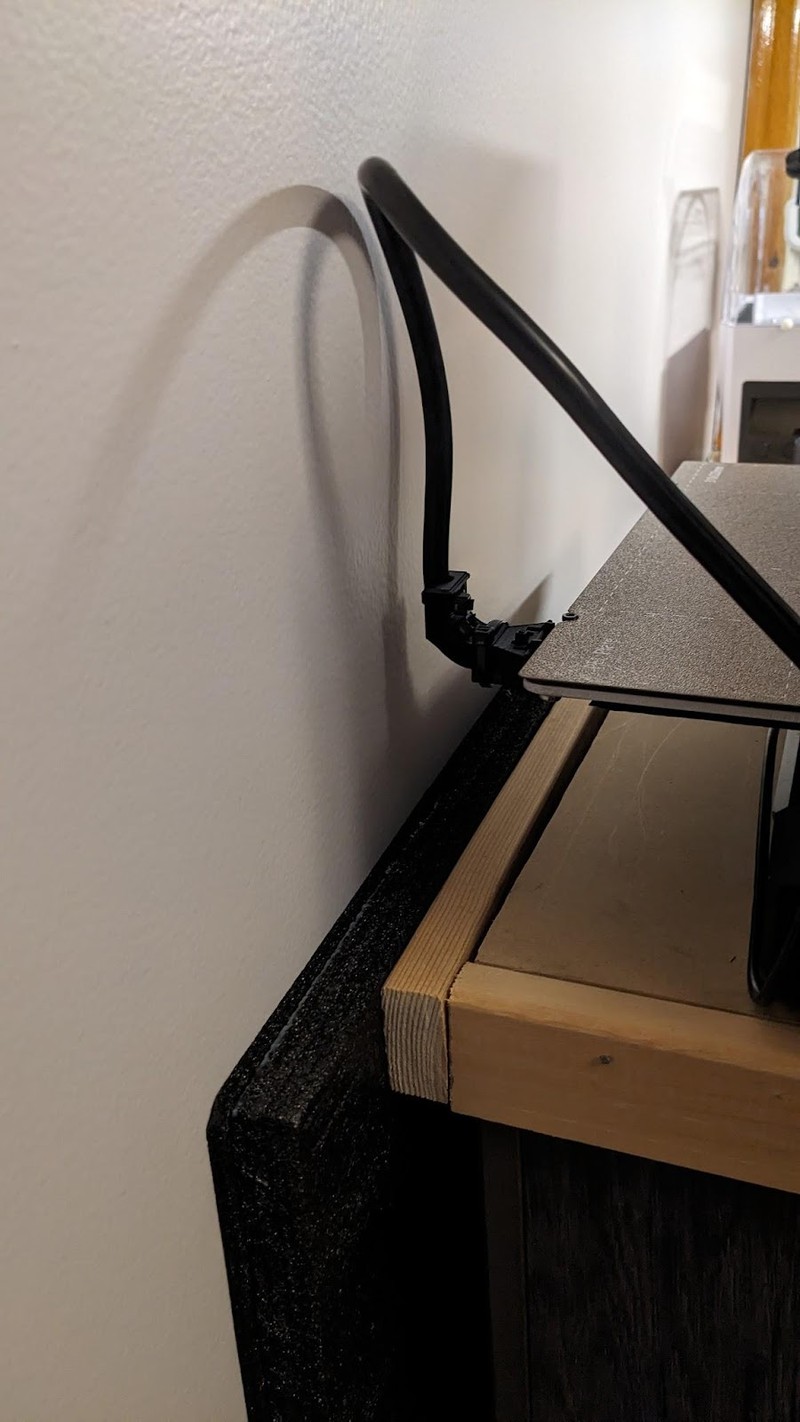
The bed cable now has a strain relief - this is good since the first SV06 Plus printers did not have such an essential safety item. There’s a lot of power flowing through the bed heater cable and it needs to be protected. The bed heater cable is very thick and very well insulated - also a good thing - but it can fall down behind the bed onto the Y axis rails and jam the bed as it moves back.

Even if it is bent out of the way and clears the bed, the cable rubs against the back of the frame. And if you position the printer near a wall, the stiff cable will be pushed against the wall with so much force the printer will push itself forward if the sensorless homing is set too insensitive or stop the bed if the sensorless homing is set too sensitive. This printer needs a LOT of clearance behind it to avoid this issue - 610mm (2 feet) was just not enough - it needs about 700mm (almost 28 inches).
Fortunately others have this issue and have designed easy-to-print guides which push the cable up away from the frame and away from a wall.
The two Z lead screws are powered by two independent stepper motors that can get out of sync, and on a printer this tall, there’s a high probability this might happen. There is no syncing belt. Sovol does provide a syncing procedure where both motors raise the Z axis until they (noisily) stall at the top, but some users manually lower the X axis beam onto two soup cans.
Some reviewers note that the paint on the bed comes off on prints. For us, this actually started coming off as soon as the bed was first cleaned with isopropyl alcohol. There has been no paint deposit on prints yet, and once all the paint is cleaned off, this will no longer be an issue.
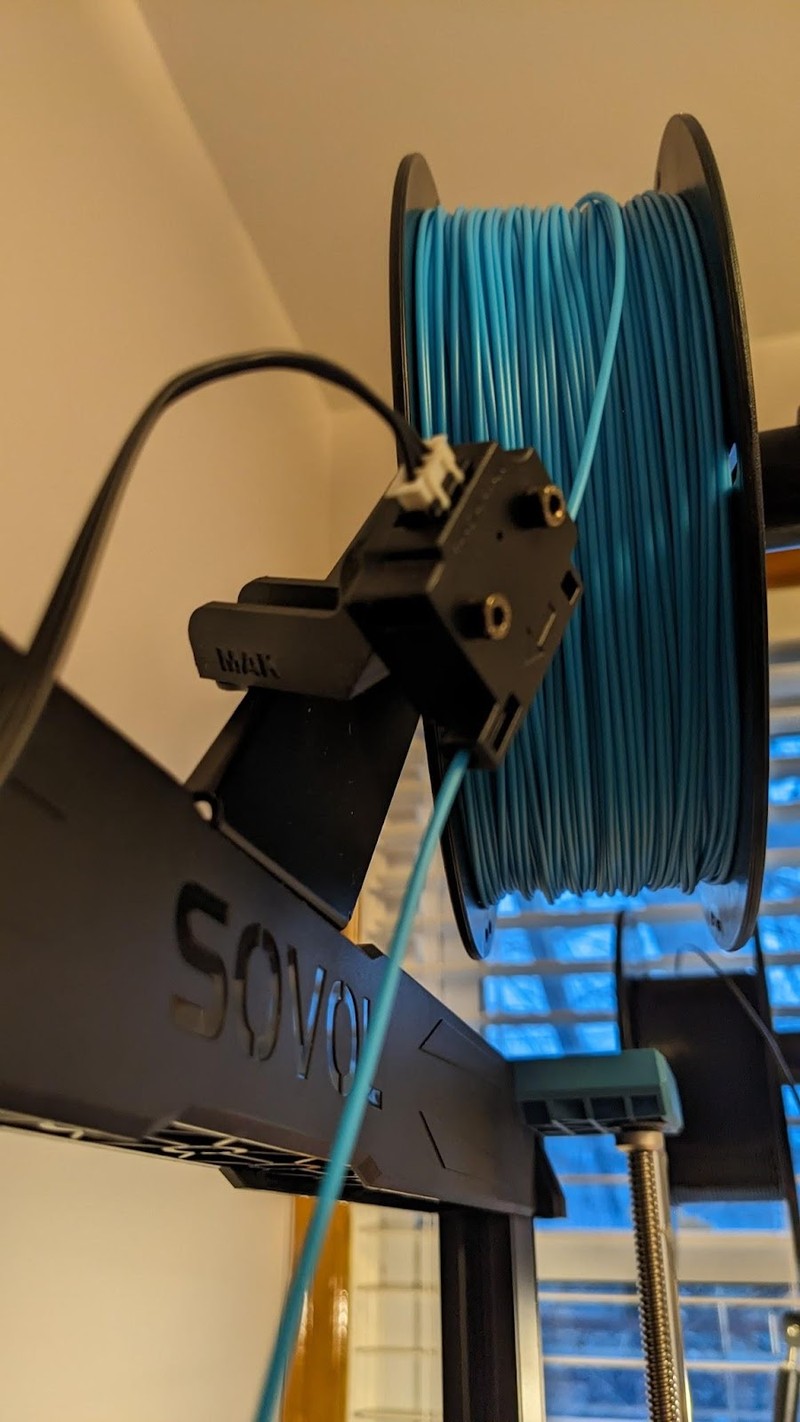
It is very difficult to get filament through the filament sensor. It uses a wiper rather than a roller and has high friction. We found that by orienting the 45 degree cut in the filament so that the long edge points to the left side of the filament sensor, it will go in, but it’s still hard. There’s a printable upgrade which uses a PTFE tube inside a modified filament sensor housing along with the original sensor electronics which reduces friction and guides the filament better around the filament sensor wiper. The filament sensor is also mounted very close to the filament spool holder bracket and since the spool falls toward the front of the printer and away from the sensor, the filament often gets pulled back at a sharp angle. This increases friction and the filament sometimes even rubs against the inside of the spool edge. Fortunately you can print an extended filament sensor mounting arm which positions the filament sensor closer to the center of the spool.
Possible Upgrades
Although the Sovol SV06 Plus has a large community following and many printable upgrades are available, there aren’t many essential upgrades since there are so many pre-installed features.
This is a tall printer yet it has no diagonal braces to ensure that the gantry sits at a perfect 90 degrees to the base. There are a few user installed modifications which provide braces. But the gantry is mounted into machined pockets on the sides of the base, not on top of it. As long as the pockets are machined accurately and the holes are drilled in line, the gantry is held rigidly at 90 degrees to the base. It does not depend on the flatness of the gantry uprights or the tightness of the screws. On this printer at least, the gantry is held so rigidly that it cannot be moved at all, even when pushed hard.
The part cooling could stand to be improved. It is a single, small 4010 blower fan which pulls warm air from over the bed, although the duct is well-designed and distributes air well on both the sides and front of the nozzle. There are many user modifications which place a larger, higher airflow 5015 blower fan on the back of the extruder mount and direct its air through a duct to the nozzle. This replaces the factory 4010 fan and one modification also includes a bracket which attaches to the now empty 4010 fan mount holes for an LED strip light, directed at the nozzle. The extruder breakout board’s spare 3-position connector provides the appropriate GND and 5V connections.
Smooth PEI, PEO or PET bed plates are available but are fairly expensive in this larger, somewhat uncommon size. None are available with the notches at the back. However, adhesive-backed PEI sheets are available in the perfect size, 310 X 320mm, which can be applied to the underside of the existing build plate, with the notches cut out.
It’s very easy to get OctoPrint to run this printer. But the ultimate upgrade here is Klipper, an alternative firmware system which uses a Raspberry Pi or equivalent small computer to do most of the gcode calculations, having the mainboard only carry out very simple commands. This printer is very easy to adapt to Klipper and there are many guides available online. The printer’s fundamentals lend themselves very well to high speed printing using Klipper - the direct extruder, the stable and accurate motion system, the high flow nozzle. Add pressure advance and resonance compensation built into Klipper and this has the potential to be a very fast machine.
The Verdict
This is an amazing printer for the price and is quite different from all the Ender 3 clones on the market. It is impressively large, with a PEI bed and bed insulation preinstalled. It uses oversized linear rods and linear bearings on all axes. The power supply and mainboard are mounted on each side for easy user access. The highly capable direct extruder is innovative, powerful, all-metal and resistant to stringing due to the extremely short filament path. The extended nozzle is high flow, allowing higher speeds.
Like any machine, it’s not perfect and there are compromises here and there, like the generic power supply, the mediocre part cooling and the plastic gantry cross piece. These don’t cause many issues in practice, there are easy workarounds for most of the problems, and the printer’s advantages greatly surpass its minor shortcomings.
It is a fantastic 3D printer, easily the best in its price and size class. It has a better fundamental design than the latest crop of fast Klipper 3D printers and with a little work, may be even faster.